MSI Payroll Version 4.0
|
|
|
- Randell Clarke
- 6 years ago
- Views:
Transcription
1 MSI Payroll Version 4.0 User s Guide Municipal Software, Inc W. Winchester Road, Ste 209 Libertyville, IL Phone: (847) Fax: (847) Contents are the exclusive property of Municipal Software, Inc. Copyright All Rights Reserved.
2 TABLE OF CONTENTS PAYROLL LOGIN SCREEN PAYROLL INSTALL SCREEN PAYROLL SYSTEM MAIN MENU PAYROLL CYCLE MENU CREATE HOURS WORK FILE TIME CARD ENTRY PRINT HOURS WORK SHEET CALCULATE PAYCHECKS PRINT DEDUCTIONS REGISTER CHECK PROCESSING MENU PRINT PAYCHECKS ASSIGN CHECKS TO BE REPRINTED PRINT DISTRIBUTION REPORT DISTRIBUTE TO TWO ACCOUNTING PERIODS POST TO GENERAL LEDGER A0 UPDATE PAYROLL FILES MONTHLY MONTHLY PROCESSING INQUIRY MENU EMPLOYEE PAY/DEDUCTION INQUIRY EMPLOYEE BENEFIT HOURS INQUIRY CHECK INQUIRY CHECK REGISTER INQUIRY REPORTS MENU EMPLOYEE LISTING YTD EARNINGS REPORT STATE RETIREMENT REPORT STATE UNEMPLOYMENT REPORT FEDERAL QUARTERLY PAYROLL REGISTER REPORT VOLUNTARY DEDUCTIONS REPORT YTD HOURS REPORT CHECK WARRANT REPORT A0 CHECK RECONCILIATION REPORT B0 BENEFIT HOURS REPORT C0 E.E.O.C. REPORT D0 INSURANCE DEDUCTIONS REPORT E0 SALARY REPORT FILE MAINTENANCE MENU EMPLOYEE MAINTENANCE DEPARTMENT CODES JOB CLASS CODES
3 5.40 JOB STATUS CODES HOURS TYPE CODE PENSION CODES INSURANCE CODES VOLUNTARY DEDUCTION CODES FEDERAL TAX RATES A0 STATE TAX RATES B0 BANK CODES C0 BENEFIT ACCRUAL CODES D0 LIABILITY CODES APPLICATION SUPPORT MENU EMPLOYEE YTD MAINTENANCE YTD PAY & TAX MAINTENANCE YTD DEDUCTIONS MAINTENANCE YTD HOURS MAINTENANCE TAXABLE & PENSION WAGES EMPLOYEE MAINTENANCE AUDIT REPORT SYSTEM DEFAULTS W-2 PROCESSING CREATE W-2 WORKFILE CLEAR CALENDAR TOTALS W-2 EDIT REPORT EDIT W-2 WORKFILE PRINT W-2 FORMS FEDERAL MAGNETIC MEDIA STATE MAGNETIC MEDIA R WORKFILE CREATION R MAINTENANCE A PRINT 1099-R FORMS CHECK RECONCILIATION ENTER CLEARED CHECKS UPDATE CLEARED CHECKS CHECK VOID DELETE HISTORY CREATE NACHA FILE ASCII MASTER DOWNLOAD A0 SIGNATURE SETUP APPENDIX A SAMPLE REPORTS CREATE HOURS WORKFILE REPORT HOURS WORKSHEET DEDUCTIONS REGISTER DIRECT DEPOSIT DEDUCTIONS REGISTER ALL EMPLOYEES SAMPLE CHECK PRINT (STUB-CHECK-STUB) SAMPLE CHECK PRINT (FULL-PAGE) PAYROLL DISTRIBUTION JOURNAL PAYROLL POSTED JOURNAL EMPLOYEE LISTING (NON-DETAIL FOR SPECIFIED DEPT.) YEAR TO DATE EARNINGS REPORT (FOR SPECIFIED DEPT.) STATE RETIREMENT REPORT UNEMPLOYMENT REPORT
4 FEDERAL QUARTERLY PAYROLL REGISTER (REPORTS MENU) VOLUNTARY DEDUCTION REGISTER EMPLOYEE YEAR TO DATE HOURS REPORT CHECK WARRANT LISTING CHECK RECONCILIATION REPORT BENEFIT HOURS REPORT EEOC REPORT APPENDIX B MAGNETIC MEDIA STATE UNEMPLOYMENT REPORT APPENDIX C VOIDING CHECKS RUNTIME GUIDE APPENDIX D BENEFIT HOUR PROCESSING APPENDIX E LIABILITY CHECK PRINTING APPENDIX F DIRECT DEPOSIT IMPLEMENTATION GUIDE F.10 BANK CODE(S) F.20 SYSTEM DEFAULTS F.30 VOLUNTARY DEDUCTION CODE(S) F.40 EMPLOYEE MAINTENANCE DIRECT DEPOSIT F.50 MULTIPLE DIRECT DEPOSITS F.60 PRE-NOTE PROCESSING F.70 DIRECT DEPOSIT PROCESSING F.80 NACHA FILE LAYOUT APPENDIX G RECORD LAYOUT EMPLOYEE ASCII FILE APPENDIX H RECORD LAYOUT TIME CARD INTERFACE APPENDIX I DEDUCTIONS REGISTER DISTRIBUTION JOURNAL BALANCING APPENDIX J FORM 941 EMPLOYER'S QUARTERLY FEDERAL TAX RETURN

5 PAYROLL LOGIN SCREEN Enter your assigned password here, press Enter or click OK. 5

6 PAYROLL INSTALL SCREEN This screen can only be accessed and modified by an MSI Employee. If you require any changes herein, please contact your Project Manager or Software Support Representative. Payroll Employee Number Mask See detail describing the Mask on the install screen itself. General Ledger Interface? Select this option if the MSI-Payroll system will interface with the MSI-General Ledger system. Beginning Fiscal Month Key in the number of the month that constitutes the company s first month of their fiscal processing year. Pre-numbered Checks? Select this option of the payroll checks are already numbered. Check Print Line Adjustment For users who run laser checks (aka stub/check/stub) this number will be For users who run full page checks (aka check on bottom) this number will be If you increase this number by 0.15 then 6
7 the Check Date, Amount, and Legal Line will move down one full line. If you decrease this number by 0.15 then the same detail will move up one full line. Set Audit Function? This function is not set on the System Defaults screen within the Payroll application. Human Resources Interface? Select this option if the MSI-Payroll system will interface with the MSI-Human Resources system. Split Distribution Journal? If this option is selected, the Distribute to two Accounting Periods option will become available within the Cycle menu of Payroll. Remote Time Card Access? Selecting this option will activate various features within the MSI-Payroll system. For instance the new icon will become active on the Payroll System Main Menu. This icon opens the Remote Payroll Entry menu. Project Costing Interface? Select this option if the MSI-Payroll system will utilize MSI-Project Costing. 7

8 0.00 PAYROLL SYSTEM MAIN MENU This is the main menu for the Payroll System. You can access each option in the system here and all processing begins with this menu. The following options are available: TOOLBAR MENU File This option exits processing from the Payroll System and returns you to your desktop. Cycle This menu is used to generate the payroll for each pay period. It takes you through the entire cycle, from entering hours, to check printing and updating the check run to the payroll history file. Monthly This program is used monthly to control the amounts that are accumulated in the monthly, quarterly and year-to-date fields. It is used at the end of each month before a new payroll begins to clear the previous month s pay buckets. Inquiry This menu is used to make inquiries into the data in the system. It allows you to view the information only. No changes can be made to it with these programs. 8
9 Reports This menu contains the options that generate reports for the Payroll System. Maintenance This menu is used to maintain employee files for each person on the payroll, the codes used within those files, and codes used in other programs. Tax rate tables are also maintained here. Support This menu contains programs that are used less frequently than others, but are needed for proper functioning of the system. This includes W-2 forms printing and year-to-date maintenance. Help This selection offers different methods for contacting Municipal Software, Inc. and contains important program information. 9

10 1.00 PAYROLL CYCLE MENU This menu is used every pay period to generate the payroll for the employees. It contains each step in the payroll cycle, beginning with creating an hours workfile, and ends by updating the payroll cycle. Each option is listed below and must be taken consecutively for proper functioning. Create Hours Workfile This program is the first step in the payroll cycle. It is used to indicate which employees are to be included in the payroll. It creates a workfile for those employees and includes the base hours and rates of pay that they normally receive. Time Card Entry This option is used to modify the hours workfile that was created for the payroll. Any changes to the regular hours which will be used to determine the gross pay are made here. This includes hours entry for part-time employees. Print Hours Worksheet This option is used to print a worksheet that lists the gross pretax earnings of all employees in this payroll. It serves as a worksheet to check that the correct employees will receive the proper amount of pay, before net pay is calculated in the next step. Calculate Paychecks This option takes the gross pay for all employees included in the payroll and calculates their net pay. This includes taxes, pensions, voluntary deductions, and other net pay calculations. Print Deductions Register This program prints a register of all deductions that were taken from the employees gross pay to determine their net pay. It also provides totals for the employers portion of payroll expenses. Check Processing Menu: Print Paychecks This option is used to print the employee paychecks that have been calculated using the previous steps. Assign Checks to be Reprinted 10
11 Section pending completion. Check back to for updates to this user guide. Print Distribution Report This option is used to generate a report that shows the effects of this payroll in the general ledger. It is only used if the MSI General Ledger System has been installed at your installation and is interfaced with the Payroll System. Distribute to two Accounting Periods Section pending completion. Check back to for updates to this user guide. Post to General Ledger This option posts the information from the current payroll to the general ledger. It is used only if the MSI General Ledger System has been activated at your location. Update Payroll Files This option is the final step in the payroll process. It takes the information created by this payroll and updates the files within the Payroll System. 11

12 1.10 CREATE HOURS WORK FILE This program is the first step in the payroll creation cycle. It is used to define pay period information and which employees are to be included in the payroll. It creates a workfile of standard hours for the employees and prints a worksheet of this data. This worksheet is used in the next step to make any modifications to the workfile. The following fields are used to begin the payroll generation. Please note that if your prior workfile is active and you select to begin a new payroll cycle, the prior workfile will be deleted. Begin New Payroll Cycle? Section pending completion. Check back to for updates to this user guide. Pay Period This field is used to indicate the pay period being processed. A pay period may be numbered either (1), (2), (3), (4) or (5). The number of the period determines calculations that will be made for deductions based on frequencies and standard liability check processing. 12
13 Period End Date The date of the last day in this pay period is entered in this field. Accounting Period The number of the accounting period to which data in this payroll will be posted in the general ledger is entered here. If the MSI General Ledger System is installed, this data is posted automatically to the MSI-GL. Check Date The issue date that will appear on the checks is entered in this field. Beginning Check Number The number that will be assigned to the first check printed is entered in this field to determine check order. This will default the value of next payroll check # in PR DAT. Liability Control This field controls which liability checks will be printed during the payroll process. It is only used if PRINT LIABILITY CHECKS Y/N in General Payroll Information is set to Y. A. (S)tandard: Indicates that the liability codes with frequencies that correspond with the current pay period will be printed. This is the default entry. B. (A)ll: Indicates that a liability check should be printed for all codes with accumulated amounts, regardless of the current pay period. C. (N)one: Indicates that no liability checks should be printed, regardless of the pay period. This can be used for special check runs that may fall between standard pay periods, or when it is not necessary to distribute liability checks. NOTE: If (N)one is used, the liability amounts for this check run will still be accumulated in the liability code table. The next section is used to indicate which employees are to be included in the workfile. Placing a check mark next to the applicable pay methods does this. The program will include any employee with a corresponding pay method code in their files. The pay methods listed below are available. NOTE: Only employees with qualifying status codes in their master files will be included using any of the following methods: A. All Methods of Pay This option is used to include all employees in the payroll. B. Empty Hours Workfile This option creates an empty workfile. All hours that are to be paid are entered manually. This option is useful when a single or small group of manual checks are written. C. Hourly and Salary The remaining fields are used to indicate any combination of hourly and salary pay methods for weekly, bi-weekly, semi-monthly, monthly or quarterly pay periods. D. Time Card Interface 13
14 By selecting this option it will allow you to import an ASCII filed created from an outside vendor source into the MSI time sheet entry to track and process hours worked for your employees. This option eliminates manual entry of hours worked for the employees included in this file. (See Appendix H for required file layout). Once your selections are made, the program will create the payroll workfile. After it is created, it will print a worksheet that lists all employees that were included along with their pay rate, base hours and gross pay. It then gives totals for the number of employees and gross pay. This printout serves as your worksheet for any modifications that are to be made to the workfile during editing in the next step. Will save your entry Will clear what you have entered and allow re-entry Exits you from this program option 14

15 1.20 TIME CARD ENTRY This program is used to make any changes to the workfile that was created for the current payroll. These include any changes to the standard base hours that are paid to the employee, such as for benefit hours or part-time employee hours. Net pay is calculated using the gross pay that is established in this program. If no changes are made in this program, net pay is calculated using the employees base hours. The following fields are used to modify the workfile. NOTE: Only those employees that are to have changes made to their base hours or for which hours are to be initially entered need be accessed using this program. All other employees will be paid for their base amounts. Time Card Entry Tab: Employee ID The identification number of the employee to be modified is entered here. Check Sequence # This field is used if the employee is to receive more than one check during this pay period. The standard check defaults to "00". If another check is needed, it should be number sequentially with (01) for the first, (02) for the second, etc. 15
16 Department The employee s department number is displayed here. Job Class The employee s job class is displayed here. Job Class Pay Rate The employee s rate of pay, as defined by their current level in their job class, is displayed here. The next section allows you to maintain the specific types of hours that the employee is being paid for on the check indicated at the top of the screen. Each separate hours type that is being paid will have a line item defined for it. The employees base hours will automatically appear as a line item indicated as (REG) for "Regular" hours. Additional pay is defined as other line items to comprise the employees total pay. The total value of the hours will equal the employee gross pay, which is used to determine their net pay. The following fields are used. # This field is used to identify each individual line item of hours that is maintained. Date This is the date that the hours were earned. The pay date will default, but may be modified. Type Code & Description The code that represents the type of hours that are being paid is entered here. Rate The rate at which the employee is paid for the indicated hours is entered here. Hours The number of hours for the pay type for the employee is entered here. Default Override G/L Acct. # This field allows the expense for this line item to be posted to a specific General Ledger account number. If a number is entered, it will override the employee s regular disbursement account(s), and the account or substitution number for the hour s type. This is normally an expense account. Regular Hours The total amount of regular hours for which the employee is being paid is displayed here. Other Hours The total amount of hours, other than regular, for which the employee is being paid, is displayed here. Total Hours The total amount of all hours that the employee is receiving is displayed here. Add Line items detail Removes/Deletes line items from details 16

17 These options are used to temporarily override the standard calculation of an employee s paycheck. It allows you to process variations such as one-time changes to voluntary deductions without making changes to the employees master file. Excludes Tab: The changes are effective only for the current payroll. Once updated, the system reverts to its original values. It is also effective only for the Check Sequence Number the changes are defined for. If an employee receives any other checks during the same pay cycle, they will not be affected by these entries. The entries made here will override all other variables defined to the system. It is important to understand how entries on this screen affect the payroll history files. This is especially true when modifying the federal, state, local, FICA and/or Medicare taxes and/or pensions. If the standard values for these are either excluded or overridden: IT WILL NOT AFFECT THE "WAGES" ON WHICH THESE DEDUCTIONS ARE BASED! 17
18 To provide an example of this statement: Each pay period, an employee receives $ gross pay with a $50.00 deduction for federal taxes. There are no deferred deductions or pay, so the FEDERAL TAXABLE WAGES are also $ If an entry is made on this screen to override the federal tax deduction and decrease it to $20.00, the FEDERAL TAXABLE WAGES will remain at $ They are NOT affected by the change in the amount of the deduction. This is most readily observed on the W-2 forms, which provide data on taxable WAGES and not on gross amounts. The following fields are available for modifications. The employees Number, Name and Check Sequence Number will appear at the top of the screen. Exclude Taxes Will exclude federal, state and local taxes. It will also exclude the FICA and Medicare tax deductions. Exclude Voluntary Deductions Will exclude voluntary deductions that would normally be made for the paycheck. Exclude Pension Will exclude the deduction for the pension program that the employee is a member of. Exclude Benefits Indicates to the system not to accrue benefit hours that would normally be processed. NOTE: If an employee is receiving more than one check in the same payroll, benefit hours should normally be EXCLUDED from all checks other than their standard check. If they are not, you are actually increasing the number of times benefits are accrued per year for the employee, which is the same as increasing the number of pay periods for that employee. This would overstate the accrued or available hours for the employee. This would also be true for special check runs outside the normal pay cycle. Exclude Insurance Will exclude insurance deductions that would normally be made for the paycheck. 18
 should be deducted, enter (9999999) in the field as prompted.")
19 Tax Override Tab: Federal - allows you to override the normal deductions for federal, state and/or local taxes. If an amount is entered, the system will deduct that amount INSTEAD OF the normal calculation for the tax. If ($0.00) should be deducted, enter ( ) in the field as prompted. This tells the system to NOT make a deduction for the tax. If no change is needed the field should remain blank. FICA - allows you to override the normal deductions for pension, FICA and/or Medicare. If an amount is entered, the system will deduct that amount INSTEAD OF the normal calculation for the tax or pension. If ($0.00) should be deducted, enter ( ) in the field as prompted. This tells the system NOT to make a deduction for the tax or pension. If no change is needed the field should remain blank. NOTE: If the changes made to the employee s portion of FICA and/or Medicare are less than what the system would normally calculate, the difference will be charged to the employers expense when the payroll distribution journal is posted to the general ledger. This ensures that the FICA/Medicare will be fully expensed regardless of the changes that are made here. If the changes are greater than the normal calculation, the employers expense will not be affected. 19

20 Deduction Overrides Tab: Allow you to override the normal voluntary deductions. A normal deduction can be removed by entering the deduction code and ($0.00) as the amount. The normal amount can also be overridden with any dollar amount. You cannot process an overriding voluntary deduction without first having set the deduction up in employee maintenance. This option will override the amount, regardless of the deduction s frequency code. (Ex: If the voluntary deduction in Employee Master Maintenance has a frequency of 5, and this is the 1st pay period, the deduction will still be taken out). 20

21 Other Overrides Tab: This section allows you to alter the payroll information that was defined when creating the workfile. If the data is altered, it will affect the individual check of this employee only. It is normally used for sequenced checks that effect future pay periods. A. Pay Period B. Check Date C. Accounting Period Will save your entry Will clear what you have entered and allow re-entry This button will delete the existing entry that is displayed Exits you from this program option 21
22 1.30 PRINT HOURS WORK SHEET This option is used to print a worksheet, which lists the gross pre-tax earnings of all employees in the current payroll. This worksheet reflects the changes made to the workfile in the Edit Hours program. The gross pay for the employees listed will be used in the calculations to determine net pay. The worksheet can be generated using three different methods: 1. All employees in the workfile 2. Employees in the workfile from a specified department 3. Employees in the workfile from a specified job class The worksheet will then be printed for those employees indicated by your selections. If the information on the worksheet printed is correct, you may continue with the Calculate Paychecks option (4). If the data is NOT correct, you must return to the Edit Hours Workfile, option (2), make the appropriate corrections, then run this program again. This process is followed until the worksheet generated here reflects the proper hours and gross pay. 22
23 1.40 CALCULATE PAYCHECKS This option takes the gross pay in the current workfile and calculates the net pay for the employees. This includes taxes, pensions, voluntary deductions, insurance and any other net pay calculations. It also determines the benefit hours and year-to- date amounts for this payroll. When this option is selected, the screen will ask you if you wish to continue with the net pay calculations for the employees in the workfile. The length of this process will depend on the number of checks being calculated. After the calculations are made, you may continue with the payroll processing. 23

24 1.50 PRINT DEDUCTIONS REGISTER This program prints a register of all taxes and deductions that were calculated for the paychecks in the workfile. These calculations were made on the gross pay to determine the net pay for each employee. The deductions and net pay, along with corresponding totals will be printed on this report. The report will be generated based on your selection of the following methods: All employees in the workfile. Employees in the workfile from a specified department. If the information on the Deduction Register IS correct, you may continue with the selection to Print Paychecks. If the data is NOT correct, you must make the appropriate changes in the employee master files, re-run the Calculate Paychecks option, then return to this option and print the deduction register again. This process is followed until the report generated here reflects the proper deductions and net pay. You also may run (print) the distribution journal immediately after printing the deductions register. This will allow you to compare the Deductions register to the Distribution Journal for accuracy. See Appendix I for more details on tying out these reports. 24
25 WHAT IS THE AUTO DEPOSIT TOTAL AMOUNT? Occasionally on the Deductions Register, you may see a line under the Employer Totals section for Auto Deposit Total (see example): This total appears when a direct debit employee only receives part of the net check via direct debit and the remainder in the form of a check. The amount on the check is what appears as the Auto Deposit Total. For instance (in the example below), the employee received $ of their check via Direct Deposit, the remaining balance of $ is paid via check. The $ is what appears on the Deductions Register as Auto Deposit Total. 25
26 26
27 1.60 CHECK PROCESSING MENU Section pending completion. Check back to for updates to this user guide PRINT PAYCHECKS This program is used to print the paychecks for the employees in the current workfile. Select Cycle from the main menu, then Print Paychecks from the pull down options. Two options will now be available: print all employees in the workfile, or print a range of check numbers. You are also given the option to print the available benefit hours on the employee paycheck. Additionally, you may include comments that will print on all employee checks. Once checks have printed, you will receive a message that checks have completed printing. You may remove any checks from the printer tray. For example, if you are printing checks and checks 75, 76, and 77 get ruined in the printer, tear off the bad checks, start the check print again at the first good check number, and finish the check processing for the whole group of checks (1-100). VR the three bad checks. Check the outstanding liability amounts affected by those 3 employees via the Liability Code Maintenance screen and then create an empty hours workfile using the same parameters used for the first check run. Confirm the beginning check # in the Create Hours Workfile is the first good check in the box and say none for Liability Control. Use the time card entry screen and enter information for 3 employees, Calculate Pay Checks, print the Deductions Register Report and process checks except for general ledger steps; the last step in this process is to take the option to Update Payroll Files. Finally, change liabilities back to what they were before the last check run. 27
28 If the MSI General Ledger System has been installed, you should then continue with the Print Distribution Journal option. If not, you would Update Payroll Files. Will save your entry Will clear what you have entered and allow re-entry Exits you from this program option 28
29 1.62 ASSIGN CHECKS TO BE REPRINTED Section pending completion. Check back to for updates to this user guide. 29
30 1.70 PRINT DISTRIBUTION REPORT This program is used to print the distribution journal that shows the effect of the current payroll on the General Ledger. The system will prompt you to enter the fiscal year to which the payroll should be posted. It is only used if the MSI General Ledger System has been installed at your installation. If it has not, you would Update Payroll Files. If the report is incorrect, the account number(s) must be changed in the appropriate program. The payroll must then be re-calculated to include those changes. The distribution report is then printed again using this option. When the report reflects the correct information that is to be posted to the General Ledger, continue with Post to the General Ledger. NOTE: If the accounting period to which this journal is to be posted to is incorrect, you must return to Create Hours Workfile and change the original period entered. DO NOT begin a new payroll cycle. Enter "N" for (NO) to the first prompt, number the fields, and change the period. Then recalculate the payroll, and repeat this option. 30

31 1.80 DISTRIBUTE TO TWO ACCOUNTING PERIODS Section pending completion. Check back to for updates to this user guide. 31

32 1.90 POST TO GENERAL LEDGER Section pending completion. Check back to for updates to this user guide. 32
33 1.A0 UPDATE PAYROLL FILES This program is used as the final step in the payroll cycle. It takes the information created by the current payroll and updates the files within the Payroll System. When this option is taken, the system will inform you that all files affected by the current payroll will be updated. You may then continue and update the files, or exit the program. Until this program is used, the system will not reflect the current payroll in employee master files or inquiries. NOTE: You MUST run this program as the last step in the payroll cycle. If you do not and a new hours workfile is created, you will lose all data that has been processed for this payroll. You would then have to run the entire payroll again. It is suggested that you use this program immediately after the previous step as a precaution. If during your initial installation, you selected that MSI-PR and MSI-AP share a single check reconciliation file, then check records are written to both PR DAT (MSI-PR Check Reconciliation File) and AP DAT (MSI-AP Check Reconciliation). However, if you selected separate check files, then this option writes only to PR DAT. 33

34 2.00 MONTHLY Section pending completion. Check back to for updates to this user guide MONTHLY PROCESSING This program is used at the end of each month to prepare the system for the following month. It should be used AFTER all payrolls and periodic reports for the month ending have been processed but BEFORE any new payrolls in the following month are started. There are two major processes that this program completes: A. Clears the month, quarter, and/or fiscal year-to-date fields. B. Prepares the benefit hour information for the new month by performing the benefit hour analysis. 34
35 A. CLEARING "TO-DATE" FIELDS The system accumulates payroll information for pay types, taxes, deductions and pensions. It tracks this information for month-to-date (MTD), quarter-to-date (QTD), calendar year-to-date (CTD) and fiscal year-to-date (FTD) values. This information then appears on reports, inquiries, paycheck stubs, W-2 forms and other payroll related documents. Each time a payroll check run is updated, the hour and dollar amount for the payroll information listed above is equally added to the MTD, QTD, CTD and FTD fields. At the end of each month, the appropriate fields must be cleared so that the first payroll for the following month is reflected in these fields correctly when it is updated. The selection that you make will be determined by which calendar month you are preparing to open. Each selection available is indicated below, along with the appropriate time that it should be used. Clear Month Pay Amounts This option is used after the last payroll in January, February, April, May, July, August, October, and November. Clear Month and Quarter Pay Amounts This option is used after the last payroll in March, June, and September. Clear Fiscal Pay Amounts This field is used once a year after the last payroll in the last month of the fiscal year. It is used in combination with one of the other above options (1-3). B. PREPARE BENEFIT HOUR ANALYSIS At the end of each month, the system needs to perform a benefit hour analysis. This analysis performs the appropriate benefit updates and changes for the upcoming benefit month. NOTE: If you are processing benefit hours manually and are not using Benefit Accrual Codes, refer to (D), TRACKING BENEFIT HOURS MANUALLY, below which discusses what will occur to the manual benefit hours. You will be asked to ENTER THE MONTH (1-12) YOU ARE PREPARING FOR: The system will default the number of the upcoming calendar month. This should be the number of the month AFTER the one that is being closed and not the closing month. EXAMPLE: The payrolls and reports for February have been completed and you are preparing to perform the monthly processing. You will be closing month (02) and preparing for March, or month (03). This is the number that should be entered at this prompt. The default should only be changed under rare circumstances. The system will not let you enter a month PRIOR to the default. If you enter a month FOLLOWING the default, it will process the months skipped along with the month indicated. It does not skip processing for those months. 1. Calculate the Current Benefit Year To process benefits correctly, the system needs to determine the current benefit year that the employee is assigned to for each benefit hour type. This is necessary because it determines if benefit analysis should occur for the month being processed. 35
36 The information that it uses to calculate the year is defined in the Benefit Accrual Codes. The calculation that occurs for each benefit code is listed below. a. Determine what year the accrual is based on. This will be either (C)alendar, (A)nniversary, (F)iscal year or user selected (M)onth. b. Determine what the first month is for each of the years. c. Compare the month that is being prepared for (as prompted for and discussed above) to the first month for each year. d. If the two do not match, no benefit analysis will occur for that benefit. e. If one or more of the years DO match, update the benefit year in the employee s master file and perform benefit analysis for those years. Continue with (2) below. NOTE: Depending on the "year" that is defined for each benefit, the same employee could have different benefit years for each benefit hour type they have. Therefore, this process may occur for the same employee for different benefits at different times of the year. 2. Compute the Employee s Number of Years of Service For each benefit type with a year whose first month matches the month that is being prepared for, the system will calculate the number of years of service for the employee for that benefit. Once this is done, the program can determine how much of the benefit to accrue and what limit to set for the new year. 3. Compute the Accrual Rate and Limit After the number of years of service is determined, the following is calculated: a. The ACCRUAL RATE and LIMIT for the year of service is determined by matching the benefit year to the correct line on the Benefit Accrual Code. b. The new ACCRUAL RATE is calculated by dividing the HOURS ACCRUED by the number of pay periods. c. The limit has changed for the year. d. Any changes to the Employee Maintenance--S2 are updated. e. If either the ACCRUAL RATE and/or LIMIT have not changed from the prior year, there will be no visible changes to these fields. f. The program will then process the hours to rollover. 4. Rollover Available Hours After the ACCRUAL RATE and LIMIT are calculated, the system will process hours to rollover: a. In the Benefit Accrual Code, the program will determine if it should ROLLOVER available benefits. 36
37 b. If (Y) es, and the employee have available hours, these hours will rollover to the following benefit year. They will then be available for use by the employee. c. If there is a maximum number of hours to rollover set in the table, and the number of available hours is greater than this maximum, the program will only rollover hours up to the maximum amount. Any hours above the maximum will be lost. d. If (N)o hours should rollover, any available hours will be lost and not available for use in the following year. e. The system will then process accrued hours. 5. Process Accrued Hours The hours that were accrued during the previous year will now be processed: a. The number of hours that have been accrued during the previous year will be determined. b. ACCRUED HOURS will be moved to the AVAILABLE HOURS field. The ACCRUED HOURS field will then be reset to (000.00). If the table was defined to make the accrued hours immediately available, this step will not be performed because ACCRUED HOURS will always be (000.00). At this point, BENEFIT ANALYSIS has been completed. The following is an additional option that is available. C. DO NOT PERFORM BENEFIT ANALYSIS An option is available during monthly processing that instructs the program not to perform benefit analysis for the month indicated. If this is chosen, the benefit hours will NOT be effected. HOWEVER, when Monthly Processing is performed the following month, the system will perform benefit analysis for the current month AND any months that were skipped. THIS MAY CORRUPT YOUR BENEFIT DATA FILES AND REQUIRE MANUAL MODIFICATIONS TO THE BENEFIT HOURS!!!!!! This option will only be used under rare circumstances and should be used with extreme caution! D. TRACKING BENEFIT HOURS MANUALLY If you are tracking benefit hours manually without using the Benefit Accrual Codes, nothing will happen to benefits during monthly processing EXCEPT at the end of the calendar year. When you select to clear the CALENDAR PAY AMOUNTS (which is when you will normally be preparing for month 01) the following will occur: 1. USED benefit hours WILL be cleared 2. AVAILABLE benefit hours will NOT be cleared 3. ACCRUED benefit hours WILL be cleared If you would like NO changes to be automatically made to the benefit hours, select the option DO NOT PERFORM BENEFIT ANALYSIS (refer to C above). All benefit hours will remain the same and benefit hours will be maintained manually. 37
38 After the selections are entered, the system will clear the accumulators of the payroll information for the indicated time periods. This prepares the system for payroll processing for future pay periods. NOTE: It is very important that this program is used at the appropriate times. Otherwise the inquiries, reports, and paychecks may not represent accurate information NOTE: If clear MTD, QTR, YTD, is selected, prompt for Purge Employee Inactive Deductions appear. will Will save your entry Will clear what you have entered and allow re-entry Exits you from this program option 38

39 3.00 INQUIRY MENU This menu is used to make inquiries into the employee files in the system. The options allow you to view the data, but no changes can be made to it from these programs. The following inquiries are available. Employee Pay/Deduction Inquiry This option allows you to view month-, quarter-, year-to-date, and limit information for the employee s pay and deductions. This includes all pay types, taxes, voluntary deductions, insurances and pensions. Employee Benefit Hours Inquiry This option allows you to view employee s benefit hours data for month-, quarter- and year-to-date amounts. It also includes the number of hours used and any limits for each benefit. Check Inquiry This option allows you to view the check reconciliation file. Information includes employee number, check number, check status, check date and check amount. Check Register Inquiry This option allows you to view the payroll register information. It includes all payroll records for the check dates you enter. 39

40 3.10 EMPLOYEE PAY/DEDUCTION INQUIRY This program allows the user to make inquiries on the month-, quarter-, year-to-date and limit information for the employee s income and deductions. This includes all pay types, taxes, voluntary deductions, insurance and pensions. To make an inquiry, the desired employee identification number is entered at the top of the screen. The current information for that employee will appear on separate lines beneath the following columns. NOTE: For the data that appears in the inquiry to be current, the Monthly Processing program must be used at the end of each month. Refer to the Payroll Main Menu for additional information. 1. Pay/Deduction This column displays the title of the individual pay and deductions. They are grouped according to their type under one of the following headings. A. Pay (Pay) This group contains lines for the different pay types the employee has received. The first line will display gross pay. Beneath that will be a line for each individual type of hours for which the employee has been compensated. 40
41 B. Tax (Tax) This group displays taxes that have been deducted from the employee s checks for federal, state, and local taxes. It also includes FICA deductions. C. Deductions (Ded) All voluntary deductions that have been deducted from the employee s checks are displayed in this group. D. Insurance (Ins) This group contains all deductions made for insurance plans to which the employee has contributed. E. Pension (Pen) Any pension plan(s) that the employee has contributed to are displayed in this group. An additional line that shows all pension amounts that have been deferred from taxes will appear on a line titled Deferred Pension. M-T-D Amount This column contains the current month-to-date amounts for each line item that is displayed in the first column. If the first pay period of the month has not been processed, this column will remain blank. Q-T-D Amount This column contains the current quarter-to-date amounts of the calendar year for each line item that is displayed in the first column. Y-T-D Amount This column contains the current year-to-date amounts of the calendar year for each line item that is displayed in the first column. Limit This column displays any limits that may apply to the displayed line items for the employee, such as benefit and deduction limits. The items will display consecutively in the order listed under column (1). If more than one screen of information is available for an employee, you may view the additional data by scrolling down. Otherwise you may make an inquiry for another employee or exit the program. Even though all employees will not have the same number of items displayed in their inquiry, they will appear in the order discussed above. 41

42 3.20 EMPLOYEE BENEFIT HOURS INQUIRY This program allows you to make inquiries on the employees benefit hours information. It displays the hours accrued for month-, quarter-, and year-to-date time frames. It also indicates any hours used during the calendar year and limits that may apply. To make an inquiry, the desired employees identification number is entered at the top of the screen. The current information for that employee will appear on separate lines beneath the following columns. NOTE: For the data that appears in the inquiry to be current, the Monthly Processing program must be used at the end of each month. Refer to the Payroll Main Menu for additional information. Benefit The titles of the benefit hours, which have been entered in the employee s master file, are displayed here. Data that appears on the same line under the remaining columns refer to that benefit. Hours Used The total number of hours for which the employee has received income for the benefit during the current calendar year appears in this field. Accrued Hours 42

43 This section displays the amount of hours that the employee has accrued for the benefits during the current calendar year. The accrual is divided into the following time frames. A. Month-to-Date B. Quarter-to-Date C. Year-to-Date Limit This column displays any limits that may apply to the benefit hours for the employee. It can be used to determine how many more hours the employee can accrue before their limit is reached. The benefit hours will display consecutively in the order that they were entered in the employee s master file. Therefore, not all employees will have the same number of items displayed in their inquiry CHECK INQUIRY This program allows you to inquire into the status of a payroll check that is in the system. It will only display the data and no changes can be made to it in this program. You can choose to have the checks selected by a range of check numbers, or a range of check dates. There are four (4) different methods in which to make check inquiries. Include All Check Statuses This option will display all selected checks no regardless of check status. Outstanding Checks 43
44 This option will display all selected checks with a status of OUT(standing). Cancelled Checks This option will display all selected checks with a status of CAN(celled). Voided Checks This option will display all selected check with a voided status CHECK REGISTER INQUIRY This option allows you to make inquiries on payroll registers that have been processed in the past. You can select the registers you wish to view by entering a range of check dates. You can sort the selected registers by department number or employee number. You can refine the selection further by entering specific department(s) or employee(s). You can also limit the selection by displaying only employee totals or grand totals. 44

45 4.00 REPORTS MENU This menu contains the programs that print reports for the Payroll System. Each option allows you to generate the report in a variety of ways. A description of each report is given below. Employee Listing This option prints a listing of employees along with information from their Employee Master Files. YTD Earnings Report This option generates a report with employee dollar amount earnings, divided into month, quarter, calendar year, and fiscal year-to-date periods. State Retirement Report This report is used to submit data to the proper authority concerning employee contributions to the state municipal retirement fund. State Unemployment Report This option creates the employer's unemployment report of wages paid to each worker that is submitted quarterly. Federal Quarterly 941 This option produces the Federal Tax Return (Form 941) that is submitted to the Federal Government on a quarterly basis. Payroll Register Report This option is used to recreate payroll information for previous pay periods. This includes data that appears on checks and the deduction register. Voluntary Deductions Report This option generates a report that lists voluntary deductions that have been deducted from employee checks. 45
46 YTD Hours Report This option generates a report that lists the number of hours for different hour type codes that an employee has worked. Check Warrant Report This option creates a listing of payroll check numbers, who they were issued to, and for what amount. Check Reconciliation Report A report that can be used for check reconciliation purposes that indicates the checks status is generated here. Benefit Hours Report This option generates a report with information for the benefit hours that are processed on the system. It includes information on accrued, used and available hours, along with the current benefit year for each benefit. E.E.O.C. Report This option prints the report that is used to submit employment data to the Equal Employment Opportunity Commission. Insurance Deductions Report Section pending completion. Check back to for updates to this user guide. Salary Report Section pending completion. Check back to for updates to this user guide. 46

47 4.10 EMPLOYEE LISTING This program is used to print a listing of employees with data from their master files. It does not include information on an employee s earnings or hours worked. The report may be printed in employee number or name order. A detailed version containing employment and tax data, or a summarized version may be created. You may also specify employees from particular departments or those with specific job statuses. 47
48 4.20 YTD EARNINGS REPORT This report includes employee earnings for current monthly, quarterly, calendar year, and fiscal yearto-date periods. It does not include the hours worked on which the pay was based on. The report may be printed in number or name order, with employees from a specified department and/or with a specified job status. You may also include data on pay, taxes, voluntary deductions, insurance, and pension amounts, or any combination of the five. NOTE: This report may be run at any time. However, it must be run before Monthly Processing is used to include data for the prior month, quarter, or year(s). 48
49 4.30 STATE RETIREMENT REPORT This report is used to submit data to the proper agency concerning employee contributions to the state municipal retirement fund. It has been formatted to meet the requirements of your states retirement fund. Once approval has been received to use a computer-generated version of the report, this report can be sent directly to the agency. If this is not an option, then the data printed on the report can be transferred to the required form. For the Illinois Municipal Retirement Fund, the following fields are used to produce the report. Municipal Retirement Pension Code The pension code that you use to indicate employees that contribute to IMRF is entered here. Up to 20 pension codes can be entered. Report on Earnings Through: The month and year for which you are submitting data is entered in this section. Summarize by Department? Most users should not check off this option. If the option is left unchecked, the report will print out in Social Security Number order. If the option is checked, the report will be sorted by the Department Code listed on the Personal Info tab of Employee Maintenance. To summarize by department, you must use 3-digit department codes. PLEASE NOTE: (Illinois users only) If Summarize by Department is checked, and your department codes are not 3 digits long, IMRF will not process your magnetic media. Include or Exclude specific departments If you wish to select Include specific departments, place an I in the available box. You will then receive additional fields to enter the department codes you would like included in this process. Selecting Exclude specific departments will perform the opposite function, and will allow you to enter the departments you do not want included in this process. Up to 10 department codes can be entered. The last page printed is not to be submitted to IMRF. It contains data that is to be transferred to the first page of the form that you submit. The remaining pages are to be included with that form. After the report has run, the file IMRF.DAT is created for electronic submission to the agency. Submitting via Internet If submitting the IMRF.DAT file via the internet, select the appropriate check box at the bottom of the screen. After the report has run, the file IMRF.DAT is created for submission to the agency. 49

50 If, after running the report, you notice that an employee is missing from the listing, then simply pull up that employee in YTD Maintenance (off the Support menu) and check their gross pay. If the gross pay is zero dollars, then simply add a penny to it. The penny may be removed after the report is in hand. NOTE: The information is calculated from the payroll detail history file. You can reprint the report, regardless of the date, for the current calendar year. You cannot run the report for a previous calendar year. 50
51 4.40 STATE UNEMPLOYMENT REPORT This report is used to create the employer's unemployment report of wages paid to each worker that is submitted quarterly to the State Government. It has been formatted to meet the requirements of the government. Once approval has been received to use a computer-generated version of the report, this report can be sent directly to the authorities. The following fields are used in this program: Quarter # to Report On (1-4) The number of the quarter for which the report is being generated for is entered here. It will default to the current quarter. It will recognize the next quarter after clearing quarter-to-date fields in monthly processing has been completed. The quarter will include all checks with check dates that fall between the 1st day of the quarter and the last day of the quarter. Quarter From Date To Date 1 01/01/YY 03/31/YY 2 04/01/YY 06/30/YY 3 07/01/YY 09/30/YY 4 10/01/YY 12/31/YY Year to Report On The current year should be entered in a CCYY format. 51
52 State Account Number The account number assigned to the employer by the state is entered in this field. This field must have an R(eimburse) or T(ax) in the first position and a - in the second. This is required for Illinois customers only. Contribution Rate (%) Your contribution rate, which can be found at the top of the form you submit, is entered here. Wage Limit The wage limit up to which contributions can be calculated on is entered here. This can also be found on the front of the form. Note: State Account Number, Contribution Rate (%) and Wage Limit will default to the value entered the last time the option was run. These defaults are stored in the General Payroll Information, System Defaults table. FEIN Number Enter your FEIN number. (I)nclude or (E)xclude specific depts. Enter RTN to include all departments, I to enter up to 10 dept codes to include or E to enter up to 10 dept codes to exclude. Employer Contact Enter the employer contact for this report. Contact Phone Number Enter the employer contact phone number for this report. Contact Phone Extension Enter the employer contact phone extension. The last page printed is not to be submitted with the report. It contains data that is to be transferred to the first page of the form that you submit. The remaining pages are to be included with that form. Upon completion of this report, an ASCII file UNEMPLOY.DAT will be created. This file can then be submitted to the IDES. Submission instructions are included in the appendix. NOTE: The information is calculated from the payroll detail history file. You can re-print the report, regardless of the date for the current calendar year. You cannot run the report for a previous calendar year. Also, employees whose ELECTED - OFFICIAL - YN = Y, or whose CALENDAR - YTD - GROSS PAY = $0, will not be included on this report. 52

53 4.50 FEDERAL QUARTERLY 941 This report generates the data that is used to complete the Employer's Quarterly Federal Tax Return (Form 941). The data is transferred to the form that is submitted to the Federal Government quarterly. The following fields are used. Quarter # to Report On (1-4) The number of the quarter for which the report is being generated is entered here. It will include all checks whose check dates fall with in the 1st day of the quarter through the last day of the quarter. Total Deposits for Quarter The total amount of deposits for Federal taxes made during the quarter being reported on is entered here. Include in this amount overpayments applied from previous quarter. The data printed on the report is then transferred to the form (941) that is to be submitted. This data may need adjustments made to it due to special circumstances at your installation. The information is calculated from the payroll detail history file. You can re-print any 941, regardless of the date for the current calendar year. You cannot run a 941 for a previous calendar year. If your balance due does not equal $0, please refer to Appendix K. 53

54 4.60 PAYROLL REGISTER REPORT This report prints employee paycheck information for all paychecks that fall within a user entered beginning and ending check date. It will list all paycheck information including earnings, hours and deductions. The report may be printed in department or employee number order. You may include employees from a specified department and/or specified employees. A detailed version, employee totals only or grand totals only can be printed. 54

55 4.70 VOLUNTARY DEDUCTIONS REPORT This report lists voluntary deductions that have been deducted from employee checks. This includes deductions that have been entered on Screen 3 of the Employee Master files. It does not include tax, pension or insurance deductions. The report may be printed in employee number, name, or social security number order. You may include employees from a specified department and/or a range of employees, and/or those with specified deduction codes. A detailed version can be printed which lists each deduction by pay period for the employees selected in the previous variables. 55

56 4.80 YTD HOURS REPORT This report lists the number of hours an employee has worked for different hour type codes, along with the amount paid for those hours. It provides this data for the time frame indicated and also on a yearto-date basis. Totals at the end of the report list all hours paid during the same time periods. The program first prompts you to enter a range of dates for the report to cover. The report may be printed in employee number or name order, with employees from a specified department or a range of employees. You may also specify the hour codes that will be included in the report. 56

57 4.90 CHECK WARRANT REPORT This program creates a listing of payroll check information. It includes check numbers, the employees to whom they were issued to, and the amount of the checks. The warrant can be sorted by department number, and will include checks that were issued for the range of payroll dates that you indicate. 57
58 4.A0 CHECK RECONCILIATION REPORT This report lists check numbers that have been issued in the system. The report will be printed in check number order. It can include a range of checks, all outstanding, all voided, or all canceled checks. Information includes check number, employee number, name, check date, check status and check amount. 58
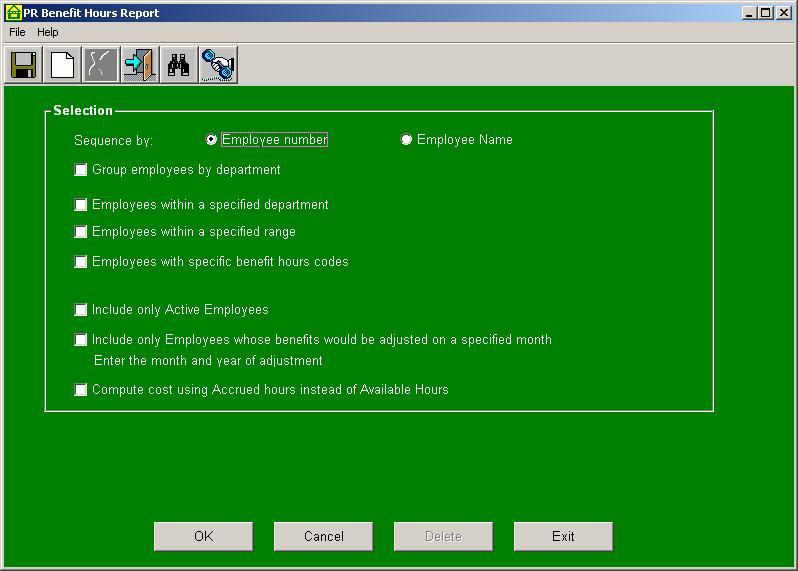
59 4.B0 BENEFIT HOURS REPORT This report lists all employee benefit hours and balances. The report may be printed in employee number or name order, name, or social security number order. You may include employees from a specified department and/or a range of employees, and/or those with specified hour s codes. This program generates a report with information for the benefit hours that are processed on the system. It is often printed before and after the Monthly Processing ( ) is run to monitor the effects to benefit hours. The first group of options indicates the sorting order of the employees selected in the second group. A. Employees Ordered by Employee Number: B. Employees Ordered By Employee Name: One of the following options must be selected. Group Employees By Department: This option will sort and group the selected employees by their department number. Employees With A Specified Department: This allows you to include employees from one specified department. Employees Within A Specified Range: Allow employees to be selected who fall in a range of specified employee numbers. Employees With Specified Benefit Codes: This option allows you to enter up to 10 benefit hour codes. Only those employees who have one or more of these codes will be included on the report. Include Only Active Employees: Only employees who are active, as determined by their Job Status Code ( ), will be included on the report. Include Only Employees Whose Benefits Would Be Adjusted On A Specified Month: This option allows you to analyze what will happen when Monthly Processing occurs ( ). It allows you to enter the number of a calendar month and a year. The system will then determine which employees the Monthly Processing would affect if that were run for the month indicated. Only those employees are included on the report. Compute Cost Using Accrued Hours Instead of Available Hours: One of the columns on the report calculates the cost of unused benefit hours to the employer. Normally this column takes the employees AVAILABLE hours multiplied by their current rate of pay. If this option is selected, the system will use the employees ACCRUED hours instead of the available hours. After your selections have been made, the system will process the information and print the report. 59
60 60

61 4.C0 E.E.O.C. REPORT This report prints the Federal EEOC report. It is not a required report unless specifically notified by the federal government. If you run the report for less than 250 employees, it will print a summarized format. 61
62 4.D0 INSURANCE DEDUCTIONS REPORT Section pending completion. Check back to for updates to this user guide. 62
63 4.E0 SALARY REPORT Section pending completion. Check back to for updates to this user guide. 63

64 5.00 FILE MAINTENANCE MENU This menu is used to maintain the employee files, codes used within those files, and all other codes used by the Payroll System. The following is a description of the programs on this menu. Employee Maintenance This is where you will maintain general employee maintenance information including the employee s name, Employee I.D., Address, Department, Pay information, Insurance, Pay Types, Employee Benefit codes, Voluntary Deductions, ect. Department Codes Identifies the department for which the employee works. Job Class Codes Identifies the type of job within a department to which an employee works. It is also used in maintaining the pay rate table and EEOC information for specific classes of jobs. Job Status Codes Indicates the current employment status of the employee. This is maintained in the Employee maintenance screen one, and indicates how the employee s file will be handled during the payroll cycle. Hours Type Codes This is where you will identify the types of compensation for which an employee is paid. REG, is an example of the code used for Regular Pay. Pension Codes This option identifies the code for the pension program for which the employee belongs. Insurance Codes Identifies the types of insurance programs used to assign to an employee under Insurance Plans in Employee Maintenance Screen 2. Voluntary Deduction Codes 64
65 This option is used to maintain the various voluntary deductions assigned to an employee. This is entered in Employee Maintenance, Screen 4. Federal Tax Rates The Federal Tax tables are set here. Federal deductions are calculated for each payroll based on these tables. State Tax Rates This option is used to maintain tax tables and rates for state and local governments for use during calculation of the payroll. Bank Codes Bank codes are maintained here when using Direct Deposit of employee paychecks. Benefit Accrual Codes Benefit accrual schedules for Benefit Hours such as Sick, Vacation, etc are maintained here. Liability Codes This option is used to maintain Liability Codes for remittance checks for Federal Taxes, Pensions, Voluntary Deductions, Wage Garnishments, etc. 65

66 5.10 EMPLOYEE MAINTENANCE WHAT IS EMPLOYEE MAINTENANCE? Employee maintenance allows you to enter new employees or maintain current ones. This maintenance is where all payroll deductions, pay rates, ect are associated to your employees to ensure correct payroll processing. HOW DO I SET UP MY EMPLOYEE MAINTENANCE DATA? From your main application screen click on Maintenance and select the first option (Employee Maintenance). After each field is input, press tab to accept the information and proceed to the next field. Personal Info Tab: Personal Information Fields: Employee ID# Assign a unique identifier that will allow you to associated payroll information to each individual Name: First Employee s first name. 66
67 Name: Last Employee s last name. Address Employee s address. Telephone Employee s telephone number. Social Security Number Employee s Social Security Number. Birth Employee s date of birth. Sex Employee s gender. Race Employee s race, which can be used for EEOC reporting purposes. W White, Non Hispanic H Hispanic A American Indian B Black I Asian or Pacific Islander Marital Status M for Married or S for Single. This is a required field and is used to calculate the employee s taxes. Elected Official If the employee is an elected official, and you select Y for Yes, the employee is omitted from the Quarterly Unemployment Insurance Report. Hire Date The employee s date of hire. This is a required field that affects the employee s benefit accrual (Service Years). Level date This is optional and can be used as a reference to note the date of the employee s last pay rate change. Status Date The date of the employee s current employment status. Emergency Information Fields: Contact Name Who should be contacted in case of an emergency? Relationship What is the contact s relationship to your employee? 67
68 Telephone Phone number at which the emergency contact can be reached. Location Indicates the location of the contact. Employment Information Fields: Department Assign a department code to indicate where the employee works. Status Indicates an employee s current status of employment (can indicate active vs. inactive / full time vs. part time.) Pension Pension program to which this employee participates. 68

69 Pay Info Tab: Job Class The Job Class Code that is assigned to the employee. Job Level The number of the job class level that represents the employee s current earnings rate. Method Enter the code for the method of pay an employee is to receive: use the chart below, or click on the selection key next to the screen to look up. WH Weekly Hourly BH Bi-weekly Hourly SH Semi-monthly Hourly MH Monthly Hourly QH Quarterly - Hourly WS Weekly Salary BS Bi-weekly Salary SS Semi-monthly Salary MS Monthly Salary QS Quarterly Salary Base Hours The number of base hours on which the employee s gross pay is calculated for each payroll is maintained here. 69
70 Pay Rate Pay rate will display only; based on the job class and level you selected above. Gross Pay This is a display field and is determined by the employee s Pay Rate and Base Hours. This section is used to define additional pay types and rates, other than the default base rate found above. If any additional pay types are entered, they will be written to the payroll hour s workfile when the Create Hours Workfile option is taken. Additional Pay Types Fields Pay Code This is he hour s type code for the additional pay type this employee is to receive. Frequency Defines how often the employee is eligible to receive the additional pay type. A All pay periods 3 Third pay period B Both first and second pay periods 4 Fourth pay period 1 First pay period 5 Fifth pay period 2 Second pay period Rate Enter the hourly rate the employee will be paid. Hours Enter the number of hours the employee will be paid for. G/L Account Number Enter the general ledger account number that the additional pay type should post to. If no account number is entered, the program will determine the general ledger accounts to use from the payroll distribution ac counts 70
71 Benefit Info Tab: Benefit Hours Code Defines the benefit the employee is eligible for such as sick or vacation time. Accrual Code Determines the employees accrual rate based on your accrual table Ben. Year This is a display field and is based on the employee s hire date Accrual Rate Displays the benefit accrual rate based on the accrual code and benefit code selected. Accrual Limit Displays the predefined limits for the accrual. Accrued Displays the benefit hours accrued. Used Displays the benefit year-to-date hours used. 71

72 Available Displays the current benefit hours available. Ins. Info Tab: Insurance Code Enter the insurance plan code(s) that applies to this employee. Description This field will populate based on the insurance code entered in the previous field. Start Date Enter the date this employee becomes available to use the plan; the system will not make deductions from that plan until that date is met. 72
 and ($/%).")
73 Tax Info Tab: State Enter the postal state code. This is a required field. Exemptions Number of exemption this employee is claiming. Amount Entering an amount here will alter the standard tax calculations that are made for this employee. The amount or percent you enter will be used in conjunction with Add (Y/N) and ($/%). These will be entries you make following the amount set up. Note: If the employee is to have NO tax deducted (aka tax-exempt), enter 0 as the tax amount. Set the Add (Y/N)? to N and the ($/%) to $. Local Tax 1? Click yes if a local tax 1 is to be calculated. Local Tax 2? Click yes if local tax 2 is to be calculated. 73

74 GL Distribution Tab: G/L Account Number This distribution set up determines how to distribute the employee s pay to the general ledger. Description The description field will populate based on the G/L account number entered in the previous field. Percentage Enter what percentage of the salary expense is distributed to this account. The total of all values entered must equal 100% 74

75 Direct Deposit Tab: Bank Code Identifies which bank will be used for the employee s direct deposit. Account # Bank account number for this employee s bank. C/S Enter C for checking or S for savings. Deduction Code Voluntary deduction code created for the direct deposit. 75
76 Vol. Deductions Tab: Code Enter the code that defines the voluntary deduction. Description This field will populate based on the voluntary deduction code entered in the previous field. Frequency Defines how often the voluntary deduction is to occur. A All pay periods 3 Third pay period B Both first and second pay periods 4 Fourth pay period 1 First pay period 5 Fifth pay period 2 Second pay period Amount Enter the amount or percent to be deducted per the frequency above. ($/%) Enter the dollar sign to indicate the deduction will be a flat amount or use the percent sign to indicate a percentage 76

77 Limit (C/T) Enter the limit or maximum amount (if applicable) to be deducted. Once that amount is reached, no further deductions will occur. If there is a dollar amount in the Limit field and it has a C after it, then it is a calendar deduction. This means that during the calendar year (January to December) this employee will not be deducted for more than the limit amount and that the deductions will begin again when the next calendar year commences (even if the limit was reached during the prior calendar year). Total deductions are those Limit amounts with a T after them. This means that when the dollar limit is reached, that this deduction will cease to come out of the employee s pay checks even when the new calendar year begins. YTD Amount This is a display of the total amount deducted for the calendar year. Comments Tab: Comments Enter unlimited, free-form comments pertaining to this employee in this area. Note, that comments do not print anywhere. They are for reference only. Will save your entry 77
78 Will clear what you have entered and allow re-entry This button will delete the existing entry that is displayed Exits you from this program option 5.20 DEPARTMENT CODES This program is used to define the codes that describe the different departments in which the employee s belong to. These descriptions are used to identify the departments on reports and within the system. The following fields are used. Department Code The code that identifies the department is entered in this field. Description A description for the department is entered here. Federal ID Number Use this field when employees who are part of this department will participate in pensions that require their own FEIN number. 78

79 5.30 JOB CLASS CODES This program is used to setup and maintain scaled pay rates by levels that will be assigned to employees. These codes serve as a dual function. They not only define the pay tables that determine the employee s rate of pay, but they also identify EEOC information that prints on the Federal EEOC report. Class Code 1-3 digit alpha-numeric code that will identify the job class Class Description Description of the 1-3 digit code Pay Level These fields are used to define up to 10 pay levels for each class defined. Rate (4) The associated pay rates for each level are entered here. 79
80 Comments These fields can be used to enter comments for each of the pay levels defined, such as names, ranks, or positions. EEOC Category This field is used to define the EEOC job category code under which the employees assigned to this job class are categorized. The EEOC categories are a broad job definition that defines the area of work that the employee is involved in. One of the following codes may be used. OA - Officials / Administration TE - Technicians PP - Para-Professionals SC - Skilled Craft PR - Professionals PS - Protective Services AS - Administrative Support SM - Service / Maintenance EEOC Function This field is used to define the EEOC job function code under which the employees assigned to this job class are categorized. The EEOC functions are more specific definitions of the employee s actual function within their assigned job category. One of the following codes may be used Financial Administration / General Control 02 - Streets and Highways 03 - Public Welfare 04 - Police Protection 05 - Fire Protection 06 - Natural Resources / Parks and Recreation 07 - Hospitals and Sanatoriums 08 - Health 09 - Housing 10 - Community Development 11 - Corrections 12 - Utilities and Transportation 13 - Sanitation and Sewage 14 - Employment Security 15 - Other 80
81 5.40 JOB STATUS CODES This program is used to define job status codes that represent the current employment status of your employees (i.e. Full Time, Part Time, Retired, etc). These codes determine whether employees are eligible to be included in the payroll (i.e. retired employees will not be included in upcoming pay runs). This allows you to keep employees in the system without having to cut them new paychecks. An example would be seasonal workers who only work for a portion of the year. Job Status Code 1-3 digit alpha-numeric code that will identify the job status Note: To meet the requirements of the Social Security Administration, deceased employees must be indicated on their W-2 forms. A code should be created in this program and entered in the master files of the deceased employees when necessary. This code is then used during W-2 form printing. Description Description of the 1-3 digit code 81
82 Exclude From Payroll? If employees with this status are not to be included in any future payroll runs, regardless of the Method of Pay code entered in their Employee Maintenance file, select this checkbox. If they are an active employee and therefore eligible for pay, then leave the box unselected. Note: By default only active employees who are eligible for pay will appear in the Employee Lookup box that appears when the binocular icon is selected next to any Employee # field. To see all employees regardless of whether or not they will be excluded from payroll, select the Load all Status Codes checkbox and click on the Refresh button. 82
. Note: The only code that is required in the system is REG for regular hours.")
83 5.50 HOURS TYPE CODE This program is used to define various types of hours codes that an employee can be paid for, including hours paid as salary and all benefit hours, which are processed throughout the system (i.e. vacation hours, overtime hours, regular hours). Note: The only code that is required in the system is REG for regular hours. The system will default to this code during the creation of the payroll workfile and it does not follow the same rules as other codes. For instance, any Rate/Amount entered under REG will not override the employee s pay rate. Hours Type 1-3 digit alpha-numeric code that will identify the type of hours entered against this code Hours Description Description of the 1-3 digit code that will appear on reports, checks, and programs in which the hours type is involved. Rate/Amount If there is a fixed rate or amount for which the hour s type is paid, it can be entered in this field. Whenever this code is used during the payroll, this figure will be the applicable pay rate that will 83
84 override the employee s normal pay rate for that line item. It can also be used in conjunction with the multiplier discussed in the next field. For example $10.00 per hour would be entered as G/L Account Number The number of the general ledger account to which the expense for this hours type is posted is entered in this field. The system will default to this account when determining general ledger distribution unless indicated otherwise in another program. Substitution Account # This field is used for the substitution feature of the MSI Payroll System. Please consult your MSI Representative for more information. Multiplier? This field can be used if the rate for this hour s type is a multiplier of an employee s normal pay rate. An example of this would be an overtime rate that is paid double the employee s normal pay rate when overtime hours are worked. In this case, (2) would be placed in the Rate/Amount field and (Y) for "Yes" would be entered in this field. Any time this code is used as the hour s type, the employee will receive two times their normal pay for the hours worked. If this code is not a multiplier, click on No. Defer Federal Tax? If Yes is selected, the specific Hours Type code will defer Federal Taxes. Defer State Tax? If Yes is selected, the specific Hours Type code will defer State Taxes. Defer Local 1 Tax? If Yes is selected, the specific Hours Type code will defer Local 1 Taxes. Exclude From Hours Report? If Yes is selected, then the specific Hours Type code will not be included on the Hours Report. Defer Local 2 Tax? If Yes is selected, the specific Hours Type code will defer Local 2 Taxes. Defer FICA? If Yes is selected, the specific Hours Type code will defer both FICA and Medicare. Benefit Type Hours Code 84

85 5.60 PENSION CODES This program is used to define codes for the pension programs that the employees may participate in. Pension calculations are made according to the fields maintained in this program. The codes are then entered in the records of applicable employees. Pension Code The code to identify the pension is entered here. Pension Description A description of the pension program may be entered here for identification. It will appear on the reports, checks, and programs in which the pension is involved. Pension ID # The identification number assigned by the government to the employer for this pension program is entered here. Calculate on G/B/H? This field indicates which type of pay the employee s pension calculations are based on. This can be either their Gross pay (G), the Base hours (B) entered in their master files, or specific Hour Types (H). If (H) is entered, the types of hours are entered in the next field. 85
86 Deferred From? This section is used to indicate if the amounts calculated for this pension are deferred from taxes. If so, click Yes in the applicable fields. If they are not deferred, the program will default to No. Deferred pension may be indicated in the following fields. A. Federal B. State C. Local 1 D. Local 2 The next section is used to define deduction information for the pension program. A separate column is provided for both the Employee and Employer to define the data for each. Include FICA? This field indicates if Social Security (FICA) deductions are to be made for employees in this pension plan. If a Yes is clicked on, FICA deductions will be made IN ADDITION TO their pension deductions. Include Medicare? This field indicates if Medicare deductions are to be made for employees in this pension plan. If a Yes is clicked on, Medicare deductions will be made IN ADDITION TO their pension deductions. $/% These fields are used to indicate if the Amount of the employee and employers contributions is a dollar ($) or percentage (%) amount. Amount These fields indicate what the dollar or percentage amount is for the employee and employers contribution. G/L Account # The account numbers to which the pension deductions are posted to are entered in these fields. The employee s contribution is normally a liability, and the employer s is normally an expense. Calculate on Hours This section is used if pension is calculated on income from specific types of hours (H), as defined in the previous field. Up to 10 hour types may be entered for each pension. 86

87 5.70 INSURANCE CODES This program is used to define codes that represent insurance programs that are provided for the employees. It defines data that is used in insurance cost calculations and reporting for those employees who participate in the programs. If a flat dollar deduction is needed, it may be input in the Voluntary Deduction Code Maintenance screen. YOU DO NOT HAVE TO USE INSURANCE DEDUCTION. Insurance costs are calculated by taking the Total Coverage Cost defined below and dividing it by the number of times the employee is paid per year (as determined by the employee s method of pay). Then the appropriate percent of the total cost is deducted from the employee s paycheck. A liability for the employer s percent of the cost is also created. Insurance Code The code that identifies the insurance program is entered here. Insurance Description A description of the program may be entered here. 87
88 Frequency This field is used to indicate during which pay periods this insurance is calculated. Qualifying Period The number of months that an employee must work before they qualify for the insurance program is entered here for reference purposes. Cost/Thousand This field indicates the cost per thousand dollars for the coverage provided by the insurance program for the employee. Coverage Amount This field indicates the total value of coverage for this program. It is entered per thousand dollars. Ex. $100,000 in coverage would be entered as (100). Total Coverage Cost The yearly coverage cost of this insurance program for each employee is displayed in this field. It is automatically calculated by multiplying the Cost/Thousand by the Coverage Amount. This amount is used to determine the cost of the program for each pay period. NOTE: The amount calculated for this field can be manually modified to represent an alternate cost. Employee Percent This field indicates the percentage of the cost of the program that the employee pays. Employee Account # The general ledger account number to which the expense of this program to the employee is posted to can be entered here. Employer Percent This field indicates the percentage of the cost of the program for which the employee pays. Employer Account # The general ledger account number to which the expense of this program to the employer is posted to can be entered here. 88
 deduction codes defined at any one time.")
89 5.80 VOLUNTARY DEDUCTION CODES This program is used to define codes for voluntary deductions that are deducted from the employee s net pay. Examples of these deductions would be charities and credit unions. They do NOT include pensions or taxes. An employee may have up to (99) deduction codes defined at any one time. The following fields are used. Deduction Code The code of to identify the voluntary deduction is entered in this field. Description A description of the deduction may be entered in this field for identification. It will appear on reports, checks and programs that involve this deduction. Account Number The general ledger account number to which this deduction is posted is entered in this field. Based On Gross? This field indicates if the deduction is based on the employee s gross or net pay (for percentage deductions). If it is based on gross pay, whether on a % basis or flat dollar amount, click Yes. 89
90 Direct Deposit? If this field is set to Yes if any Voluntary Deductions Report run for the Voluntary Deduction Code, will include the employee s bank account number as found on Employee Maintenance-S2. If the employee reference to this deduction is set to 100% and Direct Deposit (Y/N) = Y, then this voluntary deduction will be used as the direct deposit amount. Calendar? When this option is set to Yes, then it is a Calendar deduction type code. This means that during the calendar year (January to December) an employee setup with this code will not be deducted for more than the limit amount specified on their maintenance screen and that the deductions will begin again when the next calendar year commences (even if the limit was reached during the prior calendar year). When this option is set to No, then it is a Total deduction type code. This means that when the dollar limit is reached (as established in Employee Maintenance, under the Vol. Deductions tab), that this deduction will cease to come out of the employee s pay checks even when the new calendar year begins. Print Employee on Check? This field indicates if the Payroll Check print should print the employee s name and address or the employee s bank s name and address on a direct deposit check. Enter (Y)es to print employee s name and address. Defer Federal Tax? Click Yes if the deduction should be subtracted from gross pay before calculating federal tax. Defer FICA? Click Yes if the deduction should be subtracted from gross pay before calculating FICA. Defer State Tax? Click Yes if the deduction should be subtracted from gross pay before calculating state tax. Defer Local 1 Tax? Click Yes if the deduction should be subtracted from gross pay before calculating local 1 tax. Defer Local 2 Tax? Click Yes if the deduction should be subtracted from gross pay before calculating local 2 tax. Defer Pension? Click Yes if the deduction should be subtracted from gross pay before calculating pension. Defer Medicare? Click Yes if the deduction should be subtracted from gross pay before calculating Medicare. 90

91 5.90 FEDERAL TAX RATES This program is used to define the federal tax tables and related data that are used to determine federal taxes. This data can be found in Circular E, which is issued by the federal government. It is generally maintained only at the end of the calendar year as mandated by the federal government. The following fields are used to define the tax rates. Federal ID # This field indicates the identification number that is assigned to your employer by the federal government. This number will appear on reports and forms that are submitted to the federal government. SSA # This field indicates the identification number that is assigned to your employer by the Social Security Administration. This number will appear on reports and forms that are submitted to the SSA and begins with "69". Fed. Tax Acct The general ledger account number to which the liability created by the federal tax deductions is posted to is entered in this field. 91
92 Exempt Allow. This field defines the amount of the exemption that is allowed for each dependent that the employee claims for their federal taxes. FICA Employee % The percent of income that is deducted from gross pay for the employee s contribution to social security is maintained here. FICA Employee Account # The expense account to which the deductions of the employee s FICA contributions are post to is entered here. FICA Employer % The percentage of the employee s income on which the employer s contribution to FICA is based on is entered in this field. FICA Employer Account # The liability account to which the employer s contributions to FICA are posted to is entered here. FICA Max Wage The maximum yearly income per employee to which FICA can be applied to is entered here. Once the employee s gross income reaches this amount, FICA is no longer deducted from their checks. Medicare Employee % The percent of income that is deducted from gross pay for the employee s contribution to Medicare is maintained here. Medicare Employee Account # The expense account to which the deductions of the employee s Medicare contributions are post to is entered here. Medicare Employer % The percentage of the employee s income on which the employer s contribution to Medicare is based on is entered in this field. Medicare Employer Account # The liability account to which the employer s contributions to Medicare are posted to is entered here. Medicare Max Wage The maximum yearly income per employee to which Medicare can be applied to is entered here. Once the employee s gross income reaches this amount, Medicare is no longer deducted from their checks. Single Table The figures that are used to determine the employee s federal taxes for single individuals are entered in this table. The ANNUAL table used by the system appears in "Circular E", issued by the federal government, as a table for the percentage method of withholding for single employees. The table should be entered exactly as it appears in that publication. Married Table The figures that are used to determine the employee s federal taxes for married individuals are entered in this table. The ANNUAL table used by the system appears in "Circular E", issued by the federal 92

93 government, as a table for the percentage method of withholding for married employees. The table should be entered exactly as it appears in that publication. 5.A0 STATE TAX RATES This program is used to define the state tax rates and related data that are used to determine these taxes. This data is generally only maintained at the end of the calendar year as mandated by the state government. A tax table may be defined for each taxing state needed. The rates are defined using the following fields. State Code The postal abbreviation of the state for which the state or local tax rate is maintained is entered here. State ID Number This field indicates the identification number that is assigned to your employer by the state government. This number will appear on reports and forms that are submitted to the state government. Exemption Allowance This field defines the amount of the exemption that is allowed for each dependent that the employee claims for their state taxes only. 93
94 G/L Account Number The general ledger account number to which the taxes deducted are posted to is entered here. Tax Table The figures that are used to determine the state and/or local taxes for employees are entered in this table. Examples of different tax tables are given below. A. Flat Tax % If all employees are taxed the same percent regardless of their income level, that rate is entered in the "Tax %" column on line 1, and all other fields will remain blank. B. Flat Tax Amount If all employees are taxed a flat amount, regardless of their income level, that figure is entered as an ANNUAL AMOUNT in the "Tax Amt." column on line 1. All other fields will remain blank. The annual figure is calculated by multiplying the "flat amount" by the number of pay periods in the year. C. Graduated Table If the employee s tax varies with the level of their income, a graduated table is entered. The income levels are defined in the "Minimum Amount" column. If a flat tax is applicable for those levels, they are entered in the "Tax Amt." column as annual amounts. If a percentage tax is applicable for those levels, they are entered in the "Tax %" column. 94
95 5.B0 BANK CODES This program is used to define the various banks that are used by employees who utilize direct deposit. If your payroll has 100 employees who bank at 9 different banks, then 9 bank codes would be created in this option. Bank Code Enter the code for each individual bank utilized by your employees for direct deposit. Bank Name Enter the name of the bank ABA Number Enter the ABA Number assigned to this bank. Transit Route Enter the Transit Route Digit assigned to this bank. 95

96 5.C0 BENEFIT ACCRUAL CODES This program is used to identify the various benefit hour programs that are offered to the employees. It defines and controls how the benefit hours are accumulated and processed. There are two screens to this program. This first screen identifies how many hours of the benefit to accrue each year, based on the number of years the employee is in the program. The second screen (Figure 49) controls how the benefits are processed during the payroll cycle and at the end of the benefit year. This data is used to process benefits during Monthly Processing ( ). There are many factors that affect how benefit hours can be processed on the system. For detailed instructions on Benefit Hour Processing, please refer to Appendix D in this manual. Each variation of any benefit hour table that will be processed will have a separate table created here. For example, if some employees get 40 hours of vacation their first year, while others get 45 hours their first year, there will be at least two benefit hour tables for vacation. If however, the number of hours increases from 40 hours the first year to 45 hours the second year, there will be only one table for that specific plan. The following fields are used on the first screen of this program. 96
97 Accrual Based on: Determines what month the benefit table is based on, which defines when the benefit table year begins. This controls how the other variables on this screen will be used, which effects how the data entered on Screen 1 will be processed. There are three available options: A. (C)alendar - This selection indicates that the benefit table is based on January of each year. B. (A)nniversary - This selection indicates that the benefit table is based on the employee s anniversary date. The employee s anniversary date is determined by the date entered as the HIRE DATE on Screen 1 of the Employee Maintenance program (figure 5). The table will be based on the month of the hire date. C. (F)iscal year- This selection indicates that the benefit table is based on the month in which the fiscal year begins. For example, if the fiscal year begins on May first, the benefit table will be based on the month of May. D. (M)onth- This selection indicates that the benefit table is based on a user entered month. For example, if (M)onth is entered, the screen will prompt with Accrual starts in month number: If 8 is then entered, the table will be based on the month of August. Maximum # of hours Available to Rollover Determines what will happen to available benefit hours when a new benefit year begins. The following options are available. Rollover available benefits? If there is benefit hours available at the end of the year, this determines what will happen to remaining or unused hours. If (Y)es is entered, the hours will rollover and remain available for use by the employee, along with any new hours that are accrued during the following year. If (N)o is entered, available hours at the end of the year will be lost and not be available for use at a future date. Are Accrued Hours Immediately Available? Answer Yes if hours can be used as soon as they are accrued. Answer No, if accrued hours cannot be immediately set to Available. 97

98 Accrual Code Identifies the Benefit Hour Table to the system. Accrual Year Allows you to define how benefit hours are processed as determined by the number of years in which the employee is in a specific program. Each benefit hour table can be defined for up to 45 years. Hours Accrued Determines how many hours are accrued for the corresponding year that is defined. This figure is on a yearly basis and can be as high as ( ) in any single year. Limit Determines the maximum number of hours that can be accrued by the employee. For example, if an employee earns 80 hr. of sick time each year and can continue to accumulate (accrue) up to 800 hr., than the limit would be entered as 800. After you make your first entry in the HOURS ACCRUED and LIMIT fields, the system defaults the previous entries in the next fields. This is designed to limit data entry time, but can be changed as needed. 98

99 5.D0 LIABILITY CODES This program provides for a method to automatically y issue checks for liabilities that are accumulated during a payroll cycle. For each check that will be issued to reimburse the liabilities, a liability code must be defined. This code will determine when, how and for what liabilities the checks will be written for. Liability Code This code identifies each separate check to be written. Some checks may be written for more than one deduction or liability. Therefore, you may have fewer liability codes than deductions that you are reimbursing. For example, if you issue one check to a bank for the federal taxes, FICA and Medicare, only one liability code is necessary to create the check. Description This identifies what the code represents for you reference only. Frequency This field determines how often the liability check will be written. It allows you to indicate during which pay period(s) the check should be generated. It functions much in the same manner as frequency code for voluntary deductions. The following frequencies are available: 99
100 A - All pay periods 3 - Third pay period B - Both first and second pay periods 4 - Fourth pay period 1 - First pay period 5 - Fifth pay period 2 - Second pay period Mailing Name and Address The name and address of the recipient of the check is entered here. There are two lines for name and two lines for address, which will print on the check. Outstanding Amount For liability checks that are not printed each pay period, the system will accumulate those amounts here until the check is printed. Amounts will not appear until after the payroll has been updated. From Payroll Dated If an outstanding amount exists in the previous field, the date of the oldest payroll, which contributed, to the balance will appear. It provides a reference to which payroll the outstanding amount was generated from. NOTE: If any changes must be made to a liability code during a payroll cycle, you MUST recalculate the payroll for the system to recognize the changes. If you do not, the checks may not print for the expected amounts. A message will display reminding you to recalculate. Liability Codes-Screen 2 is used to indicate what deductions and liabilities will be included on the liability checks. The information that is entered on Screen 1 will determine when and to whom the checks will be written. Magnetic Media? Check Comment Ded. Type Indicates what type of deduction will be included on the check. The prompt at the bottom of the screen will display the valid selections: A. (I)nsurance - Enter I if deductions made for insurance programs are included. These codes are defined under Insurance Code Maintenance. NOTE: This is not used if deductions for insurance have been set up as voluntary deductions. B. (D)eductions - Enter D if voluntary deductions are to be included on a liability check. C. (P)ensions - Enter P if pension code deductions are to be included on a liability check. D. (T)axes - Enter T if federal, state, FICA, Medicare and/or local taxes are to included on a liability check. Ded. Code Valid entries in this field will depend on what was entered as the Deduction Type. 100
101 Deduction Type (I)nsurance (D)eductions (P)ensions (T)axes Deduction Code Any valid insurance deduction code Any valid voluntary deduction code Any valid pension code (FED) Federal; (FIC) FICA; (MED) Medicare; (ST) State; (T-1) Local Tax 1; (T-2) Local Tax 2 Employee Liability If a liability check is not printed during a pay period (as per the frequency code), the EMPLOYEE S portion, if any, from that payroll is accumulated in this field. It will be stored there until the next time a check is printed for this liability code. After the check is printed and the payroll is completed, this column will return to $0.00. Employer Liability If a liability check is not printed during a pay period (as per the frequency code), the EMPLOYER S portion, if any, from that payroll is accumulated in this field. It will be stored there until the next time a check is printed for this liability code. After the check is printed and the payroll is completed, this column will return to $0.00. NOTE: If any changes must be made to a liability code during a payroll cycle, you MUST recalculate the payroll for the system to recognize the changes. If you do not, the checks may not print for the expected amounts. A message will display reminding you to recalculate. Both the employee and employer columns can be modified if the amounts reflected are incorrect. The following examples illustrate when this may be necessary: A. Check Void: If a check which made contributions to a liability code is voided, the amount to submit on the next liability check may need to be decreased. This is done by either decreasing amounts already present in this column or by creating a negative amount to offset the amounts from the next payroll. B. Initial Liability Check: Depending on when you implement the liability check processing, there may be outstanding amounts for liabilities generated on prior payrolls. Those amounts can be entered here and will be accumulated along with the next payroll amounts. 101

102 6.00 APPLICATION SUPPORT MENU This menu contains programs that are used less frequently than others but are important for proper functioning of the Payroll System. The following options are available: Employee YTD Maintenance This program is used to alter the month-, quarter-, and year-to- date information for the employee s income, deductions, and benefits. It allows you to directly alter the data in the history file to reflect changes in the payroll. It is also used at the beginning of the year to enter accrued benefit hours. Payroll Information This option allows you to set up default payroll information and also defines requirements for creating your payroll NACHA file. W-2 Processing This menu is used at the end of the calendar year to print the W-2 forms, the 1099-R forms and to produce the federal and state magnetic media versions of the W-2 data when necessary. Please review this and all related documents thoroughly before using the programs. Check Reconciliation This menu is used for check reconciliation for checks issued by the Payroll System. Each option is used to perform a different function so that you can keep track of the history of the checks you produce. Check Void This option allows you to void checks processed through the Payroll System. Delete History This option will remove payroll history that meets the requirements of the selections made below. Create NACHA file This program is used to produce the PRNACHA.DAT file that is then transmitted to your bank for your direct deposit transferring. 102
103 ASCII Master Download This option creates an ASCII file of your employee master. Signature Setup Use this program to setup specifications related to automatic payroll check signing. 103
104 6.10 EMPLOYEE YTD MAINTENANCE This program is used to alter the month-, quarter-, and year-to- date information for the employee s income, deductions, and benefits. It allows you to directly alter the data in the history file to reflect changes in the payroll. It is also used at the beginning of the year to enter accrued benefit hours. NOTE: This program directly affects the data that will appear on checks, reports, inquiries, and W-2 forms. Therefore, only limited access should be allowed to protect the integrity of the data. The program is divided into four screens of information that may be maintained. Each is described below. 1. YTD Pay & Tax Maintenance This screen is used to maintain the dollar values of gross pay and pay types that the employee has received, and taxes that have been deducted from that income. 2. YTD Deductions Maintenance This screen is used to maintain the dollar values of voluntary, pension, and insurance deductions made for the employee. 3. YTD Hours Maintenance This screen is used to maintain the HOURS that the employee has earned and benefits that they have accrued and used. 4. Taxable & Pension Wages 104

105 6.11 YTD PAY & TAX MAINTENANCE 105
106 6.12 YTD DEDUCTIONS MAINTENANCE 106

107 6.13 YTD HOURS MAINTENANCE This program is used to make modifications to the benefit hours that are processed on the system. It allows you to modify the accrued, used and available benefit fields, which cannot be maintained in the Employee Maintenance program. This program is normally only used when: 1. Benefit hours are being processed on the system for the first time and information must be entered to start the process. 2. Errors were made during a payroll cycle that needs to be corrected. EXTREME CAUTION SHOULD BE TAKEN WHEN USING THIS PROGRAM!!!! Any changes made here are not reflected in the history file and an audit trail is not provided! The following fields can be maintained in this program. 1. YTD Hours Paid- displays the number of hours paid to the employee for each hour type. NOTE: This is the only field that can be maintained for non-benefit hours. It should RARELY be used. 107

108 2. Accrued - displays the accrued benefit hours. 3. Used - displays the used or "paid" benefit hours. 4. Available - displays the available benefit hours. All changes that are made to fields (2), (3) and (4) will immediately affect the employee master file and reports TAXABLE & PENSION WAGES 108
109 6.20 EMPLOYEE MAINTENANCE AUDIT REPORT Section pending completion. Check back to for updates to this user guide. 109
110 6.30 SYSTEM DEFAULTS This option allows you to set up default payroll information and also defines requirements for creating your payroll NACHA file. The following fields are available: Employer Name, Address, City, State & Zip This is the employer s mailing address. The STATE field is important because it will notify the MSI-PR system to load the appropriate State Tax Table, Pension Report, Unemployment Report and W-2 versions. Use as Default? Select this checkbox if you would like to use the due to account INSTEAD of those defined in MSI-GL Fund Codes Maintenance. Audit Employee Maintenance Select this checkbox if you want to be able to audit changes and additions made to the Employee Maintenance file. It will also keep track of Universal Pay Increases done via MSI-Human Resources. The audit report is an option that can be run off the Payroll Support Menu. 110

111 Independent of Accounts Payable Select this checkbox if the payroll checks are on a separate bank account and/or numbering sequence than your MSI-Accounts Payable System. Limit Lookup Set the number of records to load whenever the lookup box is accessed. Keeping this number low will allow your lookup boxes to load quickly so that individual search options can be executed promptly. Next Check Number Enter the appropriate value of the next check number available to print on your check stock. Print Liability Checks Select this checkbox to activate liability check processing. Laser W-2 (Y/N/F) Do longer an active option. Will be removed in version 5.0 of payroll. Laser Check (Y/N/F) Select Y for stub/check/stub, select F for check on the bottom option. N is no longer an active option. Lock Out of Maintenance Select this checkbox just before processing a pay run and unselect it once the run is updated. This is a new feature added to V4.0. It is recommended to select this checkbox prior to creating the hours work file and then uncheck it after the run is updated. While this box is selected, users will not be able to access the maintenance screens in payroll. If anyone tries to select a maintenance screen while this box is selected, they ll get the below message: Keeping people out of maintenance screens during a pay run will prevent file lock errors that can prevent payroll runs from processing smoothly. Direct Deposit Information Please refer to Appendix F for information on these fields as they relate to Direct Deposit processing. General Ledger Account Information Enter the general ledger account, which the system will credit when posting to the general ledger. If using interfunds, please enter the appropriate account in the Detail Due to/from Interfund account field. 111

112 6.40 W-2 PROCESSING This menu is used at the end of the calendar year to print the W-2 forms, the 1099-R forms and to produce the federal and state magnetic media versions of the W-2 data when necessary. Please review this and all related documents thoroughly before using the programs. We hope this makes your W-2 processing as trouble-free as possible. However, you are responsible for the information that appears on the W-2 forms and for any changes that are made to the data. If you have any questions on the information that should appear on the W-2 forms, please contact your auditor or accountant for further details. If you have any questions on how to enter or modify the data, or with the use of any programs, please call MSI for further instructions so that you have a full understanding of their use and results. Create W-2 Workfile This option is used to create a workfile on the W-2 data. This will allow you to begin your first new payroll in January without having to print the forms. 112
113 NOTE: This option must be processed BEFORE continuing with your Payroll Year-End Checklist! Clear Calendar Totals W-2 Edit Report This option prints a report listing general information that will appear on the W-2's. It should be reviewed to determine that the information and totals are accurate. Edit W-2 Workfile This program allows you to display each W-2 form and to make modifications when needed. Please be extremely careful in the use of this program. Print W-2 Forms The W-2 forms are printed using this option. The forms can be printed as many times as needed. Federal Magnetic Media This program is used by those employers who are required to submit their W-2 information to the Social Security Administration on magnetic media. State Magnetic Media This program is used by those employers who are required to submit their W-2 information to their state taxing authority on magnetic media. The file is formatted to the proper requirements of each individual state. Create 1099-R Workfile This option is used to create a workfile on the 1099 data. This will allow you to begin your first new payroll in January without having to print the forms. NOTE: This option must be processed BEFORE continuing with your Payroll Year-End Checklist! 1099-R Maintenance This program is used to enter the information that will appear on the 1099-R forms for pension and retirement payments, if applicable. Print 1099-R Forms This program is used to print the 1099-R forms. It uses the data entered in the 1099-R Maintenance program. 113

114 6.41 CREATE W-2 WORKFILE This option is used to create a workfile of the W-2 information. It allows you to begin your first payroll in January without having to print the W-2 forms if time does not allow. THIS PROGRAM MUST BE USED BEFORE CONTINUING WITH YOUR PAYROLL YEAR END CHECKLIST! You must run the W-2 EDIT REPORT directly after this option. If there appears to be any problems, please call MSI immediately for further instructions. Please enter the appropriate data in the following fields to complete this program, then continue with the W-2 Edit Report. Fringe Benefit Hours Codes Any Hour Type Codes (up to 5) that are to be reported as fringe benefits, such as car allowances, should be entered here. Life Insurance over $50,000 Hours Code Enter the Hour Type Code of the pay type that was used to process life insurance programs over $50, in value. 114

115 Section 457 Deferred Deduction Codes Enter the Voluntary Deduction Codes (up to 5) that are deferred from taxes and are contributed to a "457" type plan. Tips Wages Hours Code Pension Codes Mark Elected Officials as Statutory Employees 6.42 CLEAR CALENDAR TOTALS 115

116 6.43 W-2 EDIT REPORT This option prints an edit report that allows you to review the data that will appear on the W-2 forms. It provides the opportunity to analyze the data in a report format rather than on the W-2 forms themselves. The system will print warning messages for those items that may need attention to assist you. If any data appears incorrect, you can make modifications using the W-2 Maintenance Program. This report can be run as many times as needed. 116

117 6.44 EDIT W-2 WORKFILE This program allows you to display each W-2 form on your screen and to make modifications when needed. You are responsible for the information that appears on the W-2 forms, and for any changes that are made to them. If you have any questions on the information that should appear on the W-2 forms, please contact your auditor or accountant for further details. If you have any questions on how to enter or modify the data, please call MSI for further instructions. If changes are made, the W-2 Edit Report should be run again to verify your entries and totals. 117

118 6.45 PRINT W-2 FORMS This program is used to print the W-2 forms. Please enter the appropriate data in the following fields to complete this program. Select Form Specify whether you are printing to 2 or 4 forms per page and whether or not to collate. Employer Address Pre-printed on Forms Select the checkbox if you ordered your forms to come printed with your name and address on them. Otherwise, leave the box blank and specify how you d like the name and address to print on the forms in the fields to follow. Employer Name & Address The city name and address will default in these fields. They may be modified if necessary. Include Departments Select this option to include only employees from specified departments. Exclude Departments Select this option to exclude departments, if needed, such as pension payroll departments. 118
119 Print Forms Previous Printed Select this option if you need to reprint an employee s W-2. After your entries have been made, follow the instructions displayed on the screen to load the forms and print the W-2's. We suggest first printing the forms on paper for a small department to familiarize yourself with the printing routine. Forms may be printed as many times as necessary. NOTE: When lining up the forms, printing should begin on the second form of a full sheet. The test print lines will be printed on that form, then the first actual W-2 will be printed on the top of a new page. The SSA requires this. 119
120 6.46 FEDERAL MAGNETIC MEDIA This program is used to create the federal magnetic media file for the Social Security Administration. It can be used as many times as necessary. The system will overwrite the previous file each time you run this program. Enter appropriate data in the following fields to complete this program. Employer Name & Address The city name and address will default in these fields. They may be modified if necessary. (I)nclude/(E)xclude Dept. Enter (I) to include only employees from specified departments, or (E) to exclude departments if needed, such as pension payroll departments. This program will create a file called "W2REPORT" on the same directory as where the MSI Payroll System is located. The file will be in the required format, based on the same workfile that was used to print the W-2 forms. 120

121 6.47 STATE MAGNETIC MEDIA This program is used to create the magnetic media file to be submitted to your state taxing authority. It can be used as many times as necessary. The system will override the previous file each time you run this program. Enter appropriate data in the following fields to complete this program. Employer and Address The city name and address will default in these fields. They may be modified if necessary. (I)nclude/(E)xclude Dept. Enter (I) to include only employees from specified departments, or (E) to exclude departments if needed, such as pension payroll departments. This program will create a file on the same directory as where the MSI Payroll System is located. The name of the file is determined by the state for which it is produced. This name will appear in the screen heading and in the message at the end of the program indicating that processing is complete. In Illinois and Minnesota, the name of the file to be submitted is the same as the Federal Magnetic Media file (W2REPORT). However, the system does not allow files names to be duplicated. When the program is run, the name of the file created will be (W2REPORT.IL) for Illinois and (W2REPORT.MN) for Minnesota. When you transfer this file to your magnetic media, remember: 121
122 THE FILE MUST BE RENAMED TO (W2REPORT) BEFORE IT IS SUBMITTED!!! In Wisconsin, the name of the file to be created and submitted is (STATREPT). It is not necessary to rename this file. No file is created for Missouri. The file will be in the format required by the state, based on the same workfile that was used to print the W-2 forms and create the Federal Magnetic Media file. NOTE: Additional fields may appear on your screen, which are specific to the requirements of your state. Provide the appropriate responses as prompted. 122

123 R WORKFILE CREATION This option is used to create a workfile of the 1099 information. It allows you to begin your first payroll in January without having to print the 1099 forms if time does not allow. THIS PROGRAM MUST BE USED BEFORE CONTINUING WITH YOUR PAYROLL YEAR END CHECKLIST! Please enter the appropriate data in the following fields to complete this program. 123

124 R MAINTENANCE This program is used to enter the information that will appear on the 1099-R forms for pension and retirement payments. Each employee who is to receive a 1099-R will be entered here. The system will NOT automatically create 1099-R forms. After determining the employees that are to receive the forms, use the Payroll Register Report or other related reports to calculate the necessary totals. Employee # Identifies the employee who will receive the form. Form Number Allows more than one 1099-R form to be created for each employee, if necessary. The system will default to (1). Recipients ID Number Is normally the employees Social Security number. Recipients Name & Address Will default to the name and address from the employee's master file. 124

125 After you have identified the recipient of the 1099-R form, the remaining fields are used to document the payments distributed. When all data is entered, the forms can be printed using the Print 1099-R Forms program. 6.4A PRINT 1099-R FORMS This program is used to print the 1099-R forms. It uses the data entered in the 1099-R Maintenance program ( ). This data is not referenced to or affected by the W -2 data in any manner. Forms will only print for those recipients entered in ( ). Please enter the appropriate data in the following fields to complete this program. Is the address pre-printed on the forms? Enter (Y)es if the city name and address have been pre-printed on the form. Enter (N)o if the printer is to print the name and address. Employer Name and Address The city name and address will default in these fields. They may be modified if necessary. (I)nclude/(E)xclude Dept. This field is for future use and is not used at this time. 125
126 After your entries have been made, follow the instructions displayed on the screen to load and print the 1099-R forms. We suggest printing the forms on paper to review the data and familiarize yourself with the printing routine. If any data is incorrect or missing, you may return to the entry program ( ), modify the data as needed, then print the forms again. Forms may be printed as many times as necessary. NOTE: When lining up the forms, printing should begin on the second form of a full sheet. The test print lines will be printed on that form, then the first actual 1099-R will be printed on the top of a new page. The SSA requires this. 126

127 6.50 CHECK RECONCILIATION This menu is used for check reconciliation for checks issued by the Payroll System. Each option is used to perform a different function so that you can keep track of the history of the checks you produce. Enter Cleared Checks This option is the first step in check reconciliation. It is used to enter the checks to be canceled and lets you indicate what their status will be after they are canceled. Update Cleared Checks This option is where the checks are actually canceled in the system and the affected files are updated. 127

128 6.51 ENTER CLEARED CHECKS HOW DO I PROCESS MY CHECK RECONCILIATION? From the Payroll Toolbar Menu click on Support, from the dropdown menu click Check Reconciliation. This will take you to your 2 menu options for check processing Select the menu options in the order that they appear. To begin your check reconciliation process click on Enter Cleared Checks. This program is where you select the checks you wish to cancel. It is the first step in the check reconciliation process. Reconciliation allows you to account for all checks produced by the Payroll System for administrative and historic purposes. This program allows you cancel "ranges" of checks at one time to speed the process. This is because most checks, when canceled, are given the same status. This program uses the following fields New Status 128
129 The new status that should be assigned to the range of checks is entered here. The new status can either be "CAN" for (Canceled) or "OUT" for (Outstanding). Control Total The total dollar amount of all checks to be canceled is entered here. This amount is only entered once. The system will compare this amount to the values assigned to the checks in the system to serve as a balancing tool for those to be canceled. Also, click the box for which check status you would like displayed. Once the selection is made click ok to display all checks for the status you have selected. Once displayed you may select the checks to reconcile by double clicking the line for the check or by clicking once on the line, which will highlight the line, then click the add button. You may also select line items, if you have a group in sequential order, by highlighting the first check and then holding your shift key and highlighting the last check. This will select the first, last and all checks in between. Once selected, click your add button and all checks will be selected for reconciliation. When all checks are selected click ok to save this information. Moves a check or checks from the check history file to be reconciled Moves a check or checks from the check reconciliation back to the history file The next step in the process is to tell the system to cancel the checks. This is done using the Cancel Entered Checks option on the Check Reconciliation Menu. 129
130 6.52 UPDATE CLEARED CHECKS In this step, the statuses of the checks entered are updated to (CAN)celled. This program indicates to the system that the checks are no longer outstanding. It is the final step in the check reconciliation process. All checks will be reconciled and the status changed once the ok button is selected. If a check is cancelled in error, this can be corrected by starting back at Enter Cleared Checks, but rather than assign it a (CAN)celled status, assign it a (OUT)standing status. Follow it through the process. 130

131 6.60 CHECK VOID This program is used when checks that have already been issued need to be voided on the system. This can be used for spoiled checks, reissued checks and non-reissued checks. To void checks, the following fields are used: Check Number Identifies the number of the check to be voided. After a valid number is entered, the corresponding data for the following fields will appear: A. To whom the check was issued B. Check Amount This data can be used as a reference to make sure you are voiding the correct check. Void Status Indicates the reason the check is to be voided for future reference. Enter the appropriate void status code: A. VS = Spoiled Check B. VR = Reissue Check C. VNR = No Reissue of Check 131
132 After the Void Status is selected, the system will display which of the Year-to-Date fields will be cleared by placing an (X) in front of the fields that qualify. An (X) may appear in the Month-to-Date, Quarter-to- Date, Calendar-Year-to-Date and/or the Fiscal-Year-to-Date fields. The selections are determined by the current system date. If the fields that are indicated are not accurate, you must make manual changes to the Employee YTD Maintenance to correct the appropriate columns. If the Calendar-Year-to-Date field is selected and the employee was paid Benefit Hours on the paycheck indicated, the system will subtract the benefit hours from the USED field and add them to the AVAILABLE field. If you are not using Benefit Accrual Codes for the benefit paid, the system will subtract any hours that were accrued from the ACCRUED field, and also subtracts them from AVAILABLE hours. If you are using Benefit Accrual Codes, this will only happen if the field "Are Accrued Hours Immediately Available?" says (Y)es. When voiding checks, please make sure that all information on the Employees YTD maintenance appears correctly after the voiding. Please refer to Appendix C for additional information on check voids. 132
133 6.70 DELETE HISTORY This option will remove payroll history that meets the requirements of the selections made below. 133

134 6.80 CREATE NACHA FILE This program is used to produce the PRNACHA.DAT file that is then transmitted to your bank for your direct deposit transferring. 134
135 6.90 ASCII MASTER DOWNLOAD This option creates an ASCII file of your employee master(s) depending on your selection(s). Note: Any option selected will create the Employee ASCII file (PR DAT). Your selected options will determine who is to be incorporated in the ASCII file. Every time this option is taken the previously created file is overwritten. (Refer to Appendix G for file layout.) Employees ordered by department This option will include all employees in department order. Employees order by employee number This option will include all employees in employee number order. Process a specified department This will allow you to select a specific department you want included in the file. Process specified employee(s) This will allow you to include one or more specific employees to be included in the file. Process specified job status codes 135

136 This will allow you to select one or more job status codes you want included in the file. 6.A0 SIGNATURE SETUP Section pending completion. Check back to for updates to this user guide. 136
137 APPENDIX A SAMPLE REPORTS Create Hours Workfile Report Hours Worksheet Deductions Register Direct Deposit Deductions Register All Employees Sample check Print (stub-check-stub) Sample Check Print (full-page) Payroll Distribution Journal Payroll Posted Journal Employee Listing (Non-Detail for Specified Dept.) Year to Date Earnings Report (for Specified Dept.) State Retirement Report 137
138 Unemployment Report Federal Quarterly 941 Payroll Register (Reports Menu) Voluntary Deduction Register Employee Year to Date Hours Report Check Warrant Listing Check Reconciliation Report Benefit Hours Report EEOC Report 138
139 APPENDIX B MAGNETIC MEDIA STATE UNEMPLOYMENT REPORT The following instructions are for executing PR440000, which will produce the State Unemployment Report and also create a file called UNEMPLOY.DAT, which can be sent via magnetic media to the Illinois Department of Unemployment Security. 1. New version of PR COB has been loaded on your system. (Option 4 from the payroll reports menu). 2. The selection screen for the State Unemployment Report will be displayed. Three new selection fields have been added to supply IDES with the correct data. These are Employer Contact, Contact Phone Number, and Contact s phone extension. These are required fields, and you should have this information before executing the report. 3. Enter the correct information for your installation. Modifications and corrections can be made to the screen just as they have been done in the past. When you have the information entered correctly, respond with a Y at the prompt at the bottom of the screen. 4. The program will execute as before, and the report will be produced. A file called UNEMPLOY.DAT will also be produced. At the completion of the processing you can copy this new data file to magnetic media and send it to IDES. Attached are instructions from IDES for sending the magnetic media. (NOTE: The file should be sent on a 3 1/2 inch diskette and the UNEMPLOY.DAT file should be named to the IDES naming convention. Per IDES instructions, the file does not contain any carriage return or line feed.) REQUIREMENTS In order to report magnetically to the state of Illinois, there are certain requirements you should meet before attempting to submit your report: Signature Because the entire report can be submitted to IDES magnetically, there will be no need for a paper form with a signature on it to be sent each quarter. In order to file magnetically, an employer must sign a Filing Agreement that IDES will have on file to serve as the legal signature for the Contribution and Wage Report. Test Tape Once an employer decides to report magnetically, a test tape/cartridge or diskette must be submitted to IDES. Once the test is completed, written approval will be forwarded to the employer. DISKETTE SPECIFICATIONS IDES can accept the Quarterly Contribution and Wage Report on 3 1/2 diskette (preferred) and 5 1/4 diskette. Data must be recorded in ASCII character set. File Name 139
140 The diskette file must be named: L(seven digit account number).yyq Where: YY = Year Q = Quarter Example: 1/94 report for account File name would be L The file on the diskette should not contain any control characters such as carriage returns, line feeds or page breaks. Instead it should be one continuous file. For multi-volume diskette files, the external diskette must indicate the proper sequence (e.g. disk 2 of 3) for processing. A multi-volume diskette file is a file for which the data records exceed the capacity of a single diskette. Note: Diskettes submitted to IDES will not be returned SUBMITTING TAPES/CARTRIDGES AND DISKETTES External Label Using an external stick-on label should properly identify all items sent to IDES. The label should contain the following information: Employer Name State Account Number Reporting Period Contact Person Telephone Number VOLSER # (cartridge and tape only) DSN (cartridge and tapes only) Internal Label Type (cartridge and tape only) Number of Records NOTE: IDES will not process files without labels. Shipping After labeling the magnetic media, it should be mailed or delivered to: Illinois Department of Employment Security ATTN: Magnetic Media Unit 401 S. State Street, 4W-4C Chicago, IL Reports are due at the end of the month following the end of a quarter. (January 31, April 30, July 31, October 31) 140
141 APPENDIX C VOIDING CHECKS RUNTIME GUIDE I. Voiding Employee Payroll Checks When a PR check needs to be voided from the system, the following steps are used: NOTE: NEVER attempt to void a check in a payroll cycle that has not been updated. This will cause errors that will require maintenance by MSI. Check voiding should always be done AFTER the check run is updated! A. Select the Check Void option ( ) B. Enter your check number C. If an employee number, name, and check amount are not displayed, you have entered an unprocessed check. The only status that can be assigned to this is (VS) for VOID-SPOILED. See (E.1) below for additional information. D. If the employee number, name, and check amount are displayed, verify that the correct check number was entered. NOTE: Once a check is voided, it cannot be unvoided. See instructions under (III) below if this occurs. E. Depending on the status you select, the following will occur: 1. VS: Void-Spoiled a. Changes the check status from unprocessed to VS. NOTE: This is only used if you have pre-numbered checks. NOTE: The system will not allow you to use this status for a check that has been updated. Only unprocessed checks can be given this status. 2. VR: Void-Reissue a. A message will appear warning you that the system will NOT reissue the check automatically. You must run a separate payroll cycle to complete this. 141
142 NOTE: See (F) and (G) below for additional information regarding liability checks. b. Another message will appear to remind you to make a reversing GL journal entry to reflect this voided check. c. The following message will then appear: According to the system date of MM/DD/YY, the following to-date totals with an (X) before them will be affected: ( ) Month ( ) Quarter ( ) Year ( ) Fiscal This is used to indicate the month-, quarter-, calendar-, and fiscal year-to-date fields that will be reversed during this voiding by the amounts processed on the paycheck. The timing of when you void the check will determine which fields will be marked. The check date is compared to the current system date. If the month of the check date matches the current month, the MTD will be reduced. The same process occurs for quarter and calendar YTD amounts. The fiscal YTD field is based on your current fiscal year. NOTE: If more fields than those indicated should be cleared, you will need to access the Employee YTD Maintenance ( ) and manually reduce the appropriate columns on (S1), (S2), and (S4). EXTREME CAUTION SHOULD BE USED WHEN MAKING THESE MODIFICATIONS AS THEY MAY DIRECTLY EFFECT THE EMPLOYEES W-2 FORMS AT THE END OF THE YEAR. d. If you continue, the system will reverse the indicated year-to-date fields. e. The check status will be changed from OUT to VR. f. If you are NOT using Benefit Accrual Codes for the benefit paid, the system will subtract any hours that were accrued from the ACCRUED and AVAILABLE fields. g. If you are using the Benefit Accrual Codes, the above will only happen if the field Are Accrued Hours Immediately Available? says (Y)es (5.12.S2). 3. VNR: Void-No Reissue a. A message will appear to remind you to make a reversing GL journal entry to reflect this voided check. b. The system will indicate which year-to-date fields will be reversed. See (2.c) above for details. c. If you continue, the system will reverse the indicated year-to-date fields. d. The check status will be changed from OUT to VNR. e. Appropriate benefit hours will be reversed. See (2.f) and (2.g) above, 142
143 f. If liability checks were printed on the payroll system, they will have to be manually reissued through the Accounts Payable System. F. If payroll liability checks are issued through the Accounts Payable System, process them manually for the correct value as needed. G. If payroll liability checks are issued through the Payroll System using the Payroll Liability Check Printing features on the Payroll System (see Appendix 002): 1. VR: Void-Reissue a. If the check that is reissued DECREASES the amount that was printed on the liability check, void the liability check(s) (see II below), and reissue manually through the AP System. b. If the check that is reissued INCREASES the amount that was printed on the liability check, print additional checks to be submitted. This is done by indicating that (S)tandard liability checks should be produced when creating your Hours Workfile ( ). OR Indicate (N)one so that no liability checks are printed. This will accumulate the liability amounts in the Liability Codes ( ) and will be included the next time the liability check is normally printed. II. Voiding Payroll Liability Checks When a PR liability check needs to be voided from the system, the following steps are used. This text is only applicable for those clients who have activated the Payroll Liability Check Printing features on their system (Appendix 002). NOTE: Never attempt to void a check in a payroll cycle that has not been updated. This will cause errors that will require maintenance by MSI. Check voiding should always be done after the check run is updated. A. Select the Check Void option ( ). B. After entering the check number and the liability code, the description and amount will appear. NOTE: Verify that you have entered the correct check number. Once voided, a liability check cannot be unvoided and must be processed through the Accounts Payable System. C. Depending on the status you select, the following will occur: 1. VS: Void-Spoiled a. This status cannot be used for a liability check. 2. VR: Void-Reissue a. A message will appear warning you that the system will NOT reissue the check automatically, it will only be printed if you process a separate payroll cycle. 143
144 b. Another message will appear to remind you to make a reversing GL journal entry to reflect this voided check. c. The following message will then appear: This check is for a liability. Do you want the amount of this check to be added to the liability s outstanding total? (Y/N). If you answer (Y)es, the system will add the amount of the check to the liability code as an outstanding amount. This amount will then be included on the liability check the next time it is generated. If you answer (N)o, the system will not add the amount to the liability code. You will then have to process the amount manually. d. The check status will be changed from OUT to VR. 3. VNR: Void-No Reissue a. A message will appear to remind you to make a reversing GL journal entry to reflect this voided check. b. The system will ask you what should be done with the value of the liability check. See (2.c) above for details. c. The check status will be changed from OUT to VNR. III. Voiding the Wrong Payroll Check If you have voided the wrong payroll check, the following steps should be followed: A. Void the check that SHOULD have been voided according to the instructions for Voiding Employee Payroll Checks (see I above). B. Submit an RFS to MSI to have a programmer change the data file so that the incorrectly voided check is changed to (CAN)celled. NOTE: This is an optional step. However, if the status of the check is not changed, it will be referenced incorrectly as Voided. C. Process the checks manually following the steps indicated for the void status used: 1. VR: Void-Reissue a. Process the paycheck using the Payroll Cycle Menu using a check number in either a very high or low range so that it will not interfere with future check runs. This will correct the vendor's history. NOTE: Ex. If the check voided was #7563, use # as the new number. 144
145 NOTE: If you do not wish to post this check to the general ledger, you may skip the option to Post to General Ledger ( ). ALL OTHER OPTIONS on the Payroll Cycle Menu MUST BE USED. b. Make a notation for the person that does check reconciliation indicating that the check to be canceled on the system will be different than what is returned from the bank. 2. VNR: Void-No Reissue a. Follow the same steps as for a check voided with the status of Void-Reissue (C.1 above). 145
146 APPENDIX D BENEFIT HOUR PROCESSING This document will provide you with the steps needed to implement the Benefit Hours Processing features on your MSI Payroll System. Please read and study each section carefully prior to attempting to implement the features discussed. Many times the implementation of an electronic benefit tracking system will bring to light benefit policy questions. This guide is designed to show you HOW to implement the benefit hour features, not WHAT features to implement. NOTE: As with any changes to items that affect the payroll, carefully monitor the first few payrolls cycles THAT incorporate the new benefit hour processing and verify the accuracy of the data! A. General Concepts The items listed below are general concepts that you will need to understand prior to reviewing the other documents related to the MSI benefit hour processing. The terms may be familiar, but their definitions are how they relate to MSI processing. 1. Benefits are processed for a specific benefit year. This year controls when certain functions of benefit processing will occur and is determined by the Benefit Accrual Code. Three possible years are available. a. ANNIVERSARY YEAR This uses the month in which the employee was hired as the beginning month of the benefit year. The HIRE DATE field is in the Employee Maintenance program (5.01.S1). b. CALENDAR YEAR This uses January as the beginning month of the year. c. FISCAL YEAR This uses the month in which your fiscal year starts as the beginning month of the benefit year. NOTE: It is important to remember that when a benefit year is referenced, it can be any of the above options. It will depend on the type of benefit being discussed. 2. The system has the ability to track the number of benefit hours related to three fields of benefit information. The benefit codes that are defined will control which of these fields will be used and how. Remember these all make reference to the benefit year discussed above. a. ACCRUED These are hours that have been earned or accumulated for the benefit during the year. b. AVAILABLE These are hours that are currently available for use by the employee. c. USED This indicates the number of hours that have been paid to the employee during the year. 146
147 3. Benefit hours are processed and accrued during EACH pay period, NOT on a monthly basis. The total hours to accrue for the year are divided by the number of pay periods in the year. This determines the per pay period accrual amount. The employees METHOD OF PAY determine the number of pay periods. Method of Pay # of Pay Periods Per Year Weekly 52 Biweekly 26 Semi-Monthly 24 Monthly 12 Quarterly 4 NOTE: The number of pay periods for a specific method of pay is the same for all three types of years discussed in (A) above. 4. Benefits are measured and processed in hours, not dollars. The dollar value of the benefit is an extension of the employee's current rate of pay times the number of benefit hours being processed. B. Implementing the Features Once the above information are understood, the following steps should be taken to implement the features: 1. Determine the total number of Benefit Accrual Codes you will need, and enter each code. 2. Determine the time schedule in which you will begin entering the information for the employees. Please consider the following: a. When entering information for small groups of employees, entering by department may be useful. b. Begin entry during the middle of a quarter when there are fewer payroll tasks required. c. Start each group at the BEGINNING of a month ONLY. 3. When the schedule has been determined, enter the Benefit Accrual Codes in the Employee Maintenance program for the group(s) selected above. 4. Enter the current benefit information (if needed) in the Employee YTD Maintenance. 5. Print the Benefit Hour Report to review the information entered. 6. Process your first pay period of the month. Review the paychecks carefully to verify that the UNUSED HOURS printed are accurate. 7. Before updating the payroll cycle, perform a backup of the payroll data. This will allow you to restore the data if the codes are not producing the desired results in regards to the benefit hours. 8. After the payroll is updated, print the Benefit Hours Report again to verify that the results of the current payroll appear accurately. 147
148 9. Continue with the time schedule as indicated above. 10. The first time the Monthly Processing is run after activating benefit hours, print the Benefit Hour Report before and after to verify the accuracy. We suggest also performing a backup in the event the results are not what were expected. C. Tracking Benefit Hours Manually If you do not plan on using the benefit hours codes, you may still use the system to track benefits manually. Current benefit information is still entered in the Employee YTD Maintenance and updated during each payroll. However, all benefits are treated on a calendar year basis. Review section (D) of the Monthly Processing program for further information. D. Examples The following examples screens are provided as reference to the features discussed: EXAMPLE 1: The first example illustrates a standard vacation benefit plan. The employee earns two weeks (80.0 hours) for years 1-5, three weeks (120.0 hours) for years 5-10, four weeks (160.0 hours) for years 11-20, and five weeks (200.0 hours) for years thereafter The limit for each year would be the same as the hours accrued. The employee is paid bi-weekly (26 pay periods per year). 148
149 On the second screen print, note the following items for the corresponding letters: A. We have indicated that the benefit is based on their anniversary date. Note, however, that in the last field, we have indicated that the # of days from the hire date is (31). When the system is calculating the benefit month, it will use the month AFTER the hire date month as the beginning of the benefit year, regardless of which day in the month the employee was hired. B. This benefit does not rollover available benefits at the end of the year. If the employee does not use the benefits, they will lose them. C. Accrued hours are NOT immediately available. The hours accrued during year (01) will not be available for use until the beginning of year (02). Likewise, the hours accrued in year (02) will not be available until year (03). If this field was indicated as (Y) es, then the hours accrued during year (01) would be immediately available for use during year (01). The same would apply to all following years. 149
150 The Benefit Hours section of Employee Maintenance -- Screen 2 would appear as follows at the beginning of years (01) and (08): Employees 1 st year of service Employee s 8 th year of service 150
151 EXAMPLE 2 The second example illustrates a variation to the standard vacation benefit plan discussed in Example 1. Screen 1 of the Benefit Accrual Code remains the same. Screen 2, however, has the following modifications: 151
, the employee will immediately accrue 52.")
152 On the second screen, fields (A), (B), and (C) have not changed. A. In this variation, we have indicated that the employee does not begin accruing until 120 days after their hire date. This would be an example of a probationary period or related procedure. Even though there is no accrual during the first 120 days (8 pay periods), the employee will immediately accrue hours, which is the amount that they would have accrued had there not been the 120 day deferment. This field is used since hours accrued are not immediately available. The benefit year is still based on their anniversary date. B. Had hours available immediately been defined as (Y)es, the would have been placed in field # of hours available when accrual begins to correspond to benefits being immediately available. NOTE: There would be no visible changes to the Employee Maintenance -- Screen 2 at the beginning of years (01) and (08). 152
. The limit increases each year by 96.")
153 EXAMPLE 3 The third example illustrates a standard sick pay benefit plan. The employee earns 12 sick days per year (96 hours). The employee is paid bi-weekly (26 pay periods per year). The hours accrued is the same for all benefit years. The maximum number of sick days the employee can accrue is 125 (1, hours). The limit increases each year by hours until year (11) when it levels off at 1, hours. Benefit Accrual Screen 2 153
 and (08): Employees 1 st year of service Employee s 8 th year of")
154 Benefit Accrual Screen 1 The Benefit Hours section of Employee Maintenance -- Screen 2 would appear as follows at the beginning of years (01) and (08): Employees 1 st year of service Employee s 8 th year of service 154
155 155
156 APPENDIX E LIABILITY CHECK PRINTING This document will provide you with the steps to take to implement the liability check-printing feature on your MSI Payroll System. It also discusses options for a methodical implementation. NOTE: As with any changes to items that affect the payroll, monitor the first few payroll cycles, which incorporate liability check printing and verify that all new variables are accurate! A. Read the related pages from the manual 1. Section : Create Hours Workfile (Item #6) 2. Section : File Maintenance Menu (Item #13) 3. Section 5.13.S1: Liability Codes--Screen 1 4. Section 5.13.S2: Liability Codes--Screen 2 B. Choose a payroll cycle to implement these features. We suggest using the first payroll of the month when there are usually no outstanding liabilities. C. Determine which Liability Codes you will be defining, and which deduction codes will be assigned to each one. 1. You will need one code for each check to be written. 2. If you have one voluntary deduction code, which has to be distributed to more than one check recipient, you will need to create more Voluntary Deduction Codes. This will not affect the employee s check but will allow the correct liability checks to be written. Ex. If a child support deduction is currently defined as (CS), and there are two employees with this deduction, but each deduction is distributed to a separate location, you will have to create two new codes. (CS1) and (CS2) might be appropriate choices. These would replace the (CS) codes on Screen 3 of each employee s master file. D. Determine how frequently each check will be written. 1. If a deduction is made for a liability code with a frequency that does not match the frequency of the payroll, the amounts will be accumulated in the liability code to be distributed the next time a check is printed for the liability. 2. If you run a bi-weekly payroll, you cannot define a code to print on the LAST payroll of those months, which have three pay periods. You will have to define the frequency as (A)ll, or override the Liability Control field when creating the hour s workfile with (A)ll during those pay periods (see ) if a check is to be printed. E. After you have determined the above information, take the following steps to define the codes: 1. Go to option (2) on the Application Support Menu to select the General Payroll Information program (see ). 156
157 2. Change the prompt of Print Liability Checks? in field (12) from (N)o to (Y)es. This activates the liability check features. NOTE: Make no other changes to this screen. Any changes that are made may require custom programming by MSI to correct the variables that were altered! 3. Use the Liability Codes program on the File Maintenance Menu to define the codes (see 5.13.S1 and 5.13.S2). F. The next time a payroll cycle is prepared, you will see the following changes: 1. When you create the hour s workfile, you will be asked to make an entry in the liability control field (see ). 2. On the deduction register after the employer s totals, a new section listing all the liability checks is printed. It will use the next available check number after the last employee on the register. If any changes are made to the liability codes during the payroll, you must recalculate the payroll to recognize these changes just as if you had made a change to any other file maintenance program. 3. When you print checks, the liability checks will be printed immediately following the last employee s check. No realignment is necessary. If you have to reprint a liability check, it is treated the same as if it was a payroll check. 4. On the distribution journal, a new section will immediately follow the current journal, which indicates how the General Ledger will be affected by the liability checks. 5. All other programs on the Payroll Cycle Menu will function as they did before. G. General Comments: 1. A liability check will not print for ($0.00). If there are no liabilities to be reimbursed for a specified liability code during a payroll, a check will not be issued for that code even if the frequency matches that of the payroll. 2. A negative liability check will never be issued. 3. Negative amounts cannot be entered in the liability codes. 4. When a check is voided, the liability amounts are not affected. You will need to manually decrease any outstanding amounts for that liability on S2 of the Liability Codes Maintenance program (see 5.13.S2). 5. Once the liability option is turned on, it should not be temporarily turned off. You should control the liability checks through the Liability Code Maintenance or when creating the payroll cycle workfile. 157
158 APPENDIX F DIRECT DEPOSIT IMPLEMENTATION GUIDE INTRODUCTION The MSI-Payroll System (MSI-PR) is capable of depositing payroll checks automatically into employee bank accounts through an electronic data transfer. The system will create a NACHA file format to be transmitted to your host bank. This document will cover five areas, A. Setting Up System, B. Pre-note Processing, C. Direct Deposit Processing, D. NACHA File Layout and E. Sample Reports. A. SETTING UP SYSTEM There are five main areas in the MSI-PR that need to be activated. These are: 1. Bank Code(s) 2. General Payroll Information 3. Voluntary Deduction Code(s) 4. Employee Maintenance (Screens 2 & 4) 5. Multiple Direct Deposits 158

159 F.10 Bank Code(s) WHAT IS A BANK CODE? These codes represent bank definitions that are used during direct deposit of employee paychecks. One bank code needs to be created for each different bank that an employee will make a deposit to. HOW DO I DEFINE MY BANK CODES? From your main screen select option File Maintenance, press enter This will take you to your File Maintenance menu Select option #11 (Bank Codes), press enter The following fields are required to define your bank codes. After each field has been entered, press TAB to save your entry and proceed to the next field. Bank Code - this field is alphanumeric and can be 1, 2 or 3 characters in length. Bank Name - identifies the name of bank this code will apply to. 159
160 ABA Number - represents the first 8 characters of the bank s account number. Transit Route Digit - represents the last character of the bank s account number. NOTE: Each bank must have its own entry in the Bank Code Master File. Both the employer s bank and each bank used by an employee must be entered. The minimum number of entries is one bank code, and that would only be valid if the employer and all employees used the same bank. 160

161 F.20 System Defaults WHAT IS SYSTEM DEFAULTS? System Defaults informs the MSI Payroll application that direct deposit is activated. HOW DO I ACCESS SYSTEM DEFAULTS? From your Payroll System Main Menu select Support and then System Defaults: 161
162 The following fields are required to activate direct deposit for payroll. After each field has been entered, press enter to save your entry and proceed to the next field. Employer s Name - employer s name that will be submitting the NACHA file. Employer s Address - employer s address that will be submitted on the NACHA file. Employer s City - employer s city that will be submitted on the NACHA file. Employer s State - employer s state that will be submitted on the NACHA file. Employer s Zip - employer s zip code that will be submitted on the NACHA file. Direct Deposit - this field should be selected if direct deposit will be utilized. Direct Deposit Offset Records Select if your bank requires offset records in the NACHA File (most banks do, so if you are unsure, then select this option for your initial test). 162
163 Destination Bank Code - identifies the bank that will process the NACHA file (required). Origination Bank Code - identifies the bank that will send the NACHA file the to destination bank (optional). Note: If you specify both the Destination Bank Code and Origination Bank Code then the Header in the NACHA file will be different than if you just specify a Destination Bank Code. See the section on NACHA File Layout and refer to "#1 RECORD - FILE HEADER" Field #4 and 5 for more information. Direct Deposit Account- the employer s account number at their bank Account Type Specify C if the Direct Deposit Account is a checking account or S if it s a savings. NACHA CR-LF delimited Select this option to set your NACHA file format to a carriage return/line feed. If this option is not selected the format will be word wrap. NACHA Description - description on the employee s bank statement to describe the deposit 163

164 F.30 Voluntary Deduction Code(s) WHAT IS A VOLUNTARY DEDUCTION CODE? These codes represent deductions from the employees paychecks that he/she has requested. HOW DO I ENTER VOLUNTARY DEDUCTION CODE? From your main screen select Maintenance. From the Maintenance Menu select Voluntary Deduction Codes. The following fields are required to define your deduction codes. After each field has been entered, press return to save your entry and proceed to the next field. Deduction Code - identifies the code to be used for this deduction. Description - description of the deduction code. This description will appear on reports, checks and programs that involve this deduction. Account Number - Represents the General Ledger account number to which the deduction will post. 164
165 Based On Gross - indicates if the deduction is based on the employee s gross or net pay (for percentage deductions; Click Yes for Gross or No for Net). Defer Federal Tax? Defer FICA? Defer State Tax? Defer Local Tax 1? Defer Local Tax 2? Defer Pension? Defer Medicare? Each of the above defer fields should be set to No when setting up the voluntary deduction code for direct deposit. Direct Deposit? - this flag must be set to Yes. Any Voluntary Deductions Report run for this deduction code, will include the employee s bank account number as found on Employee Maintenance. Print Employee - if this field contains a Yes, the employee s name and address will print on the remittance advice (check form). If it contains a No, the employee s bank name, as listed in the DESCRIPTION field of Bank Code Master File Maintenance, will be printed. 165

166 F.40 Employee Maintenance Direct Deposit WHAT IS EMPLOYEE MAINTENANCE? This program is where you will set up and maintain your employee data. You can add new employees or maintain information on your existing ones. HOW DO I MAINTAIN MY EMPLOYEES FOR DIRECT DEPOSIT? From your main menu select Maintenance. From the Maintenance Menu select Employee Maintenance. The following fields are required to active the direct deposit for your employee. Once these fields have been entered, press return to save your entry and proceed to the next field. From your Employee Maintenance screen (screen 1) input the employee number and press Tab to pull up that employee s information. Click on the Direct Deposit tab to proceed with entry for your direct deposit. The following fields need to be completed for the direct deposit to be active. 166

167 Automatic Bank Deposits section: Bank Code - identifies the employee s bank and is pre-defined in your bank code maintenance. Account Number - this field represents the employee s account number at the bank Once the account number is entered it will default you to the next field to indicate whether the account number entered is a checking or savings account. Ded. Code - this field represents the Voluntary Deduction code to allow a portion of the employee s check to be deposited in the bank. When the check is printed, a deduction will be made on the check for the amount defined. This deduction code must match a code in the Voluntary Deductions Codes Table. From here you must precede Vol. Deductions to enter the voluntary deduction code. The following fields need to be completed for the direct deposit to be active. Code & Description - the voluntary deduction code defined for direct deposit is entered in this field. All the data entered on the remainder of the same line applies to that deduction. Any deduction code 167
168 entered must match a code in the Voluntary Deduction Codes Table. For direct deposit, the voluntary deduction code must match the entered code on S2 (screen two) - Automatic Bank Deposits section. Frequency - indicates which pay period(s) of the month the deduction applies to. Amount - this field indicates the amount (or percentage) of the deduction that is to be made for applicable pay periods. $/% - indicates whether the amount entered should be valued as a dollar or percentage. Limit - represents the total dollar value that may be deducted in a calendar year. YTD Amount - indicates the year to date amount on this deduction. Once the YTD Amount field equals the Limit field, the system will stop deductions for this deduction code. 168

169 F.50 Multiple Direct Deposits WHAT ARE MULTIPLE DIRECT DEPOSITS? Multiple direct deposits allow the capability of depositing an employee s check into more then one bank account. HOW DO I SET UP MULTIPLE DIRECT DEPOSITS? NOTE: additional direct deposit entry is used only for employees with two or more direct deposits and after the first direct deposit has been set up in Employee Maintenance S2 (screen 2). The following information must be input for the additional direct deposit to be active. Employee ID identifies the employee requesting additional direct deposits Bank code identifies the employee s bank and is pre-defined in your bank code maintenance Bank Account Number - this field represents the employee s account number at the bank Bank Account Type identifies a checking or savings account Ded. Code - this field represents the Voluntary Deduction code to allow a portion of the employee s check to be deposited in the bank. When the check is printed, a deduction will be made on the check for the amount defined. This amount can then be printed to the bank on a liability check. A check will NOT be printed to the bank unless a liability code is defined for the deductions. This deduction code must match a code in the Voluntary Deductions Codes Table. 169
170 NOTE: Once the additional deposit information has been defined, remember you must enter the deduction code and amount in Vol. Deductions of the employee master. 170
171 F.60 Pre-Note Processing WHAT IS A PRE-NOTIFICATION? A pre-notification allows you to send a zero dollar NACHA file to the bank to determine if the employee s entered information is accurate. If the pre-notification flag is set to Yes, it will pull all employees in the payroll workfile that have a direct deposit voluntary deduction into the NACHA file and once sent to the destination bank, a $0 pre-notification will occur in your employee s accounts. HOW DO I PROCESS A PRE-NOTIFICATION? In order to generate a direct deposit pre-notification file, you need to calculate paychecks. The calculation of the paychecks processes the data file that will be incorporated into the PRNACHA.DAT file. If there is no paycheck the program will assume there is no direct deposit to be generated. (1) Create empty hours work file (2) Time sheet entry (time entered must calculate a greater value then the deductions for employee) (3) Print hours work file (4) Calculate the payroll checks. (5) Print Deductions Register- This option must be run in order to produce a data file called PPD.DAT. The CREATE NACHA FILE program to produce the PRNACHA.DAT file, which is then transmitted to your bank, uses the PPD.DAT file. This option generates two reports - an Audit Report and a Deductions Register. Please check each report for accuracy. (6) Create NACHA File- From your Payroll main screen select Support. From your support menu select Create NACHA File 171

172 By selecting Create NACHA File you will now need to enter your NACHA file information. The upper portion of the screen display is static. This is default information you have entered under your General Payroll Information screen through the Support menu. If an invalid bank code had been input to the General Information Screen there will be no bank name that displays. If this happens, system maintenance needs to be done. Pre-Notification Y/N (Y)es Transaction Description Date (optional) can be filled in with today s date, payroll date, or any other optional date. Transaction Effective Date (mandatory) the date entered will be the date the pre-notification is recorded on your employee s accounts. The system will check to ensure a valid date has been entered. After the file has been created the number of direct deposits processed will display as well as a zero amount for cash required. The zero amounts for cash required is due to the fact this is a prenotification and no deposits will be made. Note: Once your PRNACHA.DAT file has been created you must send this file to the bank. Some options of transmission include sending via , sending diskette via courier or sending via modem. You must discuss with your bank what options are acceptable and come to an agreement for transmission. Also, discuss with your bank how acceptance will get back to you. Most banks will only notify you if the pre-note was not received successfully. These items must be discussed and agreed upon before 172
 Create the hours work file (2) Time sheet entry (input time entry")
173 transmission can occur. Whichever method is used to send the pre-note should be followed when transmitting your actual direct deposit file. F.70 Direct Deposit Processing In order to generate a direct deposit payroll, MSI-PR needs to be run through the normal process of: (1) Create the hours work file (2) Time sheet entry (input time entry against employees) (3) Print hours work file (4) Calculate the payroll checks. (5) Print Deductions Register- This option must be run in order to produce a data file called PPD.DAT. The CREATE NACHA FILE program to produce the PRNACHA.DAT file, which is then transmitted to your bank, uses the PPD.DAT file. This option generates two reports - an Audit Report and a Deductions Register. After you have checked the report for accuracy, continue to complete the payroll with the following options: (6) Print Paychecks (7) Print Distribution Report (8) Distribute to two accounting periods (OPTIONAL) (9) Post to General Ledger (10) Update files After the payroll has been successfully updated, the NACHA file must be created. This is can be completed by performing the following steps: From your Payroll main screen Support. From your support menu select Create NACHA File. By selecting Create NACHA File you will now need to enter your NACHA file information. 173
MSI Calendar and/or Fiscal Year End Processing For year ending December 31, 2013
 MSI Calendar and/or Fiscal Year End Processing For year ending December 31, 2013 User s Guide NOTE: Screen shots for this document have been taken from the version 7.0 MSI Payroll system. Municipal Software,
MSI Fiscal Year End Processing
 MSI Fiscal Year End Processing User s Guide Harris Local Government 1860 W. Winchester Road, Ste 204 Libertyville, IL 60048 Phone: (847) 362-2803 Contents are the exclusive property of Harris Local Government
MSI General Ledger Version 7.5
 MSI General Ledger Version 7.5 User s Guide Harris Local Government 1860 W. Winchester Road, Ste 204 Libertyville, IL 60048 Phone: (847) 362-2803 Fax: (847) 362-3347 Contents are the exclusive property
Enhanced General Ledger Quick Steps version 8.016
 Enhanced General Ledger Quick Steps version 8.016 The General Ledger module is designed to handle journal entries for various transactions that are not accounted for in other modules (A/P, Payroll etc.).
MSI Accounts Payable Version 5.0 Treasurer s Report Processing
 MSI Accounts Payable Version 5.0 Treasurer s Report Processing User s Guide Municipal Software, Inc. 1850 W. Winchester Road, Ste 209 Libertyville, IL 60048 Phone: (847) 362-2803 Fax: (847) 362-3347 Contents
Sage Bank Services User's Guide. May 2017
 Sage 300 2018 Bank Services User's Guide May 2017 This is a publication of Sage Software, Inc. 2017 The Sage Group plc or its licensors. All rights reserved. Sage, Sage logos, and Sage product and service
#OptimumUC2016 V7 PTO & FMLA. Debra Van Fleet Software Support Specialist. Jean Pierce Implementation Specialist
 #OptimumUC2016 V7 PTO & FMLA Debra Van Fleet Software Support Specialist Jean Pierce Implementation Specialist Optimum Solutions, Inc. 2016 Paid Time Off Accrual Plans v7 Paid Time Off accrual tables are
Changing the General Ledger Fiscal Year End
 Changing the General Ledger Fiscal Year End (while retaining journal detail) Note: This document provides instructions to change the fiscal year end and import journal detail for the current fiscal year.
MARATHON FINANCIAL ACCOUNTING END OF CALENDAR YEAR
 The following instructions will guide you through the end of a calendar year process. This process includes steps for W-2 Forms, Electronic W-2 Filing, Clear Calendar Year to Date Totals, Tax Table updates
AccuBuild Calendar Year End Notes
 AccuBuild 2016 2 Table of Contents 1. 3 1.1... 3 1.2 Create a Bonus Check... 4 1.3 Create a Fringe Benefit Check... 5 1.4 Health Insurance Reporting on W-2s for 2015... 7 1.5 Order Tax Forms... 9 1.5.1
Sage Bank Services User's Guide
 Sage 300 2017 Bank Services User's Guide This is a publication of Sage Software, Inc. Copyright 2016. Sage Software, Inc. All rights reserved. Sage, the Sage logos, and the Sage product and service names
M UNICIPAL S OFTWARE, I NC. MSI GASB 34. User s Guide
 M UNICIPAL S OFTWARE, I NC. MSI GASB 34 User s Guide Municipal Software, Inc. 1850 W. Winchester Road, Ste 209 Libertyville, IL 60048 Phone: (847) 362-2803 Fax: (847) 362-3347 Contents are the exclusive
Total Order Plus Integrated Accounting Series General Ledger
 Total Order Plus Integrated Accounting Series General Ledger Mindware Corporation Of America Integrated ted Accounting Series Total Order Plus General Ledger User Guide Copyright 1999 by Mindware Corporation
MYOB EXO Employer Services
 MYOB EXO Employer Services Changes to Leave Entitlements Last Updated: 16 June 2015 Contents Changes to Leave Entitlements 1 Applying the Changes... 1 Upgrading... 1 After Upgrading... 2 Upgrade Log File...
Nexsure Training Manual - Accounting. Chapter 16
 Nexsure Training Manual - Accounting Month-End Review In This Chapter Overview Analyzing Month-End Financial Reports Month-End Accounting & Management Reports Month-End Balancing Month-End Corrections
MUNSOFT 5.2 INCOME: SUNDRY DEBTORS MANUAL. Y Walters B.Sc. (Math Science) Hons
 Hons") MUNSOFT 5.2 INCOME: SUNDRY DEBTORS MANUAL 1 Y Walters B.Sc. (Math Science) Hons SUNDRY DEBTORS... 4 Enquiries... 4 Sundry Enquiries... 4 Account Search... 5 Master Files... 6 Account Master... 6 Account
MUNSOFT 5.2 INCOME: SUNDRY DEBTORS MANUAL 1 Y Walters B.Sc. (Math Science) Hons SUNDRY DEBTORS... 4 Enquiries... 4 Sundry Enquiries... 4 Account Search... 5 Master Files... 6 Account Master... 6 Account
GL Budgets. Account Budget and Forecast. Account Budgets and Forecasts Menu
 Account Budget and Forecast The Account Budget and Forecast function allows you to enter and maintain an unlimited number of budgets and/or forecasts values and types. When setting up the account budgets
ACS YEAR-END FREQUENTLY ASKED QUESTIONS. General Ledger
 ACS YEAR-END FREQUENTLY ASKED QUESTIONS This document includes answers to frequently asked questions about the following ACS modules: General Ledger Payroll Accounts Payable Accounts Receivable General
Open MSI Budget Planning Module
 MSI Budgeting Open MSI Budget Planning Module 1) Enter MSI password 2) Click OK Under Maintenance Menu, click on Budget Entry If you do not Tab you will pull up the entire chart of accounts which will
IFS Year End Training 2017 Closing the Year
 Important Facts About Closing A Year On IFS The following is a summary of important facts to know about closing a year in the Integrated Financial System. * Vouchers that are transferred to Accounts Payable
RESOLV CONTAINER MANAGEMENT DESKTOP
 RESOLV CONTAINER MANAGEMENT DESKTOP USER MANUAL Version 9.2 for HANA Desktop PRESENTED BY ACHIEVE IT SOLUTIONS Copyright 2016 by Achieve IT Solutions These materials are subject to change without notice.
Introducing AP Payment Manager MUNIS - Financials: Accounts Payable
 Introducing AP Payment Manager MUNIS - Financials: Accounts Payable CLASS DESCRIPTION This session will focus on the new functionality of the AP Payment Manager. Not your momma s check run process; the
This checklist provides an overview of the end of year payroll accrual process used to post payroll expenses for employees that work in one fiscal
 This checklist provides an overview of the end of year payroll accrual process used to post payroll expenses for employees that work in one fiscal year but do not get paid until the next fiscal year. 1
GENERAL LEDGER TABLE OF CONTENTS
 GENERAL LEDGER TABLE OF CONTENTS L.A.W.S. Documentation Manual General Ledger GENERAL LEDGER 298 General Ledger Menu 298 Overview Of The General Ledger Account Number Structure 299 Profit Center Processing
Module: Budget Processing Topic: Next Year Budget Entry Next Year Budget Entry Munis Version 11
 Module: Budget Processing Topic: Next Year Budget Entry Next Year Budget Entry Munis Version 11 Objective This document provides instructions on how to enter next year budget requests. Overview Departments
Year 2016: Sage BusinessWorks Year End Tips Guide
 Year 2016: Sage BusinessWorks Year End Tips Guide Table of Contents Topic Page Year 2016: Sage BusinessWorks Year End Tips Guide... 1 Table of Contents... 1 Year 2016: Year End Tips for Sage BusinessWorks...
This checklist provides an overview of the end of year payroll accrual process used to post payroll expenses for employees that work in one fiscal
 This checklist provides an overview of the end of year payroll accrual process used to post payroll expenses for employees that work in one fiscal year but do not get paid until the next fiscal year. 1
Bank Reconciliation Processing SYSTEM ADMINISTRATION AND PROCESSING GUIDE. Last revised: 8/19/10 12:22 PM
 Bank Reconciliation Processing SYSTEM ADMINISTRATION AND PROCESSING GUIDE Last revised: 8/19/10 12:22 PM New World Systems 1 CONTENTS Contents... 1 Introduction... 3 System Administrator Guide... 4 Company
Munis General Ledger. Procedural Documentation. For more information, visit
 Munis General Ledger Procedural Documentation For more information, visit www.tylertech.com. TABLE OF CONTENTS Chart Manager... 3 Account Master... 12 General Journal Entry/Proof... 25 Recurring General
Attaché Payroll 2017/18. End of Year Procedures
 Attaché Payroll 2017/18 End of Year Procedures Table of Contents Which Version of Attaché Do I Need to Process End of Year?... 4 Checking that All Operators have Exited Attaché... 5 Blocking Access to
ShelbyNext Financials: General Ledger Best Practices
 ShelbyNext Financials: General Ledger Best Practices (Course #F213) Presented by: Dave Heston Shelby Consultant 2018 Shelby Systems, Inc. Other brand and product names are trademarks or registered trademarks
AIMS. General Ledger Version 6.3 May 1, 2006
 AIMS General Ledger Version 6.3 May 1, 2006 Copyright Western Canadian Software, 2006 - TABLE OF CONTENTS What About General Ledger?... 1 Module Topics... 2 General Ledger Menu Options... 9 File Maintenance
The Chart of Accounts can be modified at any time. Existing accounts can be modified and new accounts can be added.
 Chart of Accounts Maintenance Overview The Chart of Accounts can be modified at any time. Existing accounts can be modified and new accounts can be added. Navigate to: General Ledger>Maintenance>General>Chart
Checkbook Table of Contents. Receive Money Overview Spend Money Overview
 Checkbook Table of Contents Receive Money Overview Spend Money Overview Changing Receive Money transactions To change a Receive Money transaction To change a recurring Receive Money template's name or
Income Tax and 1099 Preparation and Reporting
 Income Tax and 1099 Preparation and Reporting Preparing income tax forms and 1099s are two of the most common ways in which practitioners become involved with their clients' QuickBooks data. This guide
Associated Connect. Reference Guide: Quick Payments
 Associated Connect Reference Guide: Quick Payments Page 2 of 14 Quick Payments Use the Quick Payments service to send, save and manage your ACH payments. Depending on your configuration, you can use Quick
Microsoft Dynamics GP Year-End Close. Manual
 Microsoft Dynamics GP Year-End Close Manual 2017 Contact FMT Consultants Support Customer Care customercare@fmtconsultants.com (760) 930-6400 option 1 Sales Felipe Jara fjara@fmtconsultants.com (760) 930-6451
Solar Eclipse Accounts Receivable. Release 9.0.3
 Solar Eclipse Accounts Receivable Release 9.0.3 Disclaimer This document is for informational purposes only and is subject to change without notice. This document and its contents, including the viewpoints,
ShelbyNext Financials: Credit Card Tracking (Course #N211)
") ShelbyNext Financials: Credit Card Tracking (Course #N211) Presented by: Dave Heston Shelby Consultant 2017 Shelby Systems, Inc. Other brand and product names are trademarks or registered trademarks of
ShelbyNext Financials: Credit Card Tracking (Course #N211) Presented by: Dave Heston Shelby Consultant 2017 Shelby Systems, Inc. Other brand and product names are trademarks or registered trademarks of
BUILDSMART DEBTORS. SmartAct. Authorized Training Manual
 BUILDSMART DEBTORS SmartAct Authorized Training Manual - 1 - - 2 - SmartAct Authorized Training Manual Notice This document and the Buildsmart software may be used only in accordance with the accompanying
End of Year Considerations
 Agvance End of Year Considerations 2014 - Version 5.1 Important Document Includes updated instructions for Processing paper or electronic W-2 s Processing paper or electronic 1099 s Ending the fiscal year
v.5 Payroll: Best Practices (Course #V229)
") v.5 Payroll: Best Practices (Course #V229) Presented by: Barbara Garrison Shelby Master Trainer 2017 Shelby Systems, Inc. Other brand and product names are trademarks or registered trademarks of the respective
v.5 Payroll: Best Practices (Course #V229) Presented by: Barbara Garrison Shelby Master Trainer 2017 Shelby Systems, Inc. Other brand and product names are trademarks or registered trademarks of the respective
SUMMARY OF 2016 YEAR- END PROCESSING FOR TOPS IQ & TOPS PROFESSIONAL
 SUMMARY OF 2016 YEAR- END PROCESSING FOR TOPS IQ & TOPS PROFESSIONAL This document summarizes the steps required to close the books for the calendar year ending December 31, 2016. This procedure will cover
Getting Started with The Professional Landlord
 with The Professional Landlord Version 12 The PROMAS Landlord Software Center 311 Maple Avenue West, Ste D Vienna, VA 22180 800-397-1499 www.promas.com 1 1 with The Professional Landlord You have the option
How To Enter or Change My Direct Deposit Banking Information
 Step 1: Go the the Lakeland Home Page found here: http://info.lakelandregional.org/pages/home.aspx Click on myworkplace Step 2: In the left hand margin, scroll down to mybenefits/ Payroll and click on
Certifying Mortgages for Freddie Mac. User Guide
 Certifying Mortgages for Freddie Mac User Guide December 2017 The Freddie Mac Single-Family Seller/Servicer (Guide) requires a Seller/Servicer selling Mortgages to Freddie Mac to forward the Notes, assignments
Sage Tax Services User's Guide
 Sage 300 2017 Tax Services User's Guide This is a publication of Sage Software, Inc. Copyright 2016. Sage Software, Inc. All rights reserved. Sage, the Sage logos, and the Sage product and service names
Microsoft Dynamics GP2013 Year-End Closing Questions and Answers
 Microsoft Dynamics GP2013 Year-End Closing Questions and Answers Table of Contents Year End Questions - General... 2 Receivables Management... 3 Payables Management... 4 Inventory Control... 5 Fixed Asset
Chapter 5 Accounting ibais User Manual BA Insurance Systems
 Chapter 5 Accounting ibais User Manual BA Insurance Systems ibais User Manual BA Insurance Systems Chapter 5 - Table of Contents CHAPTER 5 - ACCOUNTING... 5-1 OVERVIEW... 5-1 HOW TO ACCESS ACCOUNTING FUNCTIONS...
Reference Document. Customer Refunds
 Document Overview This document is being provided to explain how to generate a refund check to a customer. This document explains the process, setup involved and how the transaction affects the general
ACCOUNTS PAYABLE. Generally an invoice is recorded in A/P to pay for expenses, inventory or other amounts owed by the company excluding payroll.
 Contents Finance Payables Update AP Invoice... 1 Quick Pay:... 2 Examples of Invoices... 5 Finance Payables Update AP Cheque... 6 Finance Payables Update AP to AR... 10 Inquiries and Reports... 11 Finance
Exact Globe Next Cash Flow. User Guide
 Exact Globe Next Cash Flow User Guide Exact Globe Next Cash Flow Despite the continued efforts of Exact to ensure that the information in this document is as complete and up-to-date as possible, Exact
To see a 1 page summary of the following documentation, go to the last page.
 You may choose to pay the premiums on life insurance coverage for your employees. There are many different types of life insurance plans that an employer can provide, Group Permanent Life, Whole Life,
Accruals. Introduction Accrual Plan Setup Accrual Plan Interval Examples Employee Accrual Plan Assignment Process...
 Accruals Webinar Topics Introduction... 2 Accrual Plan Setup... 3 Accrual Plan Interval Examples... 8 Employee Accrual Plan Assignment Process... 12 When and How Does the Accrued Time Off Update?... 14
Tips & Tricks General Ledger Infinite Visions Enterprise Edition: General Ledger
 Tips & Tricks General Ledger Infinite Visions Enterprise Edition: General Ledger CLASS DESCRIPTION Let s learn something new in the General Ledger module that can help with your daily data entry and also
Fiscal Closing Methods Summary
 Fiscal Closing Methods Summary Update 1/27/2017 FALSC 1 What is Fiscal Close? In general terms, Fiscal Closing is the process of closing one set of financial books at the end of the current fiscal year
ENTERING AUTOMOBILE FRINGE IN A SEPARATE PAYROLL: EMPLOYEE PAYING TAXES
 ENTERING AUTOMOBILE FRINGE IN A SEPARATE PAYROLL: EMPLOYEE PAYING TAXES When calculating automobile fringe, you have the option to do so in a payroll cycle separate from your normal payroll. If you choose
2018 Payroll Tax Changes in BusinessWorks Page 1 of 12 IMPORTANT NOTICE TO ALL BUSINESSWORKS USERS:
 IMPORTANT NOTICE TO ALL BUSINESSWORKS USERS: Effective January 1, 2018, the Illinois income tax withholding rate is unchanged at 4.95%. Also the Illinois Department of Employment Security (IDES) states
PCGENESIS FINANCIAL ACCOUNTING AND REPORTING (FAR) SYSTEM OPERATIONS GUIDE
 SYSTEM OPERATIONS GUIDE") PCGENESIS FINANCIAL ACCOUNTING AND REPORTING (FAR) SYSTEM OPERATIONS GUIDE 4/1/2011 Section A: Budget Account Master Processing, V2.1 Revision History Date Version Description Author 04/1/2011 2.1 11.01.00
PCGENESIS FINANCIAL ACCOUNTING AND REPORTING (FAR) SYSTEM OPERATIONS GUIDE 4/1/2011 Section A: Budget Account Master Processing, V2.1 Revision History Date Version Description Author 04/1/2011 2.1 11.01.00
Microsoft Dynamics GP. Receivables Management
 Microsoft Dynamics GP Receivables Management Copyright Copyright 2012 Microsoft. All rights reserved. Limitation of liability This document is provided as-is. Information and views expressed in this document,
Release Please distribute to all Spectra users in your company.
 Release 8.2.0 DECEMBER 2018 Please distribute to all Spectra users in your company. Support Email: support@spectra.ca Visit us online at: www.spectra.ca Support Telephone: (866) 718-2345 Support Fax: (866)
GEMINI ACCOUNTING PAYROLL SETUP PROCEDURE CREATE/ENTER/POST EMPLOYEE BENEFIT DEDUCTION
 Builder Incubator a division of ISCM P.O. Box 3335 Plant City FL. 33566 PH: (813) 626-8778 Ext 2 FAX: (813) 964-7810 www.builderincubator.com EMAIL:support@builderincubator.com GEMINI ACCOUNTING PAYROLL
PCGENESIS FINANCIAL ACCOUNTING AND REPORTING (FAR) SYSTEM OPERATIONS GUIDE
 SYSTEM OPERATIONS GUIDE") PCGENESIS FINANCIAL ACCOUNTING AND REPORTING (FAR) SYSTEM OPERATIONS GUIDE 9/3/2015 Section A: Budget Account Master Processing, V2.5 Revision History Date Version Description Author 9/3/2015 2.5 15.03.00
PCGENESIS FINANCIAL ACCOUNTING AND REPORTING (FAR) SYSTEM OPERATIONS GUIDE 9/3/2015 Section A: Budget Account Master Processing, V2.5 Revision History Date Version Description Author 9/3/2015 2.5 15.03.00
General Ledger Manual
 General Ledger Manual Version 7.6 COINS COnstruction INdustry Software August 1996 SHAKER Computer & Management Services, Inc. 6 Airport Park Boulevard Latham, NY 12110 Support Center Phone: 518-C-4-COINS
Finance Manager: Budgeting
 : Budgeting Overview is a module that facilitates the preparation, management, and analysis of fiscal year budgets. Streamlined for efficiency and designed to solve the cumbersome process of budget creation,
Set Up and Generate Payroll Direct Deposits (Canada)
") Set Up and Generate Payroll Direct Deposits (Canada) Direct deposits in Sage 300 CRE is a process by which you generate a text file to electronically submit to your bank(s) as well as print notifications
Set Up and Generate Payroll Direct Deposits (Canada) Direct deposits in Sage 300 CRE is a process by which you generate a text file to electronically submit to your bank(s) as well as print notifications
Financial Budgeting. User Guide
 Financial Budgeting User Guide Copyright (c) 2002 Jenzabar, Inc. All rights reserved. You may print any part or the whole of this documentation to support installations of Jenzabar software. Where the
Additional Medicare Tax User Guide for QuickBooks
 Additional Medicare Tax User Guide for QuickBooks Beginning tax year 2013, a new Additional Medicare Tax (a provision of the Affordable Care Act) of 0.9 percent applies to individuals Medicare taxable
v.5 Financial Reports Features & Options (Course V46)
") v.5 Financial Reports Features & Options (Course V46) Presented by: Ben Lane Shelby Senior Staff Trainer 2017 Shelby Systems, Inc. Other brand and product names are trademarks or registered trademarks
v.5 Financial Reports Features & Options (Course V46) Presented by: Ben Lane Shelby Senior Staff Trainer 2017 Shelby Systems, Inc. Other brand and product names are trademarks or registered trademarks
How to Utilize Insufficiency Codes and Benefit Arrears Munis: Payroll
 [MU-PR-12-A] How to Utilize Insufficiency Codes and Benefit Arrears Munis: Payroll CLASS DESCRIPTION When employees go on leave, or do not have sufficient earnings to cover their expected deduction withholdings
MSI-Accounts Payable (with Accrual Based Accounting) Accrual Distribution Journal
 Accrual Distribution Journal") MSI-Accounts Payable (with Accrual Based Accounting) Accrual Distribution Journal The Accrual Distribution Journal (see Figure 0) will sort the invoices by their GL Account #. Positive amounts on an invoice
MSI-Accounts Payable (with Accrual Based Accounting) Accrual Distribution Journal The Accrual Distribution Journal (see Figure 0) will sort the invoices by their GL Account #. Positive amounts on an invoice
VisionVPM General Ledger Module User Guide
 VisionVPM General Ledger Module User Guide Version 1.0 VisionVPM user documentation is continually being developed. For the most up-to-date documentation please visit the VisionVPM website at www.visionvpm.com
Computer Data Resources (CDR) Ltd.
 Ltd.") Computer Data Resources (CDR) Ltd. Visual Payroll User Guide: Table of Contents Item Page Basic Operations 2 Setting Up Users 7 Employees 11 Create Pay Records 28 Pensions 39 Electronic Banking 45 Setting
Computer Data Resources (CDR) Ltd. Visual Payroll User Guide: Table of Contents Item Page Basic Operations 2 Setting Up Users 7 Employees 11 Create Pay Records 28 Pensions 39 Electronic Banking 45 Setting
PEACHTREE COMPLETE 2009 WORKSHOP 4 PETE S MARKET
 PEACHTREE COMPLETE 2009 WORKSHOP 4 PETE S MARKET Mini Practice Set Completing First Quarter Payroll for Pete s Market This workshop adds to Peachtree skills learned in Workshops 1 through 3 so complete
Accounts Receivables Accruals
 Accounts Receivables Accruals For FY18 June 20, 2018 Information Technology Understanding the Accrual Process The goal of year-end accrual process is to recognize revenues and expenses in the period in
Entering Cash Receipts
 1 Customers: Using CounterPoint Entering Cash Receipts Overview Cash receipts are entered when payments are received on customer accounts. This document explains how to enter cash receipts using Customers
Ledgers & Payables Training Guide for the Archdiocese of Atlanta
 Ledgers & Payables Training Guide for the Archdiocese of Atlanta ConnectNow Ledger and Payables Training Guide - Archdiocese of Atlanta ConnectNow Accounting: Ledger and Payables Training Guide Pub T219,
How to Journalize using Data Entry
 Steps Essential to Success 1. Print a copy of the Problem you intend to complete. To do so, go to the software log-in page and click on Download Student Manual button, click on the Problem to open it.
Next Year Budget Entry Training
 MUNIS Next Year Budget Entry Training Page 1 of 23 Module: Topic: Budget Next Year Budget Entry Next Year Budget Entry MUNIS Version 10.2 Objective This document provides step-by-step instructions on how
Deltek GCS Premier. Year-End Guide
 Deltek GCS Premier Year-End Guide November 30, 2011 Post-Installation You must complete the following in structions after installing GCS Premier. 1. Within Deltek GCS Premier, display the Set Up Data Files
Visual Intelligence Portfolio. Payroll Year End Guide
 Visual Intelligence Portfolio Payroll Year End Guide 2018-2019 The software described in this guide is provided under a license agreement. This Software may be installed or backed up only in accordance
Blackbaud FundWare Custom Florida Retirement Programs Guide
 Blackbaud FundWare Custom Florida Retirement Programs Guide VERSION 7.60, SEPTEMBER 2009 Blackbaud FundWare Custom Florida Retirement Programs Guide USER GUIDE HISTORY Date Changes July 1994 Release with
Make sure the client aged receivables balance to the general ledger total. Write off client balances. Pick a date that makes sense: a. b. c. d.
 Overview This document provides conversion tips and instructions for entering client and general ledger beginning balances Entering beginning balances in Nexsure entails bringing balances forward from
Chapter 24. Tips, Tricks and Error Messages
 Chapter 24 Tips, Tricks and Error Messages This Page Left Blank Intentionally CTAS User Manual 24-1 Tips and Tricks: Introduction The (OSA) often receives questions about CTAS from the program's users.
PCGENESIS PAYROLL SYSTEM OPERATIONS GUIDE
 PCGENESIS PAYROLL SYSTEM OPERATIONS GUIDE 10/11/2011 Section B: Payroll Update Processing [Topic 4: Update/Display Payroll Information, V2.8] Revision History Date Version Description Author 10/11/2011
CDCI. Profit Builder. Instructions Year End 2013
 CDCI Profit Builder Instructions Year End 2013 December 30, 2013 Table of Contents Year End Overview 3 Unemployment Tax Cutoff Changes 4 Federal & State Tax Changes 7 Load Year End Programs 8 2014 Payrolls
MICROSOFT DYNAMICS-SL ASI-BUDGET/FORECASTING MANUAL
 MICROSOFT DYNAMICS-SL ASI-BUDGET/FORECASTING MANUAL 140 Washington Ave North Haven, CT 06473 203.239.7740 www.asillc.com sales@asillc.com PREPARED BY ACCOUNTING SYSTEM INTEGRATORS, LLC Last Revision: March
Employee Online SunGard BusinessPLUS
 Employee Online SunGard BusinessPLUS Employee Online (EO) is a web-based system designed to provide employees with improved access to their records. The interactive nature of Employee Online enables end
NextGen Financial Management & NextGen Purchasing Fiscal Year End 2018
 Financial Management & Purchasing Fiscal Year End 2018 LOCAL GOVERNMENT CORPORATION ALL RIGHTS RESERVED 2011-2018 (Rev. 05/21/2018) Version 4 Copyright 2011-2018 All Rights Reserved Purchasing and Financial
Benefit Reconciliation. User s Guide. GeorgiaFIRST
 Benefit Reconciliation User s Guide GeorgiaFIRST TABLE OF CONTENTS BENEFIT ACCOUNTING...3 BENEFIT PROCESSES... 4 CREATE BENEFIT ACCOUNTING ENTRIES... 5 Load and Validate Accounting... 6 Load Error Correction...
Member Access Manual. Contents. Registration Process Logging In Making a Donation Donation History Account Information
 Manual Contents Registration Process Logging In Making a Donation Donation History Account Information This is the first screen you will see as a new user, and for future logins. First time users must
Finance Manager: Payroll
 : Payroll W2 Processing The W2 Processing routine prepares the employee payroll information that is necessary for completing the W-2s. The routine encompasses five steps: Generate W2 History File, Edit
Portal User Manual (Retailer) Web Rating Portal for our Retail Agents. Contents. Creating a new Indication. Creating a GL Indication
 Web Rating Portal for our Retail Agents. Contents. Creating a new Indication. Creating a GL Indication") 1 of 12 9/7/2011 10:58 AM Portal User Manual (Retailer) From SIGipedia Contents 1 Web Rating Portal for our Retail Agents 1.1 Creating a new Indication 1.1.1 Creating a GL Indication 1.1.2 Creating a Property
1 of 12 9/7/2011 10:58 AM Portal User Manual (Retailer) From SIGipedia Contents 1 Web Rating Portal for our Retail Agents 1.1 Creating a new Indication 1.1.1 Creating a GL Indication 1.1.2 Creating a Property
Payroll End-of-Year 2016/17 Processing (Australia).
.") Payroll End-of-Year 2016/17 Processing (Australia). Export date: 29 May 2017 Attaché Software Australia Pty Ltd ACN 002 676 511 ABN 32002676 511 Level 5, 118 Talavera Road, Macquarie Park NSW 2113 Australia
Payroll End-of-Year 2016/17 Processing (Australia). Export date: 29 May 2017 Attaché Software Australia Pty Ltd ACN 002 676 511 ABN 32002676 511 Level 5, 118 Talavera Road, Macquarie Park NSW 2113 Australia
Here are some special notes and rules good to know before you proceed: NOTE: In the new year you can edit or update any GL Codes if necessary.
 CLOSE YEAR PREREQUISITES In order to ensure a smooth transition of closing your fiscal year to opening a new, Pentagon 2000 Software has recommended prerequisites to accommodate your accounting practices
ConnectNow Church Accounting: Ledger and Payables Training Guide
 ConnectNow Church Accounting: Ledger and Payables Training Guide Pub T417, June 2012 Web: www.parishsoft.com www.churchmanagementsolutions.com Email: info@parishsoft.com info@churchmanagementsolutions.com
COMPARATIVE REPORTS COMPARATIVE REPORT FOR ALL EMPLOYEES
 COMPARATIVE REPORTS By comparing the year-to-date figures for any two payroll periods, the comparative report program provides the necessary information to prepare quarterly reports for government requirements
Recurring Payments. Navigate to: Accounts Payable>File Maintenance/Lists>Recurring Payments
 Recurring Payments Overview Recurring payments can be created for payments that should be generated on a user-defined periodic basis. Recurring payments are typically set up for payments that are a fixed
Palladium Company Setup Guide
 Palladium Company Setup Guide This document will assist you in setting-up your Palladium Company prior to processing transactions. Contents Setting up Linked Accounts... 2 Purpose of Linked Accounts...
XactContents Quick Start Guide
 Payment Tracker Payment Tracker The Payment Tracker allows you to record and track ACV/RCV, Loss of Use, and Advance Payments. This can be very helpful in keeping all payments made to the insured organized.