Enterprise Planning and Budgeting 9.0 Created on 2/4/2010 9:42:00 AM
|
|
|
- Virgil Freeman
- 6 years ago
- Views:
Transcription
1 Created on 2/4/2010 9:42:00 AM
2 COPYRIGHT & TRADEMARKS Copyright 1998, 2009, Oracle and/or its affiliates. All rights reserved. Oracle is a registered trademark of Oracle Corporation and/or its affiliates. Other names may be trademarks of their respective owners. This software and related documentation are provided under a license agreement containing restrictions on use and disclosure and are protected by intellectual property laws. Except as expressly permitted in your license agreement or allowed by law, you may not use, copy, reproduce, translate, broadcast, modify, license, transmit, distribute, exhibit, perform, publish or display any part, in any form, or by any means. Reverse engineering, disassembly, or decompilation of this software, unless required by law for interoperability, is prohibited. The information contained herein is subject to change without notice and is not warranted to be error-free. If you find any errors, please report them to us in writing. If this software or related documentation is delivered to the U.S. Government or anyone licensing it on behalf of the U.S. Government, the following notice is applicable: U.S. GOVERNMENT RIGHTS Programs, software, databases, and related documentation and technical data delivered to U.S. Government customers are commercial computer software or commercial technical data pursuant to the applicable Federal Acquisition Regulation and agencyspecific supplemental regulations. As such, the use, duplication, disclosure, modification, and adaptation shall be subject to the restrictions and license terms set forth in the applicable Government contract, and, to the extent applicable by the terms of the Government contract, the additional rights set forth in FAR , Commercial Computer Software License (December 2007). Oracle USA, Inc., 500 Oracle Parkway, Redwood City, CA This software is developed for general use in a variety of information management applications. It is not developed or intended for use in any inherently dangerous applications, including applications which may create a risk of personal injury. If you use this software in dangerous applications, then you shall be responsible to take all appropriate fail-safe, backup, redundancy and other measures to ensure the safe use of this software. Oracle Corporation and its affiliates disclaim any liability for any damages caused by use of this software in dangerous applications. This software and documentation may provide access to or information on content, products and services from third parties. Oracle Corporation and its affiliates are not responsible for and expressly disclaim all warranties of any kind with respect to third party content, products and services. Oracle Corporation and its affiliates will not be responsible for any loss, costs, or damages incurred due to your access to or use of third party content, products or services.
3 Table of Contents Training Guide...1 Budgeting Overview... 1 Understanding Planning and Budgeting Processes... 1 Understanding Budgeting Roles... 5 Understanding Budgeting Integrations... 8 Exporting Data to General Ledger Exporting Data to HRMS Designing the Planning Model Defining a Planning Model Assigning an Activity Group to a Model Assigning a Scenario Group to a Model Defining Activity Scenario Combinations Defining Multicurrency Options Entering Notes for a Planning Model Copying a Planning Model Validating the Planning Model Staging a Scenario and Activity Using the Model Manager Releasing the Planning Model Using Flexible Formulas Understanding Flexible Formulas Defining a Flexible Formula Source Defining a Flexible Formula Defining a Flexible Formula with a New Source Defining a Flexible Formula Using the IF Function Staging a Flexible Formula Updating a Flexible Formula Updating the Planning Model Copying the ACE Model Running Model Recalculations Running Combination Data Validation Updating Driver Parameters Using the Planning Workspace Understanding the Planning Workspace Understanding Work Items and Versions Creating a Worksheet Version Locking Planning and Budgeting Activities Unlocking Planning and Budgeting Activities Setting User Preferences Sending to Planning and Budgeting Users Attaching Documentation and Guidelines Submitting Plans and Budgets Rejecting Plans and Budgets Approving Plans and Budgets Using Line Item Activities Understanding Line Item Budgeting Entering a Line Item Amount Using Methods Entering a Line Item Amount Using Hot Keys Adjusting Line Items Page iii
4 Reviewing Line Item Data with Variance Analysis Reviewing Line Item Data with Version Analysis Submitting Line Item Activities Using the Spreadsheet Add-In Using Mass Adjustments and Allocations Defining Mass Adjustments Applying Mass Adjustments Defining Allocations Applying Allocations Using Position Budgeting Understanding Position Budgeting Adding Positions Copying Positions Distributing Position Costs Filling Positions Terminating Positions Deleting Positions Applying Compensation Adjustments Performing Position Budgeting Analysis Using Asset Budgeting Understanding Asset Budgeting Viewing In-Service Assets Adding an Asset Editing an Asset Performing Asset Analysis Running Reports Running EPM Reports Page iv
5 A budget is at the foundation of your organization s operations. Each organization goes through deliberations that result in an approved budget. In a typical organization, budgeting is also an iterative process expenses and revenue estimates are reevaluated, start and end date are changed, and objectives are modified. PeopleSoft Planning and Budgeting accommodates these changes so that you can modify your budget plan and update your database tables. By the end of this course, you will be able to: Define planning and budgeting Explain the budgeting integrations at a high level. Design a planning model. Use flexible formulas. Update a planning model. Use the planning workspace. Use line item activities. Use mass adjustments and allocations. Use position budgeting. Use asset budgeting. Run EPM reports. Budgeting Overview PeopleSoft Planning and Budgeting provides an interactive solution in which role-based access over the internet and intranet is available for every planning and budgeting participant. Planning and Budgeting is part of the Strategic Planning and Performance Management business process that creates forecasts and tests assumptions and scenarios. You design strategic plans to create target operational line item budgets. Plans and budgets are reviewed, approved, or rejected. Upon completion of this lesson, you will be able to: Define planning and budgeting processes. Define budgeting roles. Define budgeting integrations. Export data to General Ledger. Export date to HRMS. Understanding Planning and Budgeting Processes PeopleSoft Planning and Budgeting is an analytic application that enables you to use historical and current data to develop a budget model. You can use this model to analyze budget figures and to create a yearly or multi-year budget or forecast. In this topic, you will learn about Planning and Budgeting processes. Procedure Page 1
6 1. PeopleSoft Planning and Budgeting is an analytic application that enables you to: Access historical and current data. Analyze the data. Create a budget plan for the future. Page 2

7 2. Planning and Budgeting guides you through defining plan and budget objectives, accessing historical and actual data, developing a base budget, accessing data, preparing and refining plans and budgets, reviewing a plan or budget, posting and reporting results, and monitoring progress. Page 3
8 3. The Budgeting component provides for top-down planning as well as bottom-up budgeting. Developing a budget can be a resource-intensive, highly iterative process that can produce less than useful results. PeopleSoft Budgeting provides intuitive tools for maintaining forecasts and creating what-if scenarios to determine the effects business decisions will have on your entire organization. 4. The typical budgeting process may take up to six months from inception to completion. During the budgeting process there are several milestones that are completed, including the development of budget objectives, which requires the organization to state what it wants to achieve, and how much budget will be required to achieve those objectives. 5. Before the budget is developed, it is necessary to obtain historical or current budget information. This provides the budget preparer with valuable data on what has happened in the recent past. New budget figures can be based on actual expenditures from the year before or on the current year's budget. The historical analysis assists the budget preparer in preparing a realistic budget for the upcoming fiscal year. Page 4
9 6. You can also call this the "budget flow" or "budgeting review process." After all of the historical analyses are defined, the organization can build a base budget, which serves as the original (or seeded) budget during the budget preparation process. Now the budget preparers across the organization can enter their revenues and expenditures, which are ultimately submitted through the departments and divisions. 7. Management has the chance to review the budget and reject it if necessary. If a budget is rejected, the budget preparer can rework the budget numbers and resubmit the budget. After the budget is reviewed, it is posted and reports can be generated and disseminated to the appropriate individuals. 8. When using planning targets with bottom up budgets, you can only use top-down plans that use annual scenarios (one period year). When the period is greater than one within a fiscal year, the top down periods are not aggregated. Therefore, when using the top down plan with bottom up budgets as part of a planning target, the top down plans must have annual scenarios. If you are not using top down plans as planning targets for bottom up budgets, you can use any calendar period. 9. This concludes the Understanding the Planning and Budgeting Business Processes topic. End of Procedure. Understanding Budgeting Roles PeopleSoft Planning and Budgeting uses roles to configure security and control which users have access to perform budgeting tasks. The security settings can be modified at any time to reflect the changes in your organization s budgeting procedures. Page 5

10 In this topic, you will learn about budgeting roles. Procedure 1. The user profile (user ID) controls which budget functions the budget user can complete. Attached to the user profile is the budget role, which can perform specific budgeting activities. Attached to the budget role are the permission lists, which allows access to functions contained within specific pages. 2. Enterprise Planning and Budgeting is delivered with six predefined user roles: casual preparer, preparer, reviewer, analyst, coordinator, and system administrator. These user roles can be modified to accommodate your unique business model. 3. The Casual Preparer performs line item, asset and position budgeting. The casual preparer is not able to define own private views for line item budgeting. 4. The Preparer enters line item budgets, asset, and position budget amounts. Generally doesn't perform allocations or analysis. 5. The Reviewer reviews submitted budgets for a budget center. 6. The Analyst develops budget parameters and guidelines, builds budget models, and coordinates the overall budget process for the organization. 7. The Coordinator creates budget parameters and guidelines, builds the budget model, and coordinates the overall budget process for the organization. Page 6

11 Training Guide 8. The System Administrator monitors user security. The System administrator also adds and removes users from the Planning and Budgeting role access. 9. You can assign these six roles to any user ID that your organization deems necessary. Each of the user roles must be assigned a business unit, budgeting activity, and budget center. 10. It is not necessary to define every budget user role; you must define a coordinator (required to run the Model Recalculation process) and a preparer/casual preparer, but you don't have to use the other roles. 11. Roles give access to permission lists, business units, budget activities, and budget centers. Permission lists give access to menu s, components, pages, and actions. 12. An example of the planning and budgeting responsibilities are shown in this diagram. These responsibilities are defined solely by each organization and can accommodate any type and size of organization. 13. The budget coordinator maintains the most control over the budgeting process in this example. The budget coordinator sets up the system, imports and exports the data to the PeopleSoft Financials and HRMS databases, and publishes the budget model. Page 7
12 14. The budget preparer is the individual or individuals that reside at the departmental level and actually prepare the budget for their department. Once the budget preparers are finished with their pieces of the budget, they submit the budget to the budget reviewer or budget analyst, depending on the complexity of the organization. 15. This diagram represents the Budget Role Hierarchy. Each budget role has a budget center and budget activities attached to it. Budget activities include Asset Budgeting, Line Item Budgeting, Line Item Mass Adjustments, and Position Budgeting. Planning centers are made available to budget users once the budget model is published. 16. This concludes the understanding budgeting roles topic. End of Procedure. Understanding Budgeting Integrations PeopleSoft Budgeting is designed to integrate with several PeopleSoft applications as well as non-peoplesoft applications. Integration enables you to access information from these applications to be used in your budget scenarios. PeopleSoft Planning and Budgeting integrates with the following PeopleSoft applications: General Ledger Asset Management Business Planning Page 8

13 Projects Human Resource Management In this topic, you will learn about budgeting integrations. Procedure 1. This diagram illustrates how PeopleSoft Planning and Budgeting integrates with other PeopleSoft applications 2. Ascential DataStage 7.5 is the application that is used to extract, load, and transform (ETL) data from the PeopleSoft applications into the EPM database. The ETL process starts by scheduling and running DataStage jobs so that the analytical data from the source systems is extracted and moved to the Operational Warehouse Staging (OWS) layer of the Performance Management Warehouse (PMW). After the analytical applications complete their jobs, ETL copies the data into the Operational Warehouse Enriched (OWE) layer of the PMW to further enrich the data. 3. Multidimensional modeling is further achieved using the PeopleSoft ACE 4. Planning and Budgeting does not require the use of data marts. Page 9
14 5. Once the PeopleSoft Financials and HRMS data is transferred to the EPM database, you are then able to build and publish your budget model. PeopleSoft Budgeting uses PeopleSoft Financials actuals ledger data, standard budget ledger, project ledger, and commitment control budget ledger for use as seed information during the budgeting process. PeopleSoft Budgeting uses PeopleSoft HRMS data from the job and compensation tables. PeopleSoft Budgeting can also export data back to PeopleSoft HRMS and PeopleSoft Financials. 6. This concludes the Budgeting Integrations topic. End of Procedure. Exporting Data to General Ledger After you complete the budget, you can export the data from the budgeting model into staging tables in a specified database. The Export to General Ledger Budgeting Data process (BPEXPORT) is a PeopleSoft Application Engine process that extracts budgeting model data into PS_BP_LEDGER_BDEXP in the PeopleSoft EPM database or PeopleSoft Financial Management database. Based on the request parameters that you define, the system exports data located in the Master budget version at the time of the export. In this topic, you will export planning and budgeting data to Enterprise General Ledger. Procedure Page 10
15 Training Guide 1. Begin by navigating to the Export to General Ledger page. Click the Planning and Budgeting link. 2. Click the Data Integration link. 3. Click the Export to General Ledger link. Page 11
16 4. You can run this process by searching for an existing Run Control ID or you can add a new value. Creating a Run Control ID that is relevant to the process may help you remember it for future use. Click the Add a New Value tab. Page 12
17 5. A Run Control ID is an identifier that, when paired with your User ID, uniquely identifies the process you are running. The Run Control ID defines parameters that are used when a process is run. This ensures that when a process runs in the background, the system does not prompt you for additional values. Enter the desired information into the Run Control ID field. Enter "EXPORT_GL". 6. Click the Add button. 7. Use the Export to General Ledger page to enter the request parameters. These parameters will be used to define the processing rules and data to be included when the process is run. Page 13
18 8. Enter the desired information into the Description field. Enter "Export budget data". 9. Click in the Business Unit field. 10. A Business Unit is an identification code that represents a high-level organization of business information. Valid values depend on the business units associated with planning models. A planning model can be associated with only one business unit within your organization. However, a business unit can have multiple planning models. Enter the desired information into the Business Unit field. Enter "US002". 11. Click in the Planning Model ID field. 12. The Planning Model ID refers to the name of a planning and budgeting model used to perform budget development of activities and scenarios for a business unit. Enter the desired information into the Planning Model ID field. Enter "MODEL102". 13. Click in the Scenario field. Page 14
19 Training Guide 14. Scenarios provide the time element to a budget or plan. You select a calendar to use that controls periodicity of the plan and specify the beginning and ending periods of the budget or plan. The scenario also includes a ledger that the system associates with a ledger template. Ledger templates (in conjunction with the general ledger scenario), dictate the physical source of the data the system uses to seed a budget or plan; this frames the actual dimensions (ChartFields) enabled for use. The dimensions must exist on the physical ledger table. For the planning scenario specifically, this dictates the target of the plan or budget data when it is exported. Enter the desired information into the Scenario field. Enter "2007SCE101". 15. Click the Save button. 16. Click the Run button. 17. Use the Process Scheduler Request page to enter or update parameters, such as server name and process output format. Page 15
20 18. You must select a Server Name to identify the server on which the process will run. If you use the same Run Control ID for subsequent processes, the server name that you last used will default in this field. Click the Server Name list. 19. Click the PSNT list item. 20. Use the Type field to select the type of output you want to generate for this job. Your four choices are File, Printer, , or Web. 21. Use the Format field to define the output format for the report. The values are dependent upon the Process Type you have selected. In this example, the default value is TXT. 22. Click the OK button. 23. Notice the Process Instance number appears. This number helps you identify the process you have run when you check the status. Page 16

21 24. Click the Process Monitor link. 25. Use the Process List page to view the status of submitted process requests. Page 17

22 26. The current status of the process is Queued. The process is finished when the status is Success. Continue to click the Refresh button until the status is Success. Click the Refresh button. 27. Notice the status is now Success. 28. You have successfully exported planning and budgeting data to General Ledger. End of Procedure. Exporting Data to HRMS After you complete the budget, you can export the data from the budgeting model into staging tables in a specified database. The Export to HR process (BPEXPORT) exports position budgeting data from the master version in the budgeting model into the following tables located in the selected export destination: PS_BP_POSITION_EXP PS_BP_JOB_EXP PS_BP_EARN_DIS_EXP PS_BP_SAL_DIS_EXP PS_BP_BNFT_DIS_EXP PS_BP_TAX_DIS_EXP In this topic, you will export planning and budgeting data to Enterprise HRMS. Procedure Page 18
23 1. Begin by navigating to the Export to HR page. Click the Budgeting link. 2. Click the Data Integration link. Page 19
24 3. Click the Export to HR link. Page 20
25 4. You can run this process by searching for an existing Run Control ID or you can add a new value. Creating a Run Control ID that is relevant to the process may help you remember it for future use. Click the Add a New Value tab. 5. A Run Control ID is an identifier that, when paired with your User ID, uniquely identifies the process you are running. The Run Control ID defines parameters that are used when a process is run. This ensures that when a process runs in the background, the system does not prompt you for additional values. Enter the desired information into the Run Control ID field. Enter "EXPORT_HR". 6. Click the Add button. 7. Use the Export to HR page to enter the request parameters. These parameters will be used to define the processing rules and data to be included when the process is run. Page 21
26 8. Enter the desired information into the Description field. Enter "Export to HR". 9. Click in the Business Unit field. 10. A Business Unit is an identification code that represents a high-level organization of business information. Valid values depend on the business units associated with planning models. A planning model can be associated with only one business unit within your organization. However, a business unit can have multiple planning models. Enter the desired information into the Business Unit field. Enter "US002". 11. Click in the Planning Model ID field. 12. The Planning Model ID refers to the name of a planning and budgeting model used to perform budget development of activities and scenarios for a business unit. Enter the desired information into the Planning Model ID field. Enter "MODEL102". 13. Click in the Scenario field. Page 22
27 Training Guide 14. Scenarios provide the time element to a budget or plan. You select a calendar to use that controls periodicity of the plan and specify the beginning and ending periods of the budget or plan. The scenario also includes a ledger that the system associates with a ledger template. Ledger templates (in conjunction with the general ledger scenario), dictate the physical source of the data the system uses to seed a budget or plan; this frames the actual dimensions (ChartFields) enabled for use. The dimensions must exist on the physical ledger table. For the planning scenario specifically, this dictates the target of the plan or budget data when it is exported. Enter the desired information into the Scenario field. Enter "2007SCE101". 15. Click the Save button. 16. Click the Run button. 17. Use the Process Scheduler Request page to enter or update parameters, such as server name and process output format. Page 23
28 18. You must select a Server Name to identify the server on which the process will run. If you use the same Run Control ID for subsequent processes, the server name that you last used will default in this field. Click the Server Name list. 19. Click the PSNT list item. 20. Use the Type field to select the type of output you want to generate for this job. Your four choices are File, Printer, , or Web. 21. Use the Format field to define the output format for the report. The values are dependent upon the Process Type you have selected. In this example, the default value is TXT. 22. Click the OK button. 23. Notice the Process Instance number appears. This number helps you identify the process you have run when you check the status. Page 24
29 24. Click the Process Monitor link. 25. Use the Process List page to view the status of submitted process requests. Page 25

30 26. The current status of the process is Queued. The process is finished when the status is Success. Continue to click the Refresh button until the status is Success. Click the Refresh button. 27. You have successfully exported planning and budgeting data to Enterprise HRMS. End of Procedure. Designing the Planning Model The Planning Model serves as your framework to develop plans and budgets. It synthesizes all previously defined planning and budgeting parameters. It also establishes the beginning and end of the overall planning and budgeting cycle. To define the framework for the budget, you perform the following tasks: 1. Define the planning model. 2. Assign an activity group to the planning model. 3. Assign a scenario group to the planning model. 4. Create activity scenario combinations based on the groups that are associated with the planning model. 5. Define currency options for a multiple currency planning model. 6. Enter any notes for the planning model. Upon completion of this lesson, you will be able to: Define a planning model. Page 26
31 Assign an activity group to a model. Assign a scenario group to a model. Define activity scenario combinations. Define multicurrency options. Enter notes for a planning model. Copy a planning model. Validate the planning model. Stage a scenario and activity. Use the Model Manager. Release the planning model. Defining a Planning Model Creating a planning model entails defining the necessary parameters and components by business unit. When you define a planning model, you specify data requirements such as position, asset, and line item activity data. You select data sources and the source to seed the base budgets. Finally, you stage the data and release the activities and scenarios in the model to distribute the plans and budgets to budget users. In this topic, you will define a planning model. Procedure Page 27
32 1. Begin by navigating to the Model page. Click the Planning and Budgeting link. 2. Click the Planning and Budgeting Setup link. 3. Click the Planning Models link. 4. Click the Add a New Value tab. 5. Enter the desired information into the Business Unit field. Enter "US002". 6. Click in the Planning Model ID field. 7. Enter the desired information into the Planning Model ID field. Enter "MODEL101". 8. Click the Add button. 9. Use the Model page to define the planning model. On this page you will assign an activity group and a scenario group to the planning model. You can also create a new activity group and scenario group from this page. Page 28
33 10. Enter the desired information into the Description field. Enter "P&B MODEL101". 11. Status indicates if the planning model is active or inactive. For this example, leave the default value of Active. 12. Click the Multi-Currency option. 13. Click the Save button. 14. You have successfully defined a planning model. End of Procedure. Assigning an Activity Group to a Model Activities are user-definable planning components such as revenue, expenses, and balance sheet that, combined with scenarios within a model, form the basic planning unit of work known as the activity scenario. Activity groups specify a collection of activities and the dimension setids and hierarchies to apply across all dimensions of the activities contained therein. If the activity or group is staged, you cannot modify it or its properties or delete attributes (such as the activities in an activity group). You can, however, add new attributes and, if the same entity is needed as a starting point for a new entity, you can copy functionality. In this topic, you will assign an activity group to a planning model. Page 29
34 Procedure 1. Begin by navigating to the Model page. Click the Planning and Budgeting link. 2. Click the Planning and Budgeting Setup link. 3. Click the Planning Models link. Page 30
35 4. Click in the Planning Model ID field. 5. Enter the desired information into the Planning Model ID field. Enter "MODEL101". 6. Click the Search button. 7. Use the Model page to define the planning model. On this page you will assign an activity group and a scenario group to the planning model. You can also create a new activity group and scenario group from this page. Page 31
36 8. Click the Create Activity Group button. Page 32
37 9. Click in the Activity Group field. 10. Enter the desired information into the Activity Group field. Enter "AG101". 11. Click the Add button. 12. Use the Activity Group page to create an activity group. 13. Click in the Description field. 14. Enter a description for the activity group you are creating. Enter the desired information into the Description field. Enter "Activity Group 101". Page 33
38 15. Use the As Of Date field to enter the most appropriate as of date to select the desired dimension members and trees. Effective-dated dimension members and trees are based on the as of date. Because member and tree selection occurs at the activity group/activity and activity group/dimension levels, activity group must be as of dated so that you can select the correct members and trees. Only those members and tree versions that are active and whose effective dates are less than or equal to the as of date are available for selection. For this activity, accept the default value. 16. Click in the Activity field. 17. Use the Activity field to enter the activity that you want to include in the activity group. Enter the desired information into the Activity field. Enter "ASSETS". 18. Click the Add Row button. 19. Click in the Activity field. Page 34
39 20. Enter the desired information into the Activity field. Enter "POSBUD". 21. Click the Add Row button. 22. Enter the desired information into the Activity field. Enter "REV101". 23. Click the Add Row button. 24. Enter the desired information into the Activity field. Enter "ASSETBUD". 25. Click in the Method Group field. 26. Enter a planning Method Group for each line item activity. You cannot enter a method group for position or asset activity types. Enter the desired information into the Method Group field. Enter "M101". 27. Click the Hierarchies tab. 28. Use the Hierarchies page to define any special mapping rules or summarization of specific dimension members that you want included in the planning model. Page 35
40 29. Click in the Tree Name field. 30. Use the Tree Name field to assign trees to activity dimensions. Enter the desired information into the Tree Name field. Enter "BUDGETING_ACCT2". 31. Click in the Tree Name field. 32. Enter the desired information into the Tree Name field. Enter "BUDGETING_DEPT2". 33. Click the Members tab. 34. Use the Members page to define and edit dimensions associated with members. Page 36

41 35. Click the Relationships tab. 36. Use the Relationships page to define the activity relationships for the planning model. There are three types of relationships, one is workflow based, and the other two are data relationships. The collection of activities within the activity group, and the relationships defined, are applied to all activity scenario combinations within your planning model. Page 37
42 37. Use the Activity field to select an activity and define its relationship to another activity. Click the Activity list. 38. Click the REV101 list item. 39. An Includes Data From relationship indicates the related activity contains data that the system includes or aggregates into the corresponding (or parent) activity. The system uses the following three specific methods to extract data from the related activity: POSBUD (from position budgeting), ASSETS (from asset budgeting), and LINEITEM (from line item) methods. By indicating this relationship, it means the parent activity contains some of the same dimensions and possibly members of the child (or related) activity that the system can directly insert or aggregate into the parent activity. Activities defined with the Includes Data From relationship do not need to share the same planning center dimension. Click the Includes Data From option. Page 38
43 Training Guide 40. Use a References Data From relationship typically in conjunction with the flexible formula (FLEX) method. Note that you define this relationship only between line item activity types. In this case, the system does not insert or aggregate data into a parent activity, so there is no need for the related activities to contain the same dimensions, same members, or both the same dimensions and members. This relationship merely indicates that the system needs the data in the related activity to derive an amount in another activity. This relationship is only defined between line item activity types. 41. Activities defined as Approval Includes represent a workflow relationship between activities. You can define this relationship type only between line item activities and assets, and line item activities and positions, as the related activities. You cannot define an Approval Includes workflow relationship between two line item activities. When associating asset and position activity types as related activities to a line item activity, they must also share the same planning center dimension and level. When budget preparers work on these activities, they can only submit them through the parent line item activity. 42. Click the Related Activity list. 43. Click the POSBUD list item. 44. Click the OK button. Page 39
44 45. Click the Save button. 46. You have successfully assigned an activity group to a model. End of Procedure. Assigning a Scenario Group to a Model Scenario groups enable you to collect related scenarios for use within a planning model. Only scenarios in the scenario group associated to the model may be used as source, proposed plan or budget, target, and comparison scenarios. scenario groups also have time hierarchy and budgeting typ. functionality. The time hierarchy represents a series of calendars collected in increasing levels of detail that form a time tree. All of the proposed and non-history scenarios within a scenario group must be associated with calendars that are contained in the time hierarchy. This enables you to group scenarios for various plans (for example, monthly plans, quarterly plans, and annual plans), but prevents you from grouping scenarios for disparate time periods. The budgeting type controls whether the scenarios contained in the group represent standard, project, or control type plans. Specific functionality exists for each of these types. When you use the control budgeting type, then only scenarios associated to Commitment Control ledgers may be included in the group. In this topic, you will select a scenario group for a planning model. Procedure Page 40
45 1. Begin by navigating to the Model page. Click the Planning and Budgeting link. 2. Click the Planning and Budgeting Setup link. 3. Click the Planning Models link. 4. Enter the desired information into the Business Unit field. Enter "US002". 5. Click in the Planning Model ID field. 6. Enter the desired information into the Planning Model ID field. Enter "MODEL101". 7. Click the Search button. 8. Use the Model page to define the planning model. On this page you will assign an activity group and a scenario group to the planning model. You can also create a new activity group and scenario group from this page. Page 41
46 9. Use the Scenario Group field to assign a scenario group to a planning model. Click the Scenario Group list. 10. Click the SCEGRP101 list item. 11. Click the Scenario Group 101 link. 12. Use the Scenario Group page to review the scenarios that are attached to the scenario group. Page 42
47 13. Review the Scenario Group page information. If you no changes are made, you should click the Cancel button. If changes are made, click the Apply button and then click the OK button to save your changes and return to the Model page. Click the Cancel button. Page 43
48 14. Click the Save button. 15. You have successfully assigned a scenario group to a model. End of Procedure. Defining Activity Scenario Combinations Activity scenario combinations are used to organize the timing of different plans or budgets at similar or varying times throughout your budget cycle. Activity scenario combinations enable you to control information that you can view and modify in a planning model. Enterprise Planning and Budgeting enables you to have multiple activity scenario combinations within each planning model. When defining activity scenario combinations, you will: Define dimension levels or summarization for planning centers and other dimensions. Define data sources for activities. Define comparison scenarios and target scenarios for line item activities. Define defaults for line item activity types, including account category, enforced budget and zero--based budget options, method defaults, and public views. In this topic, you will define activity scenario combinations for a planning model. Procedure Page 44
49 1. Begin by navigating to the Activity Scenario page. Click the Planning and Budgeting link. 2. Click the Planning and Budgeting Setup link. 3. Click the Planning Models link. Page 45
50 4. Click in the Planning Model ID field. 5. Enter the desired information into the Planning Model ID field. Enter "MODEL101". 6. Click the Search button. Page 46
51 7. Click the Activity Scenario tab. 8. Use the Activity Scenario page to setup and manage activities and scenarios in the planning model. Page 47
52 9. Click in the End Date field. 10. Use the End Date field to define the ending date range for this activity. Enter the desired information into the End Date field. Enter "04/16/2007". 11. Click in the End Date field. 12. Enter the desired information into the End Date field. Enter "04/16/2007". 13. Click in the End Date field. 14. Enter the desired information into the End Date field. Enter "04/16/2007". 15. Click in the End Date field. 16. Enter the desired information into the End Date field. Enter "04/16/2007". 17. Click the Assets option. 18. Click the Positions option. 19. Click the Revenue 101 option. Page 48
53 20. Click the Asset Budget option. 21. When defining activity scenario combinations, you will review and update activity scenarios using the dimension level and data source links. 22. Click the Dimension Level link. 23. Use the Dimension Level Summarization page to define dimension levels, including the planning center dimension, in which an activity scenario is prepared. 24. Review the Dimension Level Summarization page information. For this example, no changes will be made. Click the OK button. Page 49
54 25. Click the Data Source link. 26. Use the Data Source page to define data sources for line-item or asset activities. Page 50
55 27. Use the Use Source Data option to stage data from your source asset management system when you integrate data for assets and depreciation. You do not need to select the check box when you do not bring data from your source system for assets and depreciation. Click the Use Source Data option. 28. Click in the Asset Book Name field. 29. Use the Asset Book Name field to enter the book name for the asset information you wish to retrieve for the business unit. Enter the desired information into the Asset Book Name field. Enter "CORP". 30. Click in the Default Depreciation Account field. 31. Use the Default Depreciation Account field to populate the depreciation account for assets that do not have matching depreciation rows. The valid depreciation accounts are taken from those defined using the Depreciation Accounts page. Enter the desired information into the Default Depreciation Account field. Enter "681800". Page 51
56 32. Click the OK button. 33. Continue reviewing the remaining activity dimension levels and data sources. Click an entry in the Dimension Level column. Page 52
57 34. Review the Dimension Level Summarization page information. For this example, no changes will be made. Click the OK button. Page 53
58 35. Click an entry in the Data Source column. Page 54
59 36. Review the Data Source page information. For this example, no changes will be made. Click the OK button. 37. Click an entry in the Dimension Level column. Page 55
60 38. Review the Dimension Level Summarization page information. For this example, no changes will be made. Click the OK button. Page 56
61 39. Click an entry in the Data Source column. Page 57
62 40. The Source Scenario is a scenario (or multiple scenarios when you select Use Multiple Data Sources) you select that was defined within your scenario group, and serves as your seed data or budget base during the stage process. This data source scenario is the starting point for your budget and plan development process. Click the Source Scenario list. 41. Click the 2002Budget list item. 42. Click in the Incremental % field. 43. Use the Incremental % field to specify an increase or decrease to be applied using a percentage that is applied globally to the source scenario data that creates or seeds your budget base. The calculated result is what is distributed in the base budget to end users. If you leave the Incremental % blank, the system treats it as a zero percent increase or decrease factor, so the plan or budget base remains unchanged from the source scenario you select. When using multiple source scenarios, you may apply an incremental increase or decrease for each source you select. Enter the desired information into the Incremental % field. Enter "12.5". 44. Use Comparison Scenarios to select scenarios associated with the scenario group that you wish to use in conjunction with the specified line item scenario. These are scenarios that are used as a source for: methods, comparison in line item, additional seed, inquiry, and reporting. These scenarios will be ones end users can access when working with their proposed plan or budget, such as using them in conjunction with method bases, comparison during analysis and reporting. For staging, the source scenarios can that be used as additional budget base source. Click the Comparison Scenario list. 45. Click the 2002Actuals list item. 46. Use the Analysis Base to define how the comparison scenario is calculated. Click the Analysis Base list. 47. Click the Prior Year Actuals list item. Page 58
63 Training Guide 48. Select the Use as Additional Source check box to use the selected scenario to generate historical row combinations for your proposed plan or budget. The data staging process recognizes this flag. When used, rows in this scenario that do not exist in the Source Scenario will be created for every missing dimension combination, creating a zero amount base budget row Click the Use as Additional Source option. 49. Click the Add Row button. 50. Click the Comparison Scenario list. 51. Click the 2002Budget list item. 52. Click the Analysis Base list. 53. Click the Current Year Forecast list item. 54. Click the OK button. Page 59
64 55. Click an entry in the Dimension Level column. 56. Review the Dimension Level Summarization page information. For this example, no changes will be made. Click the OK button. 57. Click an entry in the Data Source column. 58. Click the Use Source Data option. 59. Click in the Asset Book Name field. 60. Enter the desired information into the Asset Book Name field. Enter "ACE". 61. Click in the Default Depreciation Account field. Page 60

65 Training Guide 62. Enter the desired information into the Default Depreciation Account field. Enter "681700". 63. Click the OK button. 64. Click the Line Item Defaults tab. 65. Use the Line Item Defaults panel to assign and review the planning method group defaults 66. Click in the Account Category field. 67. Enter an Account Category default for a line item activity. After you stage the activity scenario, end users can use the account category as a way to filter on data within their line item grid as a view option or for reporting. Enter the desired information into the Account Category field. Enter "SHARECATEGORY". Page 61

66 68. Use the Method Defaults link to navigate to the Assign Planning Method Defaults page. Click an entry in the Method Defaults column. 69. Use the Assign Planning Method Defaults page to assign planning method defaults to line-item activities by account, or account and an optional dimension. 70. Click in the From Account field. 71. Use the From Account field to enter the account range to which your assign a method and related defaults that apply. Values for the account dimension are based on the SetID used for the dimension. Enter the desired information into the From Account field. Enter "617000". 72. Click in the To Account field. 73. Use the To Account field to enter the ending range for your planning method defaults. Enter the desired information into the To Account field. Enter "617000". Page 62
67 Training Guide 74. Select the default Method ID (defined using the Method Group ID page and selected for the line item activity). Click the Method ID list. 75. Click the POSBUD list item. 76. Click the Add Row button. 77. Enter the desired information into the From Account field. Enter "681001". 78. Click in the To Account field. 79. Enter the desired information into the To Account field. Enter "682400". 80. Click the Method ID list. 81. Click the vertical scrollbar. 82. Click the ASSET list item. 83. Click the OK button. Page 63

68 84. Click the Security and tab. 85. Use the Security and panel to define and assign security groups and templates for specific actions for the activity scenario. 86. Click in the Security Group field. 87. Use the Security Group field to attach a security group to this activity. Security Groups define the relationship between a planning center, a user and a role assigned to that user. Enter the desired information into the Security Group field. Enter "SG110". 88. Click in the Security Group field. 89. Enter the desired information into the Security Group field. Enter "SG110". 90. Click in the Security Group field. 91. Enter the desired information into the Security Group field. Enter "SG110". 92. Click in the Security Group field. 93. Enter the desired information into the Security Group field. Enter "SG110". Page 64
69 94. Click the Save button. 95. You have successfully defined activity scenario combinations. End of Procedure. Defining Multicurrency Options Planning Models can be associated with a number of currencies. By default, Planning Models are created with the currency associated with the business unit used to create the model. Use the Currency Option tab to define the currency available to this planning model. In this topic, you will define multicurrency options for a planning model. Procedure 1. Begin by navigating to the Currency Options page. Click the Planning and Budgeting link. 2. Click the Planning and Budgeting Setup link. Page 65
70 3. Click the Planning Model link. 4. Click in the Planning Model ID field. 5. Enter the desired information into the Planning Model ID field. Enter "MODEL101". 6. Click the Search button. Page 66
71 7. Click the Currency Options tab. 8. Use the Currency Options page to define currency options for a multi-currency model. Select entry and target currency codes used in the planning model. 9. The Currency Options page is available when you select the Multi-Currency option on the Model page. Page 67
72 10. In this example, a single currency is defined for this planning model. Use the Add Row button to define more currencies for this planning model. Click the Add Row button. 11. The Currency Code field identifies the currency available to this planning model. Enter the desired information into the Currency Code field. Enter "CAD". 12. Use the Entry Currency option to designate the currency code to perform data entry. You can specify an unlimited number of entry currencies. If the transaction currency is not defined as an entry currency, the system translates it into the default currency during the data staging process. At the same time, the system maintains the original transaction currency so that you can export data to external applications with the original currency. Click the Entry Currency option. 13. Use the Target Currency option to designate the currency code as the one into which the system translates entry currency values. You can specify an unlimited number of target currencies. Click the Target Currency option. Page 68
73 14. Click the Save button. 15. You have successfully defined multicurrency options for a planning model. End of Procedure. Entering Notes for a Planning Model Enterprise Planning and Budgeting enables you to add notes about or for the planning model. In this topic, you will enter notes for a planning model. Procedure 1. Begin by navigating to the Model page. Click the Planning and Budgeting link. 2. Click the Planning and Budgeting Setup link. 3. Click the Planning Models link. Page 69
74 4. Click in the Planning Model ID field. 5. Enter the desired information into the Planning Model ID field. Enter "MODEL101". 6. Click the Search button. Page 70

75 7. Click the Notes tab. 8. Use the Notes page to add notes about or for the planning model. Page 71
76 9. Click in the Notes field. 10. Enter the desired information into the Notes field. Enter "Use this model for sales analysis.". 11. Click the Save button. 12. You have successfully entered notes for a planning model. End of Procedure. Copying a Planning Model Copy an existing planning model to use as a starting point for a new planning model, open the new planning model, and then modify the new model's parameters as needed. In this topic, you will copy a planning model. Procedure Page 72
77 1. Begin by navigating to the Model page. Click the Planning and Budgeting link. Training Guide 2. Click the Planning and Budgeting Setup link. 3. Click the Planning Models link. 4. Click in the Planning Model ID field. 5. Enter the desired information into the Planning Model ID field. Enter "MODEL101". 6. Click the Search button. 7. Use the Model page to define the planning model. On this page you will assign an activity group and a scenario group to the planning model. You can also create a new activity group and scenario group from this page. Page 73
78 8. Click the Copy Model button. 9. Use the Copy Model page to enter a Business Unit and Planning Model ID to create the new target model that you want to create. When creating a new model for a different business unit, you may want to use a one that shares the same SetID defaults. Otherwise, the new business unit model may require changes before it will pass model validation or run data staging. Page 74
79 10. Enter the desired information into the Business Unit field. Enter "US002". 11. Click in the Planning Model ID field. 12. Enter the desired information into the Planning Model ID field. Enter "MODEL102". 13. Click the OK button. 14. Notice the new planning model, with a new Planning Model ID, has been created with the same properties as the original model. Page 75
80 15. Click the Save button. 16. You have successfully created a new planning model using the copy feature. End of Procedure. Validating the Planning Model The Model Validator is a PeopleSoft Application Engine program that ensures that the planning model is set up correctly prior to staging the model. The Model Validator is a separate model process that you can run prior to data staging. You can also run the Model Validator as an optional process called within the dating staging process. The Model Validator verifies that the activity and scenario rules are set up accurately in the planning model prior to staging. During data staging, the system assumes that data as been accurately prepared and validated. The validation process should be run when you make changes to a model. In this topic, you will validate the planning model. Procedure Page 76
81 1. Begin by navigating to the Model Validation page. Click the Planning and Budgeting link. 2. Click the Planning and Budgeting Setup link. 3. Click the Process Model link. 4. Click the Model Validator link. Page 77
82 5. You can run this process by searching for an existing Run Control ID or you can add a new value. Creating a Run Control ID that is relevant to the process may help you remember it for future use. Click the Add a New Value tab. 6. A Run Control ID is an identifier that, when paired with your User ID, uniquely identifies the process you are running. The Run Control ID defines parameters that are used when a process is run. This ensures that when a process runs in the background, the system does not prompt you for additional values. Enter the desired information into the Run Control ID field. Enter "VAL_MODEL101". 7. Click the Add button. 8. Use the Model Validation page to enter the request parameters. These parameters will be used to define the processing rules and data to be included when the process is run. Page 78
83 9. Click in the Description field. 10. Enter the desired information into the Description field. Enter "Validate MODEL101". 11. Click in the Business Unit field. 12. Use the Business Unit field to define the business unit associated with the model to be validated. Enter the desired information into the Business Unit field. Enter "US002". 13. Click in the Planning Model ID field. 14. Use the Planning Model ID field to define the planning model to be validated. Enter the desired information into the Planning Model ID field. Enter "MODEL101". 15. Click in the Scenario field. 16. Use the Scenario field to define the planning model scenario being validated. Enter the desired information into the Scenario field. Enter "2007SCE101". Page 79
84 17. Use the Activities option to validate all activities within the model. Click the All Activities option. 18. Click the Save button. 19. Click the Run button. 20. Use the Process Scheduler Request page to enter or update parameters, such as server name and process output format. 21. You must select a Server Name to identify the server on which the process will run. If you use the same Run Control ID for subsequent processes, the server name that you last used will default in this field. Click the Server Name list. 22. Click the PSNT list item. Page 80
85 Training Guide 23. Use the Type field to select the type of output you want to generate for this job. Your four choices are File, Printer, , or Web. 24. Use the Format field to define the output format for the report. The values are dependent upon the Process Type you have selected. In this example, the default value is TXT. 25. Click the OK button. 26. Notice the Process Instance number appears. This number helps you identify the process you have run when you check the status. 27. Click the Process Monitor link. 28. Use the Process List page to view the status of submitted process requests. Page 81
86 29. The current status of the process is Queued. The process is finished when the status is Success. Continue to click the Refresh button until the status is Success. Click the Refresh button. 30. Notice the status is now Success. 31. Next, you will navigate to the Model Validator Report page to view the results of the model validation. Click the Model Validator Report link. Page 82
87 32. Click in the Planning Model ID field. 33. Enter the desired information into the Planning Model ID field. Enter "MODEL101". 34. Click the Search button. 35. Notice there is a separate validation report for each model activity. Click the ASSETS link. 36. Use the Model Validation Report page to verify that there were no exceptions or errors found in the planning model. 37. You have successfully validated a planning model. End of Procedure. Staging a Scenario and Activity Data Staging is a PeopleSoft application engine program that processes and places source data into tables that are used by activities for preparing plans and budgets. When data staging takes place, the system creates a copy of the ACE model and formulas for line item activities. In this topic, you will review the activity overview and stage a scenario and activity. Procedure Page 83
88 1. Begin by navigating to the Data Staging page. Click the Planning and Budgeting link. 2. Click the Planning and Budgeting Setup link. 3. Click the Data Staging link. Page 84
89 4. You can run this process by searching for an existing Run Control ID or you can add a new value. Creating a Run Control ID that is relevant to the process may help you remember it for future use. Click the Add a New Value tab. 5. A Run Control ID is an identifier that, when paired with your User ID, uniquely identifies the process you are running. The Run Control ID defines parameters that are used when a process is run. This ensures that when a process runs in the background, the system does not prompt you for additional values. Enter the desired information into the Run Control ID field. Enter "STAGE_MODEL101". 6. Click the Add button. 7. Use the Data Staging page to enter the request parameters. These parameters will be used to define the processing rules and data to be included when the process is run. Page 85
90 8. Click in the Description field. 9. Enter the desired information into the Description field. Enter "Stage MODEL101". 10. Click in the Business Unit field. 11. Use the Business Unit field to define the business unit of the model to be staged. Enter the desired information into the Business Unit field. Enter "US002". 12. Click in the Planning Model ID field. 13. Use the Planning Model ID field to define the model to be staged. Enter the desired information into the Planning Model ID field. Enter "MODEL101". 14. Click in the Scenario field. 15. Use the Scenario field to define the scenario of the model to be staged. Enter the desired information into the Scenario field. Enter "2007SCE1012". Page 86
91 Training Guide 16. Data can be staged by the model activity. Use the All Activities option to stage the data for all activities for the model. Click the All Activities option. 17. Use the Staging Type field for Partial or Standard Staging options. Partial Staging enables you to select the check boxes next to the specific functions that you want performed. Standard Staging automatically selects and performs all functions. For this example, use the default value. 18. Use the Process Type list to select the desired type of process. Parallel by Activity enables you to process the activities in parallel. Single Processing processes budget data to staging tables in a single processing instance. Click the Process Type list. 19. Click the Parallel by Activity list item. 20. Click the Save button. 21. Click the Run button. 22. Use the Process Scheduler Request page to enter or update parameters, such as server name and process output format. Page 87
92 23. You must select a Server Name to identify the server on which the process will run. If you use the same Run Control ID for subsequent processes, the server name that you last used will default in this field. Click the Server Name list. 24. Click the PSNT list item. 25. Use the Type field to select the type of output you want to generate for this job. Your four choices are File, Printer, , or Web. 26. Use the Format field to define the output format for the report. The values are dependent upon the Process Type you have selected. In this example, the default value is TXT. 27. Click the OK button. 28. Notice the Process Instance number appears. This number helps you identify the process you have run when you check the status. Page 88

93 29. Click the Process Monitor link. 30. Use the Process List page to view the status of submitted process requests. Page 89
94 31. The current status of the process is Queued. The process is finished when the status is Success. Continue to click the Refresh button until the status is Success. Click the Refresh button. 32. Notice the status is now Success. 33. You have successfully staged a scenario and activity. End of Procedure. Using the Model Manager Enterprise Planning and Budgeting enables you to manage multiple models using the Model Manager pages. In this topic, you will review the Model Manager. Procedure Page 90
95 1. Begin by navigating to the Model Manager page. Click the Planning and Budgeting link. 2. Click the Planning and Budgeting Setup link. 3. Click the Setup Model link. 4. Click the Model Manager link. 5. Use the Model Manager page to determine which models you own and view the status of each model. Also, use this page to review process information and errors that are associated with scenarios or activities within your model. 6. Use the Planning Model links to open the corresponding model. 7. Use the Manage Scenarios links to open the Scenario Manager for the corresponding model. 8. This concludes the Using the Model Manager topic. End of Procedure. Releasing the Planning Model The planning model must be released to the end-users. Planning models are released from the Scenario Manager page. Once released, end users can see their work (planning centers) from the My Planning Workspace page. In this topic, you will release a planning model. Page 91
96 Procedure 1. Begin by navigating to the Scenario Manager page. Click the Planning and Budgeting link. 2. Click the Planning and Budgeting Setup link. 3. Click the Setup Model link. Page 92

97 4. Click the Scenario Manager link. Page 93
98 5. Enter the desired information into the Business Unit field. Enter "US002". 6. Click in the Planning Model ID field. 7. Enter the desired information into the Planning Model ID field. Enter "MODEL101". 8. Click the Search button. 9. Use the Scenario Manager page to manage activity scenario status and progress by planning model. 10. Use the Activity links to open the corresponding activity. 11. Use the Scenario links to open the corresponding scenarios. 12. The Status field indicates whether the corresponding activity is initiated, on hold, released, or staged. Click the Status list. 13. Click an entry in the list. Page 94
99 14. Click the Status list. 15. Click an entry in the list. 16. Click the Status list. 17. Click an entry in the list. 18. Click the Status list. 19. Click an entry in the list. Page 95

100 20. By selecting the option and clicking the Go button, you can perform the following processes on a scenario: Manage Locks - to review or release planning center locks. Process Summary - to view stage functions. State - to import and stage activities and scenarios. Update Stage - to validate and update staged models. For this example, you will not change the options. 21. Click the Save button. 22. You have successfully released a planning model. End of Procedure. Using Flexible Formulas Planning and Budgeting has a formula-writing feature, FLEX, that enables you to define your own calculations. With flexible formulas you can be creative and imaginative when developing models that adhere to both internal and statutory accounting policies, as well as industry best practices. Typically, a coordinator defines these 'free-form' formulas used within a scenario, that can then be associated with an account as a default, or available to end-users to pick from during the preparation of their plans or budgets. Flexible formulas apply only within or across line-item activities in your scenarios. Page 96
101 Upon completion of this lesson, you will be able to: Define flexible formulas. Define a flexible formula source. Define a flexible formula. Define a flexible formula with a new source. Define a flexible formula using the IF function. Staging a flexible formula. Updating a flexible formula. Understanding Flexible Formulas Planning and Budgeting requires a general rule, formula, or method that specifies how to calculate each value in an activity. The method defines how the system calculates the budget amount for the line or how the system derives the budget amount if a calculation is unnecessary. Flexible formulas are formulas that you can use as methods in your line-item activities. In this topic, you will learn about flexible formulas. Procedure Page 97

102 1. Flexible formulas are formulas that you can use as methods in your line-item activities. You create flexible formulas using a three-step wizard for a method called FLEX, that includes built-in validations. 2. Typically, a coordinator defines the flexible formulas to be used within an activity and scenario. They can be associated with an account as a default. After they are created and staged, they are available for preparers to select during the preparation of their plans or budgets. Flexible formulas apply only within or across line-item activities in your scenarios. They cannot be used with position or asset activities. 3. You can use the flexible formula method for: Top-down, bottom-up, and forecast scenario types. Historical scenarios as a source for calculating scenarios or projections. (Note that historical scenarios are read-only.) Within and between line-item activities. You cannot use flexible formulas with position and asset activities. Page 98
103 Training Guide 4. This diagram displays the steps to define flexible formulas. First, you define the source and driver for the flexible formula. You complete several of the required steps to define flexible formulas using the wizard, including: Defining general properties. Building the expression. Validating the formula. Reviewing the formula. 5. You can also define the driver and source while defining the flexible formula. After these steps are completed, you then optionally assign a flexible formula ID to an account as a default and stage the formula. 6. Prior to Planning & Budgeting 8.9, many customer implementations required customizations to get the modeling methods and formulas that were needed to support their budgeting calculations. All of the original Budgeting 8.8 methods are still available in Planning & Budgeting 8.9. The new methods in 8.9 include FLEX and LINEITEM. 7. This is an example of a typical flexible formula. Flexible formulas contain functions, sources, drivers, and mathematical expressions to perform against those components. 8. This concludes the understanding flexible formulas topic. End of Procedure. Page 99
104 Defining a Flexible Formula Source Flexible Formula Sources are data sources used in the flexible formulas by planning model and activity scenario. Sources are also referred to as regions or data slices. You can define a source at a roll-up level. Sources act like a variable in a formula expression. Observe the following guidelines when defining flexible formula sources: When you build a flexible formula, you must define its components as valid sources or drivers. You can use existing sources or you can define them as you build your formula. A source can be used by multiple flexible formulas. A source is a user-defined range of data within a single line-item activity scenario. In this topic, you will define a flexible formula source. Procedure 1. Begin by navigating to the Flexible Formula Source page. Click the Planning and Budgeting link. 2. Click the Planning and Budgeting Setup link. 3. Click the Flexible Formula Sources link. Page 100
105 4. Click the Add a New Value tab. 5. Enter the desired information into the Business Unit field. Enter "US002". 6. Click in the Planning Model ID field. 7. Enter the desired information into the Planning Model ID field. Enter "MODEL101". 8. Click in the Scenario field. 9. Enter the desired information into the Scenario field. Enter "2007SCE101". 10. Click in the Flexible Formula Source field. 11. Enter the desired information into the Flexible Formula Source field. Enter "EE101". 12. Click the Add button. 13. Use the Flexible Formula Source page to define data sources by the planning model and activity scenario for flexible formulas. Page 101
106 14. Click in the Activity field. 15. Use the Activity field to define the activity that this flexible formula source corresponds to. Enter the desired information into the Activity field. Enter "REV101". 16. Click in the Description field. 17. Enter the desired information into the Description field. Enter "Employee Related Revenue 101". 18. Use the Dimension Member Selection group box to indicate the source (or inputs) from each dimension that is associated with the activity scenario in which you are defining a source and formula. 19. Use the Selection Options field to define your dimension options. Click the Selection Options list. Page 102
107 Training Guide 20. Selection Options include: All Members: Sources all values associated with the dimension. Single Member: Enables you to define one value used as the source. You enter this member under the last column called From Value. Same as Target: Indicates that the source value/member is the same value as the target or destination when the formula is used. Multiple Members: Requires you to define which values are to be used as the source. Click the Multiple Members list item. 21. Use the Select Members link to navigate to the Dimension Member Selection page. Click the Selected Members link. 22. Use the Dimension Member Selection page to define dimension members by using a tree or entering a range of values. 23. For a dimension that uses the Multiple Members option, you define members either By Tree or By Value. For this example, accept the default of By Value. Page 103

108 24. Click in the From Value field. 25. The From Value and To Value fields display when you select the By Value option for member selection. Specify a range or values for the selected members. Add rows as needed. Enter the desired information into the From Value field. Enter "610001". 26. Click in the To Value field. 27. The To Value field is automatically populated with the value from the From Value field. Use the To Value field to specify an ending range for the selected members. Enter the desired information into the To Value field. Enter "616000". 28. Click the OK button. 29. Click the Save button. Page 104
109 30. You have successfully defined a flexible formula source. End of Procedure. Training Guide Defining a Flexible Formula Flexible formulas are formulas that you can use as methods in your line-item activities. The method defines how the system calculates the budget amount for the line or how the system derives the budget amount if a calculation is unnecessary. In this topic, you will define a flexible formula. Procedure 1. Begin by navigating to the Define General Properties page. Click the Planning and Budgeting link. 2. Click the Planning and Budgeting Setup link. 3. Click the Flexible Formulas link. Page 105
110 4. Click the Add a New Value tab. 5. Click in the Planning Model ID field. 6. Enter the desired information into the Planning Model ID field. Enter "MODEL101". 7. Click in the Activity field. 8. Enter the desired information into the Activity field. Enter "REV101". 9. Click in the Scenario field. 10. Enter the desired information into the Scenario field. Enter "2007SCE101". 11. Click in the Flexible Formula ID field. 12. Enter the desired information into the Flexible Formula ID field. Enter "EE5101". 13. Click the Add button. 14. The Define General Properties page is the first step in the Flexible Formula Wizard. Use this page to define a description, status, owner, and notes about the formula being created. Page 106
111 15. Click in the Description field. 16. Use the Description field to enter a short description of this formula. Consider using a meaningful description, since this is the description the end users will see when picking from a list of formula ID's that have been created. Enter the desired information into the Description field. Enter "5% of Employee Revenue 101". 17. The Status field indicates whether this formula is active or inactive. The Inactive status can be used when you no longer require the formula for the activity scenario in a planning model. For this example, accept the default status of Active. 18. Click in the Notes field. 19. Enter the desired information into the Notes field. Enter "Percentage paid to employee bonus plan.". 20. Click the Next > button. 21. The Define Expression page is the second step in the Flexible Formula Wizard. Use this page to define the formula. Page 107
112 22. Use the Formula Expression area to define your expression. Type your expression directly into the expression box, or use the available insert and operator buttons to insert into the expression box. The expression builder supports all mathematical and comparison operators as well as the Boolean operators like IF, AND, OR, and NOT. 23. Click in the Expression field. 24. Use the Expression field to enter your flexible formula. Enter the desired information into the 5% of Employee Revenue 101 = field. Enter "EE101*.05". 25. Use the Validate pushbutton to verify that the expression parameters and syntax are valid, that the built-in function, if you have inserted one into the expression, exists, and that the type of function parameters are properly bound. Click the Validate button. 26. Click the Next > button. 27. The Review page is the third step in the Flexible Formula Wizard. Use the Review page to verify the formula you created. This page can also be used to edit existing General Formula Properties or Expressions. Page 108
113 28. Review the formula information. If the information is not correct, click the Back button to return to the Define Expression page to correct and validate. Click the Save button. 29. The Save Confirmation page displays the save was successful. This page also enables you to create another formula, continue editing the current formula, or go to the Assign Planning Method Defaults page. 30. You have successfully defined a flexible formula. End of Procedure. Defining a Flexible Formula with a New Source Flexible formulas are formulas that you can use as methods in your line-item activities. The method defines how the system calculates the budget amount for the line or how the system derives the budget amount if a calculation is unnecessary. In this topic, you will define a flexible formula requiring you create a new flexible formula source. Procedure Page 109
114 1. Begin by navigating to the Define General Properties page. Click the Planning and Budgeting link. 2. Click the Planning and Budgeting Setup link. 3. Click the Flexible Formulas link. Page 110
115 4. Click the Add a New Value tab. 5. Click in the Planning Model ID field. 6. Enter the desired information into the Planning Model ID field. Enter "MODEL101". 7. Click in the Activity field. 8. Enter the desired information into the Activity field. Enter "REV101". 9. Click in the Scenario field. 10. Enter the desired information into the Scenario field. Enter "2007SCE101". 11. Click in the Flexible Formula ID field. 12. Enter the desired information into the Flexible Formula ID field. Enter "SHIP2101". 13. Click the Add button. 14. The Define General Properties page is the first step in the Flexible Formula Wizard. Use this page to define a description, status, owner, and notes about the formula being created. Page 111

116 15. Click in the Description field. 16. Use the Description field to enter a short description of this formula. Consider using a meaningful description, since this is the description the end users will see when picking from a list of formula ID's that have been created. Enter the desired information into the Description field. Enter "Shipping revenue 101". 17. The Status field indicates whether this formula is active or inactive. The Inactive status can be used when you no longer require the formula for the activity scenario in a planning model. For this example, accept the default status of Active. 18. Click in the Notes field. 19. Enter the desired information into the Notes field. Enter "Shipping revenue based on a percentage of history.". 20. Click the Next > button. 21. The Define Expression page is the second step in the Flexible Formula Wizard. Use this page to define the formula's expression. Page 112

117 Training Guide 22. Use the Formula Expression area to define your expression. Type your expression directly into the expression box, or use the available insert and operator buttons to insert into the expression box. The expression builder supports all mathematical and comparison operators as well as the Boolean operators like IF, AND, OR, and NOT. 23. Click in the Expression field. 24. Use the Expression field to define your formula. Enter the desired information into the Expression field. Enter "SHIP03101*1.5". 25. Use the Validate button to verify that the expression parameters and syntax are valid, that the built-in function, if you have inserted one into the expression, exists, and that the type of function parameters are properly bound. Click the Validate button. 26. When you click the Validate button, if the system does not recognize a source or driver, it populates the grid in the Expression Components box below with that source or driver, where you can resolve it. Page 113
118 27. Use the Type list to designate the Source or Driver for this component. Click the Type list. 28. Click the Source list item. 29. If you don't find a relevant source or driver in the prompt list, click the Create New button. For a source type, the system takes you to the Flexible Formula Source page where you can define a new source. For a driver type, the system takes you to the Method Driver page where you can define a new driver ID. Click the Create New button. 30. Enter a new name for the Flexible Formula Source you are creating. Click in the Flexible Formula Source field. 31. Enter the desired information into the Flexible Formula Source field. Enter "SHIP03101". Page 114
119 32. Click the Add button. 33. Use the Flexible Formula Source page to define data sources for flexible formulas by planning model and activity scenario. 34. Click in the Description field. 35. Enter the desired information into the Description field. Enter "Shipping revenue ". 36. Use the Use Comparison Scenarios check box to display the Analysis Base field in which you can choose a source for your comparison. Click the Use Comparison Scenarios option. Page 115
120 37. The Analysis Base field is used to choose a source for your comparison scenarios. For example, some of the options might include: Current Year Budget, Current Year Forecast, Prior Year Actuals, Year To Date Actuals, or an Analysis Base defined by the coordinator. The Analysis Bases available in the drop-down will be only those defined in the Comparison Scenarios grid on the Data Source page for the line item activity scenario. We provide this check box to span across scenarios. Click the Analysis Base list. 38. Click the Current Year Forecast list item. 39. Use the Dimension Member Selection box to indicate the source (or inputs) from each dimension that is associated with the activity scenario in which you are defining a source and formula. 40. For each listed dimension specify the Selection Options. Click the Selection Options list. 41. Selection Options include: All Members: Sources all values associated with the dimension. Single Member: Enables you to define one value used as the source. You enter this member under the last column called From Value. Same as Target: Indicates that the source value/member is the same value as the target or destination when the formula is used. Multiple Members: Requires you to define which values are to be used as the source. Click the Single Member list item. 42. The From Value field defines the source value for the Single Member option. Click in the From Value field. 43. Enter the desired information into the From Value field. Enter "650061". 44. Click the Apply button. 45. Click the OK button. Page 116
121 46. Click the Save button. 47. The Review page is the third step in the Flexible Formula Wizard. Use the Review page to verify the formula you created. This page can also be used to edit existing General Formula Properties or Expressions. Page 117
122 48. Click the Save button. 49. The Save Confirmation page displays the save was successful. This page also enables you to create another formula, continue editing the current formula, or go to the Assign Planning Method Defaults page. 50. You have successfully defined a flexible formula with a new source. End of Procedure. Defining a Flexible Formula Using the IF Function Flexible formulas are formulas that you can use as methods in your line-item activities. The method defines how the system calculates the budget amount for the line or how the system derives the budget amount if a calculation is unnecessary. In this topic, you will define a flexible formula requiring you incorporate the IF function. Procedure Page 118
123 1. Begin by navigating to the Define General Properties page. Click the Planning and Budgeting link. 2. Click the Planning and Budgeting Setup link. 3. Click the Flexible Formulas link. Page 119
124 4. Click the Add a New Value tab. 5. Click in the Planning Model ID field. 6. Enter the desired information into the Planning Model ID field. Enter "MODEL101". 7. Click in the Activity field. 8. Enter the desired information into the Activity field. Enter "REV101". 9. Click in the Scenario field. 10. Enter the desired information into the Scenario field. Enter "2007SCE101". 11. Click in the Flexible Formula ID field. 12. Enter the desired information into the Flexible Formula ID field. Enter "COM101". 13. Click the Add button. 14. The Define General Properties page is the first step in the Flexible Formula Wizard. Use this page to define a description, status, owner, and notes about the formula being created. Page 120
125 15. Click in the Description field. 16. Enter the desired information into the Description field. Enter "Commission Revenue 101". 17. The Status field indicates whether this formula is active or inactive. The Inactive status can be used when you no longer require the formula for the activity scenario in a planning model. For this example, accept the default status of Active. 18. Click in the Notes field. 19. Enter the desired information into the Notes field. Enter "Commission revenue calculation.". 20. Click the Next > button. 21. The Define Expression page is the second step in the Flexible Formula Wizard. Use this page to define the formula's expression. 22. Use the Formula Expression area to define your expression. Type your expression directly into the expression box, or use the available insert and operator buttons to insert into the expression box. The expression builder supports all mathematical and comparison operators as well as the Boolean operators like IF, AND, OR, and NOT. Page 121
126 23. Use the Type field to incorporate into the expression a Driver, Function, or Source. Click the Type list. 24. Click the Function list item. 25. Click in the Text field. 26. Use the Text field to define your function. Enter the desired information into the Texy field. Enter "IF". 27. Use the Insert into Expression button to append the function or driver or source at the end of the text in the expression box. To minimize errors, the preferred method for inserting a function into the expression box is to look up the function and use the insert button, rather than typing it in. Click the Insert into Expression button. 28. Notice that the formula expression has been populated. You would now replace the expression variables with your formula values. For example, you may replace CONDITION with PROJREV101<= For this example, the expression text has been completed for you. Page 122
127 Training Guide 30. Use the Validate button to verify that the expression parameters and syntax are valid, that the built-in function, if you have inserted one into the expression, exists, and that the type of function parameters are properly bound. Click the Validate button. 31. When you click the Validate button, if the system does not recognize a source or driver, it populates the grid in the Expression Components box below with that source or driver, where you can resolve it. 32. Use the Type field to designate the Source or Driver for this component. Click the Type list. 33. Click the Source list item. 34. Use the ID field to choose a relevant source or driver for the component. For this example, you will not choose an existing ID, you will create a new one. 35. If you don't find a relevant source or driver in the prompt list, click the Create New button. For a source type, the system takes you to the Flexible Formula Source page where you can define a new source. For a driver type, the system takes you to the Method Driver page where you can define a new driver ID. Click the Create New button. Page 123
128 36. Click in the Flexible Formula Source field. 37. Enter the desired information into the Flexible Formula Source field. Enter "PROJREV101". 38. Click the Add button. 39. Use the Flexible Formula Source page to define data sources for flexible formulas by planning model and activity scenario. Page 124
129 40. Click in the Description field. 41. Enter the desired information into the Description field. Enter "Project Revenue Account 101". 42. Use the Dimension Member Selection group box to indicate the source (or inputs) from each dimension that is associated with the activity scenario in which you are defining a source and formula. 43. For each listed dimension specify the Selection Options. Click the Selection Options list. 44. Selection Options include: All Members: Sources all values associated with the dimension. Single Member: Enables you to define one value used as the source. You enter this member under the last column called From Value. Same as Target: Indicates that the source value/member is the same value as the target or destination when the formula is used. Multiple Members: Requires you to define which values are to be used as the source. Click the Single Member list item. Page 125
130 45. Click in the From Value field. 46. The From Value field defines the source value for the Single Member option. Enter the desired information into the From Value field. Enter "630000". 47. Click the Apply button. 48. Click the OK button. 49. Click the Next > button. 50. The Review page is the third step in the Flexible Formula Wizard. Use the Review page to verify the formula you created. This page can also be used to edit existing General Formula Properties or Expressions. Page 126
131 51. Review the formula information. If the information is not correct, click the Back button to return to the Define Expression page to correct and validate. Click the Save button. 52. The Save Confirmation page displays the save was successful. This page also enables you to create another formula, continue editing the current formula, or go to the Assign Planning Method Defaults page. 53. You have successfully defined a flexible formula using the IF function. End of Procedure. Staging a Flexible Formula All flexible formulas are automatically staged if they are defined prior to the data stage process. You need to run the stage formula option only if formulas are revised or created after data staging. In this topic, you will stage a flexible formula. Procedure Page 127
132 1. Begin by navigating to the Scenario Manager page. Click the Planning and Budgeting link. 2. Click the Planning and Budgeting Setup link. 3. Click the Setup Model link. 4. Click the Scenario Manager link. Page 128
133 5. Enter the desired information into the Business Unit field. Enter "US002". 6. Click in the Planning Model ID field. 7. Enter the desired information into the Planning Model ID field. Enter "MODEL101". 8. Click the Search button. 9. Use the Scenario Manager page to manage activity scenario status and progress by planning model. 10. Updated activities must be re-staged. To determine if an activity requires re-staging, review the Formulas Require Re-Staging column. For this example, notice activity Revenue 101 is set to Yes, indicating you must restage this activity. Page 129
134 11. The Status field enables you to perform actions against individual activities. To stage a formula for an activity, you must change the status to On Hold. Click the Status list. 12. Click the On Hold list item. 13. To stage a flexible formula, you must change the corresponding field to stage formulas. Click the list. 14. Click the Stage Formulas list item. 15. Click the Save button. 16. Clicking the Go button performs the selected action. Click the Go button. Page 130
135 17. After the formula has been staged, change the status to Released. Click in the Password field. Page 131
136 18. Click the Released list item. 19. Clicking the Go button when the activity has been released enables you to view the process summary and confirm that the formulas were properly staged. Click the Go button. 20. Use the Process Summary page to review processes that were run against the planning model. Page 132

137 21. Once you have reviewed the formula staging, click the Cancel button to close the page. Click the vertical scrollbar. 22. Click the Cancel button. 23. You have successfully staged a flexible formula. End of Procedure. Updating a Flexible Formula Planning and Budgeting enables you to update existing flexible formulas. You have the ability to copy existing formulas. Update enables you to make minor changes to formulas and apply those changes to your planning model. In this topic, you will update a flexible formula. Procedure Page 133
138 1. Begin by navigating to the Review page. Click the Planning and Budgeting link. 2. Click the Planning and Budgeting Setup link. 3. Click the Flexible Formulas link. Page 134
139 4. Click in the Flexible Formula ID field. 5. Enter the desired information into the Flexible Formula ID field. Enter "EE5101". 6. Click the Search button. 7. The Review page is the third step in the Flexible Formula Wizard. Use the Review page to verify the formula you created. This page can also be used to edit existing General Formula Properties or Expressions. Page 135

140 8. Use the Edit buttons to open the corresponding Flexible Formula component. Click the Edit button. 9. The Define Expression page is the second step in the Flexible Formula Wizard. Use this page to define the formula's expression. Page 136
141 10. Click in the Expression field. 11. Use the Expression field to type your expression into the formula. Enter the desired information into the Expression field. Enter "EE101*.055". 12. Click the Save button. 13. You have successfully updated a flexible formula. Whenever a flexible formula is updated, it must be re-staged. End of Procedure. Updating the Planning Model There are several ways to update your planning model. Once updated, you will need to run the Model Validator process. When updating a planning model, the following procedures will be run. Upon completion of this lesson, you will be able to: Copy the ACE model. Run model calculations. Run combination data validation. Update driver parameters. Copying the ACE Model The Copy ACE Model process is performed during Data Staging process. When you run the Copy ACE Model process, the system regenerates the Analytic Calculation Engine (ACE) model required to use your line item activities and analysis reports. Typically, it will not be necessary to rerun it after your activities and scenarios have been staged and released. Page 137
142 You may find it necessary to run this process when: There is an ACE model update for the Planning and Budgeting application. You have created your own custom configuration. When running the Copy ACE Model process, note the following: There should be no locks against activities and scenarios. Activities and scenarios status should be set to On Hold. In this topic, you will copy the ACE model. Procedure 1. Begin by navigating to the Copy ACE Model page. Click the Planning and Budgeting link. 2. Click the Planning and Budgeting Setup link. 3. Click the Copy ACE Model link. Page 138
143 4. You can run this process by searching for an existing Run Control ID or you can add a new value. Creating a Run Control ID that is relevant to the process may help you remember it for future use. Click the Add a New Value tab. 5. A Run Control ID is an identifier that, when paired with your User ID, uniquely identifies the process you are running. The Run Control ID defines parameters that are used when a process is run. This ensures that when a process runs in the background, the system does not prompt you for additional values. Enter the desired information into the Run Control ID field. Enter "COPY MODEL". 6. Click the Add button. 7. Use the Copy ACE Model page to enter the request parameters. These parameters will be used to define the processing rules and data to be included when the process is run. Page 139
144 8. Click in the Description field. 9. Enter the desired information into the Description field. Enter "Copy MODEL101". 10. Click in the Business Unit field. 11. Enter the desired information into the Business Unit field. Enter "US002". 12. Click in the Planning Model ID field. 13. Enter the desired information into the Planning Model ID field. Enter "MODEL101". 14. Click in the Scenario field. 15. Enter the desired information into the Scenario field. Enter "2007SCE101". 16. Click the All Activities option. 17. Click the Save button. Page 140
145 18. Click the Run button. 19. Use the Process Scheduler Request page to enter or update parameters, such as server name and process output format. 20. You must select a Server Name to identify the server on which the process will run. If you use the same Run Control ID for subsequent processes, the server name that you last used will default in this field. Click the Server Name list. 21. Click the PSNT list item. 22. Use the Type field to select the type of output you want to generate for this job. Your four choices are File, Printer, , or Web. 23. Use the Format field to define the output format for the report. The values are dependent upon the Process Type you have selected. In this example, the default value is TXT. Page 141
146 24. Click the OK button. 25. Notice the Process Instance number appears. This number helps you identify the process you have run when you check the status. 26. Click the Process Monitor link. 27. Use the Process List page to view the status of submitted process requests. Page 142

147 28. The current status of the process is Queued. The process is finished when the status is Success. Continue to click the Refresh button until the status is Success. Click the Refresh button. 29. Notice the status is now Success. 30. You have successfully copied the ACE model. End of Procedure. Running Model Recalculations The Model Recalculation process calculates and distributes data throughout the planning model. The system recalculates the data for multiple planning center versions, scenarios, and activities, simultaneously. Whenever you enter new information or change a budget figure, the system recalculates the data in your planning model. As a preparer, when making line item modifications at the lowest planning center level in the model, the recalculations take place immediately because the budget changes are isolated within the planning center. When using position and asset budgeting to make modifications that affect multiple planning centers, or to generate new dimension combination rows from details into line-item budgets, you run the Model Recalculation process to update the model. In this topic, you will run the model recalculation process. Procedure Page 143
148 1. Begin by navigating to the Model Recalculation page. Click the Planning and Budgeting link. 2. Click the Planning and Budgeting Setup link. 3. Click the Process Model link. 4. Click the Model Recalculation link. Page 144
149 5. You can run this process by searching for an existing Run Control ID or you can add a new value. Creating a Run Control ID that is relevant to the process may help you remember it for future use. Click the Add a New Value tab. 6. A Run Control ID is an identifier that, when paired with your User ID, uniquely identifies the process you are running. The Run Control ID defines parameters that are used when a process is run. This ensures that when a process runs in the background, the system does not prompt you for additional values. Enter the desired information into the Run Control ID field. Enter "MODELRECALC". 7. Click the Add button. 8. Use the Model Recalculation page to enter the request parameters. These parameters will be used to define the processing rules and data to be included when the process is run. Page 145

150 9. Click in the Description field. 10. Enter the desired information into the Description field. Enter "Model Recalculation 101". 11. Click in the Business Unit field. 12. Enter the desired information into the Business Unit field. Enter "US002". 13. Click in the Planning Model ID field. 14. Enter the desired information into the Planning Model ID field. Enter "MODEL101". 15. Click the Save button. 16. Click the Run button. 17. Use the Process Scheduler Request page to enter or update parameters, such as server name and process output format. Page 146
151 18. You must select a Server Name to identify the server on which the process will run. If you use the same Run Control ID for subsequent processes, the server name that you last used will default in this field. Click the Server Name list. 19. Click the PSNT list item. 20. Use the Type field to select the type of output you want to generate for this job. Your four choices are File, Printer, , or Web. 21. Use the Format field to define the output format for the report. The values are dependent upon the Process Type you have selected. In this example, the default value is TXT. 22. Click the OK button. 23. Notice the Process Instance number appears. This number helps you identify the process you have run when you check the status. Page 147
152 24. Click the Process Monitor link. 25. Use the Process List page to view the status of submitted process requests. Page 148
153 26. The current status of the process is Queued. The process is finished when the status is Success. Continue to click the Refresh button until the status is Success. Click the Refresh button. 27. Notice the status is now success. 28. You have successfully run the model recalculation. End of Procedure. Running Combination Data Validation When you run the Combination Data Validation process, the system uses combination edit rules to validate against line item activities that have the Enforce Budget flag enabled for the activity scenario on the Line Item Default tab in the planning model. When using control budget types, the validation also occurs against the commitment control rules. In this topic, you will run the combination data validation. Procedure Page 149
154 1. Begin by navigating to the Combination Data Validation page. Click the Planning and Budgeting link. 2. Click the Planning and Budgeting Setup link. 3. Click the Process Model link. 4. Click the Combination Data Validation link. Page 150
155 5. You can run this process by searching for an existing Run Control ID or you can add a new value. Creating a Run Control ID that is relevant to the process may help you remember it for future use. Click the Add a New Value tab. 6. A Run Control ID is an identifier that, when paired with your User ID, uniquely identifies the process you are running. The Run Control ID defines parameters that are used when a process is run. This ensures that when a process runs in the background, the system does not prompt you for additional values. Enter the desired information into the Run Control ID field. Enter "DATAVALIDATION". 7. Click the Add button. 8. Use the Combination Data Validation page to enter the request parameters. These parameters will be used to define the processing rules and data to be included when the process is run. Page 151
156 9. Click in the Description field. 10. Enter the desired information into the Description field. Enter "Data validation MODEL101". 11. Click in the Business Unit field. 12. Enter the desired information into the Business Unit field. Enter "US002". 13. Click in the Planning Model ID field. 14. Enter the desired information into the Planning Model ID field. Enter "MODEL101". 15. Click in the Scenario field. 16. Enter the desired information into the Scenario field. Enter "2007SCE101". 17. Click the All Activities option. 18. Click the Save button. Page 152
157 19. Click the Run button. 20. Use the Process Scheduler Request page to enter or update parameters, such as server name and process output format. 21. You must select a Server Name to identify the server on which the report/process will run. If you use the same Run Control ID for subsequent processes, the server name that you last used will default in this field. Click the Server Name list. 22. Click the PSNT list item. 23. Use the Type field to select the type of output you want to generate for this job. Your four choices are File, Printer, , or Web. 24. Use the Format field to define the output format for the report. The values are dependent upon the Process Type you have selected. In this example, the default value is TXT. Page 153
158 25. Click the OK button. 26. Notice the Process Instance number appears. This number helps you identify the process you have run when you check the status. 27. Click the Process Monitor link. 28. Use the Process List page to view the status of submitted process requests. Page 154

159 29. The current status of the process is Queued. The process is finished when the status is Success. Continue to click the Refresh button until the status is Success. Click the Refresh button. 30. Notice the status is now Success. 31. You have successfully run the combination data validation process. End of Procedure. Updating Driver Parameters When you run the Refresh Driver Parameters process, the system updates driver parameters in the line item activity scenarios in a planning model. Drivers are not refreshed for those that allow override, because users can change the values themselves. Alternatively, you can update all driver parameters defined by the Planning Method Group using the Initialize All check box whether override is allowed or not. In this topic, you will update driver parameters. Procedure Page 155
160 1. Begin by navigating to the Refresh Driver Parameters page. Click the Planning and Budgeting link. 2. Click the Planning and Budgeting Setup link. 3. Click the Process Model link. 4. Click the Refresh Driver Parameters link. Page 156
161 5. You can run this process by searching for an existing Run Control ID or you can add a new value. Creating a Run Control ID that is relevant to the process may help you remember it for future use. Click the Add a New Value tab. 6. A Run Control ID is an identifier that, when paired with your User ID, uniquely identifies the process you are running. The Run Control ID defines parameters that are used when a process is run. This ensures that when a process runs in the background, the system does not prompt you for additional values. Enter the desired information into the Run Control ID field. Enter "REFDRIVERPAR". 7. Click the Add button. 8. Use the Refresh Driver Parameters page to enter the request parameters. These parameters will be used to define the processing rules and data to be included when the process is run. Page 157

162 9. Click in the Description field. 10. Enter the desired information into the Description field. Enter "Refresh MODEL101". 11. Click in the Business Unit field. 12. Enter the desired information into the Business Unit field. Enter "US002". 13. Click in the Planning Model ID field. 14. Enter the desired information into the Planning Model ID field. Enter "MODEL101". 15. Click in the Scenario field. 16. Enter the desired information into the Scenario field. Enter "2007SCE101". 17. Click in the Activity field. 18. Enter the desired information into the Activity field. Enter "REV101". Page 158
163 Training Guide 19. Use the Initialize All? check box to refresh all line items with the current values of the drivers. Manual changes made to the drivers will be overwritten. Click the Initialize All? option. 20. Click the Save button. 21. Click the Run button. 22. Use the Process Scheduler Request page to enter or update parameters, such as server name and process output format. 23. You must select a Server Name to identify the server on which the process will run. If you use the same Run Control ID for subsequent processes, the server name that you last used will default in this field. Click the Server Name list. Page 159
164 24. Click the PSNT list item. 25. Use the Type field to select the type of output you want to generate for this job. Your four choices are File, Printer, , or Web. 26. Use the Format field to define the output format for the report. The values are dependent upon the Process Type you have selected. In this example, the default value is TXT. 27. Click the OK button. 28. Notice the Process Instance number appears. This number helps you identify the process you have run when you check the status. 29. Click the Process Monitor link. 30. Use the Process List page to view the status of submitted process requests. Page 160
165 31. The current status of the process is Queued. The process is finished when the status is Success. Continue to click the Refresh button until the status is Success. Click the Refresh button. 32. Notice the status is now Success. 33. You have successfully updated driver parameters. End of Procedure. Using the Planning Workspace The My Planning Workspace is used to perform and monitor budgeting and planning tasks, including reviewing the approval status of a plan or budget and preparing line item, position, and asset activities. Upon completion of this lesson, you will be able to: Describe the Planning Workspace. Describe Work Items and Versions. Create worksheet versions. Lock planning and budgeting activities. Unlock planning and budgeting activities. Set user preferences. Send to planning and budgeting users. Attach documentation and guidelines. Submit plans and budgets. Page 161

166 Reject plans and budgets. Approve plans and budgets. Understanding the Planning Workspace The Planning Workspace is a summary and point of access for plans and budgets that you can access to update and submit, review, reject, and approve. These plans or budgets are controlled by role, model, activity, scenario, and planning center. In general, activities and scenarios represent the plan or budget for a planning model, and your role and planning center in which you have access to work or review. After selecting an activity scenario for a model, you determine the planning center to work with by selecting or creating a working version of the plan or budget. In this topic, you will identify the planning workspace. Procedure 1. This diagram illustrates the tasks that you perform using My Planning Workspace. 2. Use the Planning Workspace to perform and monitor budgeting and planning tasks, including reviewing the approval status of a plan or budget and preparing line item, position, and asset activities. 3. The pages that you can view in the Planning Workspace are based on your login ID and your Planning and Budgeting role. Nonpreparer roles have an additional workspace page in which to review the progress of the plan or budget and perform their own adjustments. Page 162

167 Training Guide 4. You can use these two workspace views: My Planning Workspace - My Preparation Workspace: Use this view to update and work on your plans and budgets. My Planning Workspace - My Review Workspace: Use this view to review the progress of plans and budgets and reject them. 5. This diagram illustrates working and master versions of a plan or budget. 6. Budget versions are used to create what-if revisions of the budget. Each planning center can have a maximum of five versions, which include: Base version (required) Working version 1. Working version 2. Working version 3. Master version (required) Users assigned to the same planning center also share the same versions. Page 163
168 7. This diagram illustrates how the base version is used to create up to three working versions, then the submitted working version is used to create the master version. 8. Use the base version as the starting point for preparing a plan or budget and distribute it to preparers. The base budget is the base version. Users can view the base version, but cannot modify it or copy data into it. Line item rows display the BASBUD method as the amount. It represents the data source that was used to seed the proposed budget as the starting point. 9. The base version remains constant in all the planning levels defined for your activity scenario in your planning model. This means the base looks the same whether you are viewing it as the preparer, reviewer, coordinator, or other planning level or role. During the model stage process, the system creates a copy of the base version into master version, and from the master version recalculates and copies into the first working version as a starting point for preparers. 10. The master version is similar to the base version in that the data in the master version looks the same regardless of the planning level or role from which you are viewing it. However, unlike the base version, the data in the master version is not static. It changes as your planning and budgeting development process evolves. 11. The master version is updated when you: Submit a working version from one planning level to another. The system copies the data in the working version into the master version. Copy a version to the master version. Perform line item allocations, working directly with data in the master. Page 164

169 Training Guide 12. After you complete your planning and budgeting process and approve the budget, the master version contains the data that is loaded into the general ledger when the export to ledger process is run. 13. This concludes the understanding the planning workspace topic. End of Procedure. Understanding Work Items and Versions In the first lesson of this course, there is more information about the budget roles and the budget role hierarchy. Each budget role has a budget center and budget activities attached to it. All of this information makes up your budget work items. Budget work items are comprised of budget activities list and a budget center. You can enter budget data into the budget center. In this topic, you will learn about budgeting work items and versions. Procedure Page 165
170 1. Budget versions are used to create what-if examples of the budget. Each budget center can have a maximum of five versions; three working versions in addition to the base and master version. These what-if examples can be created with different assumptions, and one can be chosen as the budget that will ultimately be sent for approval. If two budget preparers share budgeting responsibilities for the same budget center they must also share the five versions. Each budget preparer does NOT get their own personal five versions with which to work. 2. The base version contains the "clean" copy of your budget model. The budget data contained within the base version cannot be modified in any way. Authorized budget users may inquire on the base version but will not be able to edit that version. The budget user may create a working version or a master version (or both) from the base version. Page 166
171 3. Each budget center can contain a maximum of three working versions, which can be used to manipulate budget data that has been copied from the base version. The budget user does not need to use all three working versions but can use as many as needed to accurately enter the budget data. A working version can be created during the publish process, so the preparer does not have to copy every budget into a working version. Page 167
172 4. You can copy from any version to create a working version. For example, you could copy from working version 1 to create working version 2 or you could copy the master version to create working version 2. All budget data contained in the version you are copying from is copied into the version you are creating. 5. The master version is updated through any of the following methods: Submitting a working version. Copy a working version to the master version. Performing budget allocations. 6. The master version contains the final budget data that is submitted up to the next budget level for review. The master version does not allow you to directly work on the budget, using line-item budgeting, position budgeting, asset budgeting, or mass adjustments. You are allowed to perform budget allocations on the master version only. The master version holds all of the budget data that will eventually be sent to the general ledger through an export process. 7. This concludes the Understanding Work Items and Versions topic. End of Procedure. Creating a Worksheet Version Budget versions are used to create "what-if" revisions of the budget. Each planning center can have a maximum of five versions, which include: Base version (required) Working version 1 Working version 2 Working version 3 Page 168
173 Master version (required) When each planning center is created, the Base, Working version 1, and Master versions are automatically created. You must create Working versions 2 and 3 if needed for your "what-if" scenarios. In this topic, you will create a worksheet version. Procedure 1. Begin by navigating to the My Planning Workspace page. Click the Planning and Budgeting link. 2. Click the My Planning Workspace link. Page 169
174 3. Use the Role Name field to specify the role you will be using to analyze the planning and budgeting model. Enter the desired information into the Role Name field. Enter "Preparer". 4. Click in the Business Unit field. 5. Enter the desired information into the Business Unit field. Enter "US002". 6. Click in the Planning Model ID field. 7. Enter the desired information into the Planning Model ID field. Enter "MODEL102". 8. Click in the Activity field. 9. Enter the desired information into the Activity field. Enter "EXP101". 10. Click in the Scenario field. 11. Enter the desired information into the Scenario field. Enter "2006SCE101". 12. Click the Search button. Page 170
175 Training Guide 13. Use the My Planning Workspace page to perform and monitor budgeting and planning tasks, including reviewing the approval status of a plan or budget and preparing line item, position, and asset activities. 14. In this example, notice that Planning Center already has the Base, Version 1, and Master versions created. These versions were automatically created with the new planning center. 15. In order to create a new working version, you must choose a version to copy. Click the Copy link. 16. Use the Copy Version page to copy planning center data from one version to the master version or one of three working versions. Page 171
176 17. Use the To Version drop-down list to choose a new version to copy into. Click the *To Version list. 18. You cannot have more than three working versions for a planning center at one time. If you have three working versions or if you select to copy to a working version that already exists, the system copies over the selected version. Click the Version 2 list item. 19. Click in the *Description field. 20. Enter the desired information into the *Description field. Enter "Version Two". 21. Click the OK button. 22. Notice that the new version appears. This new version is a copy of the original version. 23. You have successfully created a worksheet version. End of Procedure. Page 172
177 Locking Planning and Budgeting Activities When a preparer access activity scenarios to edit them, it is locked so that other users cannot update it at the same time. When you lock activities, you click the Edit link for the planning center and activity scenario that you want to work with from the Preparation Workspace view. The system automatically locks the activity scenario for that planning center and version, preventing other users from editing at the same time you are editing. If the version of the activity that you are trying to access is already locked, or you do not want to update it, you can click the View link to access the data in read-only mode. When activities are locked, other users can still view and copy the activity scenario. In this topic, you will lock an activity. Procedure 1. Begin by navigating to the My Planning Workspace page. Click the Planning and Budgeting link. 2. Click the My Planning Workspace link. Page 173
178 3. Use the Role Name field to specify the role you will be using to analyze the planning and budgeting model. Enter the desired information into the Role Name field. Enter "Preparer". 4. Click in the Business Unit field. 5. Enter the desired information into the Business Unit field. Enter "US002". 6. Click in the Planning Model ID field. 7. Enter the desired information into the Planning Model ID field. Enter "MODEL102". 8. Click in the Activity field. 9. Enter the desired information into the Activity field. Enter "EXP101". 10. Click in the Scenario field. 11. Enter the desired information into the Scenario field. Enter "2006SCE101". 12. Click the Search button. Page 174
179 Training Guide 13. Use the My Planning Workspace page to perform and monitor budgeting and planning tasks, including reviewing the approval status of a plan or budget and preparing line item, position, and asset activities. 14. Click the Edit link. 15. Use the Line Item Details page to view, add, and modify budget amounts. Also, use this page to manually enter budget amounts for a line item; and protect a line-item budget from mass adjustments. Page 175

180 16. Click the Don't Unlock link. 17. The activity is now locked. While an activity is locked, it cannot be edited by other users. You must unlock an activity before you can submit it for approval. 18. Only a user, such as a coordinator, who has access to the View Current Locks page, located under Setup Model menu, can unlock activities locked by another user. An activity scenario for a version can be locked and edited by only one user at a time for each planning center version. 19. You have successfully locked a planning and budgeting activity. End of Procedure. Unlocking Planning and Budgeting Activities After the activity is updated, you must unlock it before other users can update it. All versions for a planning center for an activity scenario in a planning model must be saved and unlocked for the system to recalculate amounts and update activity data. In this topic, you will unlock an activity. Procedure Page 176
181 1. Begin by navigating to the My Planning Workspace page. Click the Planning and Budgeting link. 2. Click the My Planning Workspace link. Page 177
182 3. Use the Role Name field to specify the role you will be using to analyze the planning and budgeting model. Enter the desired information into the Role Name field. Enter "Preparer". 4. Click in the Business Unit field. 5. Enter the desired information into the Business Unit field. Enter "US002". 6. Click in the Planning Model ID field. 7. Enter the desired information into the Planning Model ID field. Enter "MODEL102". 8. Click in the Activity field. 9. Enter the desired information into the Activity field. Enter "EXP101". 10. Click in the Scenario field. 11. Enter the desired information into the Scenario field. Enter "2006SCE101". 12. Click the Search button. Page 178
183 Training Guide 13. Use the My Planning Workspace page to perform and monitor budgeting and planning tasks, including reviewing the approval status of a plan or budget and preparing line item, position, and asset activities. 14. Notice the Unlock button is available. The activity is now locked. While an activity is locked, it cannot be edited by other users. You must unlock an activity before you can submit it for approval. 15. You can also unlock a version by navigating to the Line Item Details page and clicking the unlock link on that page. This enables you to review the version details before unlocking it. The Line Item Details page can be accessed by clicking the Edit link. 16. Click the Unlock button. 17. Notice the version is no longer locked. The Unlock column and button is no longer available. 18. You have successfully unlocked a planning and budgeting activity. End of Procedure. Page 179
184 Setting User Preferences You can set up User Preferences as the default for your My Planning Workspace pages. This enables you to reduce the number of steps required to access the My Planning Workspace page. You can default the values for the following fields: Role. Business Unit. Planning Model ID. Activity. Scenario. In this topic, you will set user preferences. Procedure 1. Begin by navigating to the User Preferences page. Click the Planning and Budgeting link. 2. Click the User Preferences link. 3. Use the User Preferences page to set up the default values that the system uses to directly access the My Planning Workspace page based on your user id. Page 180

185 4. Enter the desired information into the SetID field. Enter "SHARE". 5. Click in the Business Unit field. 6. Enter the desired information into the Business Unit field. Enter "US002". 7. Click in the Planning Model ID field. 8. Enter the desired information into the Planning Model ID field. Enter "MODEL102". 9. Click in the Activity field. 10. Enter the desired information into the Activity field. Enter "REV101". 11. Use the As of Date field to determine when these defaults are to begin. For example, if you will be starting a new assignment next month, you can future date this value to coincide with your schedule. For this example, accept the default value. 12. Click the Save button. 13. You have successfully defined user preferences. End of Procedure. Page 181
186 Sending to Planning and Budgeting Users Planning and Budgeting enables you to create and send s to contacts defined in the planning and budgeting model. In this topic, you will send an to planning and budgeting users. Procedure 1. Begin by navigating to the My Planning Workspace page. Click the Budgeting link. 2. Click the My Planning Workspace link. 3. Use the My Planning Workspace page to perform and monitor budgeting and planning tasks, including reviewing the approval status of a plan or budget and preparing line item, position, and asset activities. 4. In this example, the User Preferences had been set, which enables you to directly access the My Planning Workspace page. This saved you steps since you did not have to navigate through the My Planning Workspace search page. Page 182
187 5. Click the Send link. 6. Use the Compose Mail page to create and send s to contacts defined in the planning and budgeting application. You can also view user detail information for all users associated with a user description. Page 183

188 7. Enter the desired information into the Subject field. Enter "Test ". 8. Click in the Text field. 9. Enter the desired information into the Text field. Enter "This is a test budgeting .". 10. The Select Recipients area contains a list of users associated with this planning and budgeting model. Use the Select All button to choose all users in the list. You can also select individual users using the corresponding checkboxes. 11. In this example, select the BPO1 User. Click the Select option. 12. Review your and verify its content. Once verified, you can send your . Click the Send button. 13. Once you have sent your , you are returned to the My Planning Workspace page. 14. You have successfully sent an to planning and budgeting users. End of Procedure. Page 184
189 Attaching Documentation and Guidelines Coordinators can attach documentation and guidelines to the Planning and Budgeting application that all users can access. These documents and guidelines should be applicable to all planning and budgeting models. In this topic, you will access planning and budgeting documentation. Procedure 1. Begin by navigating to the Documentation and Guidelines page. Click the Budgeting link. 2. Click the Planning and Budgeting Setup link. Page 185

190 3. Click the Define Parameters button. 4. Click the Documentation and Guidelines link. 5. Use the Documentation and Guidelines page to attach and upload Planning and Budgeting documentation and guidelines for end users. Page 186
191 6. The Description you enter should be useful to Planning and Budgeting users when accessing these files. Enter the desired information into the Description field. Enter "Budget Guidelines". 7. Click the Attach button. Page 187
192 8. Use the Browse button to locate the file you want attached to Planning and Budgeting. Click the Browse button. Page 188

193 9. Click the Budget Guidelines.doc list item. Page 189
194 10. Click the Open button. 11. Click the Upload button. 12. Notice the documentation information now appears on the Documentation and Guidelines page. Page 190
195 13. Click the Save button. 14. You have successfully attached planning and budgeting documentation. End of Procedure. Submitting Plans and Budgets Upon completion of budget or plan entry, the preparer submits the appropriate budget version to the next higher level in the approval process. In this topic, you will submit a planning model for review. Procedure Page 191
196 1. Begin by navigating to the My Planning Workspace page. Click the Planning and Budgeting link. 2. Click the My Planning Workspace link. 3. Use the My Planning Workspace page to perform and monitor budgeting and planning tasks, including reviewing the approval status of a plan or budget and preparing line item, position, and asset activities. 4. In this example, the User Preferences had been set, which enables you to directly access the My Planning Workspace page. This saved you steps since you did not have to navigate through the My Planning Workspace search page. Page 192
197 5. Select the check box next to each planning center that you want to submit. For example, if you entered your entire budget into working versions 1 for planning centers and 13000, select the check box next to working version 1 for both planning centers, then click the Submit button above the grid. If you clicked the Submit button when the base version was selected, you would submit the base version that would contain none of your changes. Click the Version 1 option. 6. The preparer submits all planning centers for activity scenarios assigned to them when the plan or budget is complete and ready for review. Clicking the Submit button for a selected working version simultaneously submits working version 1 and copies all budget data into the master version. Click the Submit button. 7. Use the Submit Confirmation page to verify and approve or cancel your submission. Page 193
198 8. Click the OK button. 9. When the budget is submitted, the system checks and validates two rules, if defined: 1. Verifies that there are no rows marked in error that may have resulted from the enforcement of combination edits or, when using control budget, commitment control rules. 2. Verifies that planning targets are within tolerance rules when controls are set to active. If the planning center for an activity scenarios fails any of the two rules listed above, the budget cannot be submitted until the rule is satisfied. 10. If the preparer needs to update the working version of a budget after it is submitted, the reviewer, analyst, or coordinator must reject the budget to make it available, because the status of a planning center must be Open or Rejected to be editable. 11. After the planning centers for activity scenarios have been submitted, the budgets are forwarded to the next level in the budget hierarchy. The user ID and role at the next level up cannot update their planning centers until all the lower-level planning centers that make up their higher-level planning center have been submitted. 12. You have successfully submitted a budget for review. End of Procedure. Page 194
199 Rejecting Plans and Budgets The reviewer, analyst, or coordinator can reject a budget from their Review Workspace page. In this topic, you will reject a planning and budgeting model. Procedure 1. Begin by navigating to the My Planning Workspace page. Click the Planning and Budgeting link. 2. Click the My Planning Workspace link. Page 195
200 3. Enter the desired information into the Role Name field. Enter "REVIEWER". 4. Click in the Activity field. 5. Enter the desired information into the Activity field. Enter "REV101". 6. Click the Search button. 7. Use the My Planning Workspace page to perform and monitor budgeting and planning tasks, including reviewing the approval status of a plan or budget and preparing line item, position, and asset activities. 8. Notice the role name is now Reviewer. The view of the My Planning Workspace page changes based on the role used to enter the page. In this example, you are viewing Reviewer components. Page 196
201 9. Click the My Review Workspace link. 10. Coordinators, analysts, and reviewers can use the My Review Workspace page to access information permitted for their user ID and role, including: Viewing all versions of all planning centers below your level of preparation and review. Viewing line item, position, and asset activity details. Rejecting plans or budgets. Accessing the Planning Center Details page where you can view the details of planning centers and versions. Accessing the My Preparation Workspace page. Expanding higher level planning centers to view or reject lower-level planning centers. 11. Your view is filtered by your role and user ID security. You can access in view mode all planning centers and versions that roll up to your level of review and access for your user ID and role. 12. You can skip Planning Center levels when rejecting budgets, but levels cannot be skipped when submitting. 13. The Status of the budget is displayed on this page. In this example, notice Planning Centers and have been submitted for approval. Your role is designated as a reviewer for these Planning Centers. 14. You can select which budget Version you want to review, for example Master, Version <n>, Base. Page 197

202 15. After careful review, you decide to reject this plan to send it back to the preparer for changes. Click the Reject button. 16. Use the Reject Confirmation page to verify or cancel rejecting a planning center. Page 198
203 17. Review the page information to verify you are rejecting the intended planning center. Click the OK button. 18. Notice the Planning Center now displays a Status of Rejected. 19. You have successfully rejected a planning and budgeting model. End of Procedure. Approving Plans and Budgets In Planning and Budgeting, reviewers and analysts refer to the persons in your organization who are responsible for reviewing, analyzing, and approving the budgets submitted by preparers. Reviewers and analysts commonly have responsibility for more than one budget center, so their security access requirements are broader than those of a preparer. As a reviewer or analyst, you can perform budget preparation activities similar to those performed at the budget preparer level, including modifying, applying mass adjustments to, and allocating line-item budgets. You can also perform inquiry and analysis on the proposed budgets. In this topic, you will approve a plan and budget. Procedure Page 199
204 1. Begin by navigating to the My Planning Workspace page. Click the Planning and Budgeting link. 2. Click the My Planning Workspace link. Page 200
205 3. Enter the desired information into the Role Name field. Enter "REVIEWER". 4. Click the Search button. 5. Use the My Planning Workspace page to perform and monitor budgeting and planning tasks, including reviewing the approval status of a plan or budget and preparing line item, position, and asset activities. 6. Notice the role name is now Reviewer. The view of the My Planning Workspace page changes based on the role used to enter the page. In this example, you are viewing Reviewer components. Page 201

206 7. You approve a budget by submitting it to the next level in the approval hierarchy. Select the check box next to each planning center that you want to submit. Click the Base option. 8. Click the Submit button. 9. Use the Submit Confirmation page to verify and approve or cancel your submission. Page 202
207 10. Click the OK button. 11. After the planning centers for activity scenarios have been submitted, the budgets are forwarded to the next level in the budget hierarchy. 12. When the budget is submitted, the system checks and validates two rules, if defined: 1. Verifies that there are no rows marked in error that may have resulted from the enforcement of combination edits or, when using control budget, commitment control rules. 2. Verifies that planning targets are within tolerance rules when controls are set to active. If the planning center for an activity scenarios fails any of the two rules listed above, the budget cannot be submitted until the rule is satisfied. 13. You have successfully approved a planning and budgeting model. End of Procedure. Using Line Item Activities In Planning and Budgeting, you work with line-item activities in data slices based on the planning center definition. This increases the efficiency of the system and lets other budget users access other data slices of the planning model at the same time. When you work with a data slice, you're doing so for a specific planning center version for a specific activity and scenario combination. Upon completion of this lesson, you will be able to: Discuss line item budgeting. Page 203
208 Enter a line item amount using methods. Enter a line item amount using hot keys. Adjust line items. Review line item data with variance analysis. Review line item data with version analysis. Submit line item activities. Use the spreadsheet add-in. Understanding Line Item Budgeting Line item budgeting enables you to enter budget amounts for each individual account, excluding those accounts updated through position or asset budgeting. Planning and Budgeting enables you to work with line item activities for three planning scenario types, defined for one or more years: Top-down scenarios: Use top-down line item activities with the top-down scenario type when creating strategic long-term plans at a more summarized level. Bottom-up scenarios: Use line item activities with the bottom-up scenario type when creating detailed budget plans. Forecast scenarios: Use line item activities with the forecast scenario type to update a current plan or budget, in which users are not allowed to update closed and past periods. Historical scenarios: Use line item activities with the historical scenario type to compare scenarios, perform analysis and modeling using the Flex method. In this topic, you will learn about line item budgeting. Procedure Page 204
209 Training Guide 1. The sum of the line items for every budget center in your business unit makes up your organization's entire budget. Line-item budgets include your personnel, capital, and non-personnel expenditures and revenue estimates for a defined period of time. 2. Line-item budgets are usually entered by preparers. Preparers are users at the lowest-level budget center defined for the planning and budgeting model. Preparers are responsible for preparing, modifying, and submitting a detailed line-item budget for their respective budget centers. If applicable, they also prepare, modify, and submit position and asset budgets. Page 205
210 3. Preparers start with a base budget that the coordinator develops. Page 206
211 Training Guide 4. This base budget is either: Populated with proposed budget data, which is based on prior year actuals, prior year budget figures, or some other basis. Left blank for zero-based budgeting, leaving you with the job of building your budget plan from the ground up. 5. You can check out different budget activity types per model. You may have an activity in read-write mode for position, asset, and line-item activities. When a budget user checks out an activity, that activity is locked to other users. However, other budget users can check out the activity in read-only mode. You can also check out additional activities in read-only mode. Page 207
212 6. With line-item budgets, you can enter fixed budget amounts into line items directly or have the system calculate budget amounts by applying methods. Each line item is assigned a method. To manually enter a budget amount for a line item, use hot key functions to enter data directly into each budget period. Hot keys are characters you enter in the hot keys column to quickly enter budget data across periods. Page 208
213 7. If you want to use methods to calculate budget amounts, you can choose from a set of delivered methods. For example, you can assign the Amount Per Budget Period (AMTPER) method and then enter a fixed budget amount by budget period. 8. Note that you can override the methods and method details assigned to line items in your base budget if the budget coordinator enabled override capability using the Override Control page. 9. If you have defined a ledger as your proposed budget that combines revenue and expense account types, your monetary values appear as gross amounts or summed totals. Planning and Budgeting does not recognize values by account type within the line item budgeting activity. For net income amounts, you must access the available inquiry options for line item analysis. Page 209
214 10. Methods can be divided into two categories, methods that require calculation and methods that do not require calculation, where the budget amounts are derived through other means. The following methods require calculation. 11. Every line within your budget has a method assigned to it. A method defines how the budget amount for the line item is calculated or derived if a calculation is not necessary. A method can have a base against which the method is applied. Page 210

215 12. The following methods do not require calculation. Page 211
216 13. In addition to a base, a method can also have an associated driver and driver parameter. Budget coordinators define the default methods and their method details (driver, driver parameter, and base) for line items in the budgeting model. The ANN% method, which is used to apply a growth rate to an historical value on an annual basis, is an example of a method that uses a driver parameter and a method base. For this method, the user defines a growth rate (driver parameter) and an historical value (method base) on which to apply the growth rate. 14. In summary, you use line-item budgets to enter budget amounts for individual revenues or expense accounts of your organization. You work with your line-item budgets in data slices, based on your budget center definition. This increases the efficiency of the system and enables other budget users to access other data slices of the budgeting model at the same time. End of Procedure. Entering a Line Item Amount Using Methods Follow these steps to add a line-item activity: 1. Display the My Planning Workspace My Preparation Workspace page for the desired business unit, model, scenario, and line-item activity. 2. Click the Edit link next to the line item activity for a planning center and version to display the Line Item Details page for that line item. 3. If you want to override the default method, when allowed, enter a method in the Method ID field, and then enter the specific parameters for that method. 4. If you want to add an adjustment, enter adjustment amounts on the Method detail page. 5. Select the Periods 1-6 and Period 7-12 tabs to view or add the line-item amounts. In this topic, you will enter a line item activity using a Method ID. Procedure Page 212
217 1. Begin by navigating to the My Planning Workspace page. Click the Planning and Budgeting link. 2. Click the My Planning Workspace link. Page 213
218 3. Enter the desired information into the Role Name field. Enter "Preparer". 4. Click the Search button. 5. Use the My Planning Workspace page to perform and monitor budgeting and planning tasks, including reviewing the approval status of a plan or budget and preparing line item, position, and asset activities. Page 214

219 6. Click the Edit link. 7. Use the Line Item Details page to view, add, and modify budget amounts. Also, use this page to manually enter budget amounts for a line item; and protect a line-item budget from mass adjustments. Page 215
220 8. Use the Method ID field to select the calculation method for the line item activity. Click the Method ID list. 9. Every line in a budget has a Method ID assigned to it. A method defines how the system calculates the budget amount for the line or derives the amount if a calculation is not necessary. A method can have an associated driver, driver parameter, and base. 10. Click the AMTHC list item. Page 216
221 11. Click the 1,781, link. 12. Use the Amount Per Headcount page to define the AMTHC method. The AMTHC method calculates the amount per headcount. The system uses a defined amount for each headcount. Page 217

222 13. Use the Driver ID field to identify the method driver. Methods that require a system calculation use method drivers. A method driver is the calculation factor used in the method's algorithm. You define method driver defaults used during line-item budgeting. You can also enable override of the driver defaults when you set up line item activity scenarios in the planning model. Click the Driver ID list. 14. Click the BCHC list item. 15. The Budget Period is a month in an annual budget. Therefore, there are 12 budget periods displayed. 16. The Cost Per Headcount fields are automatically populated with a default value from position budgeting. The default values can be updated. For this example, accept the default Cost Per Headcount amounts. 17. Click the vertical scrollbar. 18. Click the OK button. Page 218

223 19. Click the Save button. 20. You have successfully entered a planning and budgeting activity using a method. End of Procedure. Entering a Line Item Amount Using Hot Keys Hot Key entry is a method of manually entering budget or plan amounts into line-item activities. Using hot key functions, you can enter characters into a Hot Key column to help you quickly enter budget data across periods. The syntax for Hot Key entry is: <hot key><number>@<periodn>:<periodn> For example, S300,000@1:6 spreads 300,000 evenly to periods 1 through 6. In this topic, you will enter a line item amount using hot keys. Procedure Page 219
224 1. Begin by navigating to the My Planning Workspace page. Click the Planning and Budgeting link. 2. Click the My Planning Workspace link. Page 220
225 3. Enter the desired information into the Role Name field. Enter "Preparer". 4. Click the Search button. 5. Use the My Planning Workspace page to perform and monitor budgeting and planning tasks, including reviewing the approval status of a plan or budget and preparing line item, position, and asset activities. 6. In this example, the User Preferences had been set, which enables you to directly access the My Planning Workspace page. This saved you steps since you did not have to navigate through the My Planning Workspace search page. Page 221
226 7. Click the Edit link. 8. Use the Line Item Details page to view, add, and modify budget amounts. Also, use this page to manually enter budget amounts for a line item; and protect a line-item budget from mass adjustments. Page 222
227 9. Use the Method ID field to select the calculation method for the line item activity. Click the Method ID list. Page 223
228 10. In this example, choose the AMTPER Method ID. Click the AMTPER list item. Page 224
229 11. Click in the Hot Keys field. Page 225
230 12. Use the Hot Key field to enter the hot key character for the type of distribution that you want to perform. Enter the desired information into the Hot Keys field. Enter "S3300". 13. Use the Hot Keys Help link to access help in determining how to enter hot key characters. 14. This table lists the hot keys and their uses. For more information, use the Hot Keys Help link on the Line Item Details page. 15. Press the Tab key to refresh the page and view the amount applied by this method. Press [Tab]. 16. Notice the Amount value was calculated based on your hotkey entry. Notice the $3300 value entered from the previous step has now been applied to this line item activity. 17. Notice the S3300 hot key function correctly spread the $3300 across all periods. Page 226
231 18. Click the Save button. 19. You have successfully adjusted a planning and budgeting activity using the hot key method. End of Procedure. Adjusting Line Items You can use several ways to enter adjustments for a line item: Enter adjustments by period. Spread adjustments for the entire budget year. Create line-item mass adjustments. In this topic, you will adjust a line item. Procedure Page 227
232 1. Begin by navigating to the My Planning Workspace page. Click the Planning and Budgeting link. Page 228
233 2. Click the My Planning Workspace link. Page 229
234 3. Enter the desired information into the Role Name field. Enter "Preparer". 4. Click the Search button. 5. Use the My Planning Workspace page to perform and monitor budgeting and planning tasks, including reviewing the approval status of a plan or budget and preparing line item, position, and asset activities. 6. Click the Edit link. 7. Use the Line Item Details page to view, add, and modify budget amounts. Also, use this page to manually enter budget amounts for a line item; and protect a line-item budget from mass adjustments. Page 230
235 8. Use the Amount column links to access the Amount Per Period page for a line item. Click the 3, link. 9. Use the Amount Per Period page to enter adjustment amounts. Page 231

236 10. For this example, adjust the 2006M1 Budget Period amount to $100. Enter the desired information into the Adjustment Amount field. Enter "100". Page 232
237 11. For this example, the remaining budget periods have been adjusted for you. Click the vertical scrollbar. 12. Click the OK button. Page 233
238 13. Click the Save button. 14. You have successfully adjusted line items. End of Procedure. Reviewing Line Item Data with Variance Analysis Variance Analysis enables you to compare any two scenarios, versions, or time periods (and combinations of these items) by amount or percentage variance. In this topic, you will review line item data with variance analysis. Procedure Page 234
239 1. Begin by navigating to the Variance Analysis page. Click the Planning and Budgeting link. 2. Click the Analysis and Reporting link. Page 235
240 3. Click the Variance Analysis link. 4. Use the Variance Analysis inquiry page to access and load line item activity data to an analytic grid for analysis. You can compare any two scenarios for a single activity and planning center in the planning model. 5. Several fields are populated based on your login settings. For this example, you will not change the defaulted field values. Page 236
241 6. Click the Role Name list. 7. Click the Preparer list item. 8. A Business Unit is an identification code that represents a high-level organization of business information. Valid values depend on the business units associated with planning models. A planning model can be associated with only one business unit within your organization. However, a business unit can have multiple planning models. 9. The Planning Model ID refers to the name of a planning and budgeting model used to perform budget development of activities and scenarios for a business unit. 10. Use the Activity field to analyze budgets associated with this activity. Activities are user-definable entities that you can associate with other activities, different scenarios, and different planning models. 11. Click in the Scenario field. Page 237

242 12. Scenarios provide the time element to a budget or plan. You select a calendar to use that controls periodicity of the plan and specify the beginning and ending periods of the budget or plan. The scenario also includes a ledger that the system associates with a ledger template. Ledger templates (in conjunction with the general ledger scenario), dictate the physical source of the data the system uses to seed a budget or plan; this frames the actual dimensions (ChartFields) enabled for use. The dimensions must exist on the physical ledger table. For the planning scenario specifically, this dictates the target of the plan or budget data when it is exported. Enter the desired information into the Scenario field. Enter "2007SCE101". 13. Click in the Planning Center field. 14. Planning centers define the rollup and approval structure for a planning or budgeting development process. Enter the desired information into the *Planning Center field. Enter "12000". 15. Click the *Budget Version list. Page 238
243 Training Guide 16. Budget versions are used to create what-if examples of the budget. Each budget center can have a maximum of five versions. Click the Version One list item. 17. Use the Select Variance Criteria group box to select whether you want to Compare to Self and specify the Budget Version ID and Budget Period against which you want to compare; or select a Comparison Scenario. 18. Click the Comparison Scenario list. 19. Click the 2002ACTUAL list item. 20. Click the Run button. 21. The Variance Analysis report enables you to view and compare line item costs sorted by another version or comparison scenario for the selected planning center. 22. In the analytic grid you can modify the view of the data by dragging any dimension from the row axis to the slicer bar or column axis, and by dragging cubes from the column axis to the slicer bar or row axis. 23. You have successfully reviewed line item data with Variance Analysis. End of Procedure. Reviewing Line Item Data with Version Analysis Use the Version Analysis to analyze budget information across all planning centers and budget versions. In this topic, you will review line item data with version analysis. Procedure Page 239
244 1. Begin by navigating to the Version Analysis page. Click the Planning and Budgeting link. 2. Click the Analysis and Reporting link. Page 240
245 3. Click the Version Analysis link. 4. Use the Version Analysis inquiry page to access and load line item activity data to an analytic grid for analysis. You can compare any two scenarios for a single activity and planning center in the planning model. 5. Several fields are populated based on your login settings. For this example, you will not change the defaulted field values. Page 241
246 6. Click the Role Name list. 7. Click the Preparer list item. 8. A Business Unit is an identification code that represents a high-level organization of business information. Valid values depend on the business units associated with planning models. A planning model can be associated with only one business unit within your organization. However, a business unit can have multiple planning models. 9. The Planning Model ID refers to the name of a planning and budgeting model used to perform budget development of activities and scenarios for a business unit. 10. Activities are user-definable entities that you can associate with other activities, different scenarios, and different planning models. 11. Click in the Scenario field. Page 242
247 Training Guide 12. Scenarios provide the time element to a budget or plan. You select a calendar to use that controls periodicity of the plan and specify the beginning and ending periods of the budget or plan. The scenario also includes a ledger that the system associates with a ledger template. Ledger templates (in conjunction with the general ledger scenario), dictate the physical source of the data the system uses to seed a budget or plan; this frames the actual dimensions (ChartFields) enabled for use. The dimensions must exist on the physical ledger table. For the planning scenario specifically, this dictates the target of the plan or budget data when it is exported. Enter the desired information into the Scenario field. Enter "2007SCE101". 13. Click in the Planning Center field. 14. Planning centers define the rollup and approval structure for a planning or budgeting development process. Enter the desired information into the Planning Center field. Enter "12000". 15. Use the Select Versions select the appropriate version checkboxes you want to include in the version analysis calculation. 16. Click the Show All option. Page 243
248 17. Notice all available versions are now selected. 18. Click the Run button. 19. The Version Analysis page enables you to access and load line item activity data to an analytic grid. This enables you to compare budget versions for a single activity, scenario, and planning center in a planning model. 20. In the analytic grid you can modify the view of the data by dragging any dimension from the row axis to the slicer bar or column axis, and by dragging cubes from the column axis to the slicer bar or row axis. 21. You have successfully performed version analysis on line item data. End of Procedure. Submitting Line Item Activities Use the My Planning Workspace page to submit line-item budgets to the next planning center level. When you submit a budget version, the system sends it up to the next planning center level and updates the master budget version with data from the submitted version. In this topic, you will submit a line item activity. Procedure Page 244
249 Training Guide 1. Begin by navigating to the My Planning Workspace page. Click the Planning and Budgeting link. 2. Click the My Planning Workspace link. Page 245
250 3. Enter the desired information into the Role Name field. Enter "Preparer". 4. Click the Search button. 5. Use the My Planning Workspace page to perform and monitor budgeting and planning tasks, including reviewing the approval status of a plan or budget and preparing line item, position, and asset activities. Page 246
251 6. For this example, submit Version 1 for Planning Centers Click the Select option. 7. When the budget is submitted, the system checks and validates two rules, if defined: 1. Verifies that there are no rows marked in error that may have resulted from the enforcement of combination edits or, when using control budget, commitment control rules. 2. Verifies that planning targets are within tolerance rules when controls are set to active. If the planning center for an activity scenarios fails any of the two rules listed above, the budget cannot be submitted until the rule is satisfied. 8. The Master version is updated when you click the Submit button for a working version or manually copy the working version into the master version. 9. Click the Submit button. Page 247
252 10. Review the Planning Center information to confirm you are submitting the correct items. Click the OK button. 11. Notice the versions are now displaying a status of Submitted. 12. If the preparer needs to update the working version of a budget after it is submitted, the reviewer, analyst, or coordinator must reject the budget to make it available, because the status of a planning center must be Open or Rejected to be editable. 13. After the planning centers for activity scenarios have been submitted, the budgets are forwarded to the next level in the budget hierarchy. The user ID and role at the next level up cannot update their planning centers until all the lower-level planning centers that make up their higher-level planning center have been submitted. 14. You have successfully submitted line item activities. End of Procedure. Using the Spreadsheet Add-In The Spread Sheet Add In (SSAI) was created to enable preparers to download the line item activity data for a specific planning center to their workstation or laptop so that they can work on it offline. Although budget users must be connected to their network during spreadsheet when the Page 248
253 SSAI is accessing data from Planning and Budgeting and sending data back to Planning and Budgeting, they can work offline at all other times. After you have downloaded data from the Planning and Budgeting application to the SSAI, you can work offline to enter amounts into the spreadsheet. When you are ready to send data back to the Planning and Budgeting application, use the SSAI login dialog box to log back in to PeopleSoft and submit the data. To use the SSAI functionality, you must first install the Planning and Budgeting Spreadsheet Add-In program Excel file, ExcelToCI-BP.xls. In this topic, use the spreadsheet add-in feature. Procedure 1. The Spread Sheet Add In program (SSAI) uses a Planning and Budgeting Spreadsheet Add-In program Excel file, ExcelToCI-BP.xls. 2. The SSAI is divided into four tabbed worksheets: The Coversheet provides an overview of how to use SSAI. On the Connection Information worksheet, specify how to access the PeopleSoft database in which your Planning and Budgeting resides. On the Search Criteria worksheet, select the business unit, planning model, activity, scenarios, planning center, and budget version to download. On the Edit & Submit worksheet, enter data and submit it back to the database. 3. To open the SSAI: 1. Minimize the window for the PeopleSoft application so you can see the desktop. 2. On your desktop, click Shortcut to ExcelToCI-BP.xls. 3. When the dialog box appears, click Enable Macros. Note: If the Enable Macros selection does not appear, from the Excel menu, select Tools, Macro, Security, and select the Medium security option button. Click OK, then exit from Excel. Start over again by selecting Shortcut to ExcelToCI-BP.xls from your desktop. Page 249
254 4. Click the Coversheet tab. 5. Use the Coversheet worksheet to enter the connect information for communicating with a PeopleSoft Internet Applications (PIA) server, such as the Web Server machine name, protocol, and PeopleSoft site name. 6. Click the Connect Information tab. 7. Use the Connect Information worksheet to define criteria for the budgeting data that the system retrieves 8. For this example, the connection information has been entered for you. This connection information reflects a demonstration database and will be different from your system. Click the Search criteria tab. 9. Use the Search Criteria worksheet to define criteria for the budgeting data that the system retrieves. Page 250
255 10. Click the Login/Refresh link. Page 251
256 11. The Login dialog box appears, prompting you to login to your Planning and Budgeting environment. Enter the desired information into the User ID field. Enter "STA101". 12. Click in the Password field. 13. Enter the desired information into the Password field. Enter "STA101". 14. Click the OK button. 15. Based on your Planning and Budgeting login identification, some of the search criteria will be populated. Click the Planning Center list. Page 252
257 16. Click an entry in the list. Page 253

258 17. Click the Budget Version ID list. 18. Click an entry in the list. Page 254
259 19. Use the Find Rows link to retrieve budget information from Planning and Budgeting into your spreadsheet. Click the Find Rows link. 20. The SSAI retrieves the data from Planning and Budgeting and displays the information in the Edit & Submit page. Use this page to update budgeting data, unlock the planning center, and submit the version for approval. Page 255

260 21. Click the horizontal scrollbar. 22. You can update amounts by directly entering those changes into a corresponding cell. You can also use spreadsheet formulas to calculate one cell with another. For example, you could calculate seasonal trends by increasing sales by a percentage in certain months. SSAI enables you to use standard spreadsheet functionality on your planning and budgeting models. For this example, the data has been updated for you. Page 256
261 23. Once you have made all of your SSAI changes, save the spreadsheet. Click the Save link. Page 257
262 24. Use the Save dialog box to confirm your save. Click the Yes button. Page 258
263 25. When you retrieved data from Planning and Budgeting, the corresponding data was locked. Use the Unlock link to unlock the data in Planning and Budgeting. Click the Unlock link. Page 259

264 26. Click the Yes button. 27. Data from the spreadsheet has now been transmitted to the Peoplesoft Planning and Budgeting database. You have successfully used the spreadsheet add-in feature. End of Procedure. Using Mass Adjustments and Allocations The line-item mass adjustment functionality enables you to apply an amount or percentage change to one or many line items at the same time. Users perform mass adjustments in line item activities across one or many budget periods and dimensions for planning center working versions in which they have access to. Allocation functionality enables you to allocate budget amounts to cover, or offset, the costs in one planning center by charging them to another planning center. For example, an amount that you charge to another planning center displays as a negative amount in your planning center. This same amount displays as a positive amount in the other planning center that is intended to cover the cost. Upon completion of this lesson, you will be able to: Define mass adjustments. Apply mass adjustments. Define allocations. Apply allocations. Page 260
265 Defining Mass Adjustments Mass adjustment functionality enables you to apply an amount or percentage change to one or many line-items at the same time. The first step performing a mass adjustment is to define the mass adjustment. In this topic, you will define a mass adjustment. Procedure 1. Begin by navigating to the My Planning Workspace page. Click the Planning and Budgeting link. Page 261
266 2. Click the My Planning Workspace link. Page 262
267 3. For this example, the login ID has default field selections. Accept the default values and enter a Role Name. Enter the desired information into the Role Name field. Enter "Preparer". 4. Click the Search button. 5. Use the My Planning Workspace page to perform and monitor budgeting and planning tasks, including reviewing the approval status of a plan or budget and preparing line item, position, and asset activities. 6. Click the Edit Adjustment link. 7. Use the Mass Adjustment List page to can manage adjustments. You can also perform Apply and Reverse actions to adjustment IDs using this page. Page 263
268 8. Use the Adjustment ID field to enter a new name for a mass adjustment. Enter the desired information into the Adjustment ID field. Enter "ADJ101". 9. Click the Save button. Page 264
269 10. Click the Go button. 11. Use the Mass Adjustment Selection page to specify and edit the selection of line items to which you want to apply mass adjustments. The system uses the dimension and member ranges defined here as a filter to retrieve the associated line item data. 12. The Go To section on the Mass Adjustment Selection page contains the links to all the Mass Adjustment pages. Page 265

270 13. Enter the desired information into the Adjustment ID field. Enter "Adjust New York Freight by 10%". 14. Use the Choose Individual or Range of Values area to define the Accounts, Departments, Operating Units, and Currency that this mass adjustment will apply to. 15. Click in the Account From field. 16. Enter the desired information into the Account From field. Enter "402000". 17. Click in the Account To field. 18. Notice the Account To field is automatically populated with the value from the Account From field. You can edit this default value. For this example, leave the field as defaulted. 19. Click in the Operating Unit From field. 20. Enter the desired information into the From field. Enter "NEWYORK". 21. Click in the Operating Unit To field. Page 266

271 Training Guide 22. Notice the Operating Unit To field is automatically populated with the value from the Account From field. You can edit this default value. For this example, leave the field as defaulted. 23. Click in the Currency Code From field. 24. Enter the desired information into the Currency Code From field. Enter "USD". 25. Click the Mass Adjustment Details link. 26. Use the Mass Adjustment Details page to enter a positive or negative adjustment percentage or amount to apply to the selected line item rows. 27. Use the Percentage field to enter a positive or negative adjustment percentage to apply to the selected line item rows. Enter the desired information into the Percentage field. Enter "10". Page 267
272 28. You can select all accounts using the Select All button. To select individual accounts, use the checkboxes next to each account. Click the Select All button. 29. Click the vertical scrollbar. 30. Click the Save button. 31. You have successfully defined a mass adjustment. The next step is to apply the mass adjustment. End of Procedure. Applying Mass Adjustments Once a mass adjustment has been defined, it needs to be applied. Applying a mass adjustment performs the planning and budget calculations and assigns those adjustment amounts to the defined accounts. In this topic, you will apply a mass adjustment. Procedure Page 268
273 Training Guide 1. Begin by navigating to the My Planning Workspace page. Click the Planning and Budgeting link. 2. Click the My Planning Workspace link. Page 269
274 3. For this example, the login ID has default field selections. Accept the default values and enter a Role Name. Enter the desired information into the Role Name field. Enter "Preparer". 4. Click the Search button. 5. Use the My Planning Workspace page to perform and monitor budgeting and planning tasks, including reviewing the approval status of a plan or budget and preparing line item, position, and asset activities. Page 270
275 6. Click the Edit Adjustment link. 7. Use the Mass Adjustment List page to can manage adjustments. You can also perform Apply and Reverse actions to adjustment IDs using this page. Page 271
276 8. In this example, ADJ101 has been defined, but not applied. Click the Apply button. 9. Click the Save button. 10. After applying the adjustment, you have the option of unlocking the planning center or not. Click the Unlock link. Page 272

277 11. After applying a mass adjustment, you should navigate to the Line Item Details page to verify the adjustment. Click the Edit link. 12. Use the Line Item Details page to view, add, and modify budget amounts. Also, use this page to manually enter budget amounts for a line item; and protect a line-item budget from mass adjustments. Page 273
278 13. Next, review the mass adjustment amounts. Click the Amount link. 14. The Amount Per Period page displays the adjustment information based on the AMTPER method. Page 274
279 15. Click the Adjustment Details button. 16. The Adjustment Details page displays the adjustment information. Use the to verify the source and detail of the AMTPER adjustments. 17. Review the adjustment details for the mass adjustment. For this example, notice the Adjustment ID is the mass adjustment you just applied. Page 275

280 18. Click the Return button. Page 276

281 19. Click the OK button. 20. Click the Save button. 21. You have successfully applied a mass adjustment. End of Procedure. Defining Allocations Allocations are used to distribute or transfer amounts from and to other planning centers, budget periods, and dimension members. In this topic, you will define an allocation. Procedure Page 277
282 1. Begin by navigating to the My Planning Workspace page. Click the Planning and Budgeting link. 2. Click the My Planning Workspace link. Page 278
283 3. Enter the desired information into the Role Name field. Enter "Preparer". 4. Click the Search button. 5. Use the My Planning Workspace page to perform and monitor budgeting and planning tasks, including reviewing the approval status of a plan or budget and preparing line item, position, and asset activities. Page 279
284 6. Click the Edit Allocations link. 7. Use the Allocation List page to add, edit, or delete an allocation ID and execute an allocation defined by an allocation ID. Page 280
285 8. Click in the Allocation ID field. 9. Enter the desired information into the Allocation ID field. Enter "ALLOCATE101". 10. Click the Save button. 11. Click the Go button. 12. Use the Allocation Source page to specify the line items that you want to allocate. The system uses the dimensions and members that you define on this page to retrieve the line-item data associated with them. 13. Use the Choose Individual or Range of Values area to define the Accounts, Departments, Operating Units, and Currency that this allocation will come from. Page 281

286 14. Click in the From Value field. 15. Enter the desired information into the From Value field. Enter "402000". 16. Click in the To Value field. 17. Notice the To Value field is automatically populated with the value from the Account From field. You can edit this default value. For this example, leave the field as defaulted. 18. Click in the From Value field. 19. Enter the desired information into the From Value field. Enter "NEWYORK". 20. Click in the To Value field. 21. Notice the To Value field is automatically populated with the value from the Account From field. You can edit this default value. For this example, leave the field as defaulted. 22. Click in the From Value field. 23. Enter the desired information into the From Value field. Enter "USD". Page 282

287 24. Click the 3: Source Amount link. Training Guide 25. Use the Source Amount page to define the allocation source amount as a fixed amount or a percentage of the amount. 26. Click in the Percentage field. 27. Enter the desired information into the Percentage field. Enter "12". 28. You can allocate to all or some of the budget periods displayed below. Use the Select All button to choose all budget periods. Use the individual check boxes to select a subset. For this example, select rows periods 2006M1-2006M Click the 85, option. 30. Click the 82, option. 31. Click the 91, option. Page 283
288 32. Click the 83, option. 33. Click the 87, option. 34. Click the vertical scrollbar. 35. Click the 92, option. 36. Click the vertical scrollbar. 37. Use the Refresh button to apply the allocation percentage to the selected budget periods. Click the Refresh button. 38. Click the 4: Allocation Target link. 39. Use the Allocation Target page to specify the line items used in the activity to receive the allocation amounts calculated for an allocation ID. 40. Use the Choose Individual or Range of Values area to define the Accounts, Departments, Operating Units, and Currency that this allocation will go to. Page 284
289 41. Click in the From Value field. 42. Enter the desired information into the From Value field. Enter "402000". 43. Click in the To Value field. 44. Notice the Account To Value field is automatically populated with the value from the Account From Value field. For this example, accept the default value. 45. Click in the From Value field. 46. Enter the desired information into the From Value field. Enter "NEWYORK". 47. Click in the To Value field. 48. Notice the Operating Unit To Value field is automatically populated with the value from the Operating Unit From Value field. For this example, accept the default value. 49. Click the 5: Target Amount link. 50. Use the Target Amount page to specify the amounts of selected line-item rows to receive the allocation source amounts. Determine how the total source allocation should be distributed to each selected line item. Define the allocation target amount as a fixed amount or as a percentage of the total amount to be allocated. Page 285
290 51. Use the Allocation Spread list to select how the allocation will be distributed. Values are: Weighted - Distributes the Total to Allocate amount based on the weighted percentage of each selected line-item row. Even - Distributes the total amount to allocate evenly across all selected line-item rows. Click the Allocate Spread list. 52. Click the Even list item. 53. You can allocate to all or some of the budget periods displayed below. Use the Select All button to choose all budget periods. Use the individual checkboxes to select a subset. For this example, you will select budget periods 2006M7-2006M Click the vertical scrollbar. 55. Click the 83, option. 56. Click the 90, option. Page 286
291 57. Click the 89, option. 58. Click the 93, option. 59. Click the 87, option. 60. Click the 88, option. 61. Click the vertical scrollbar. 62. Click the Refresh button. 63. You have successfully defined an allocation. The next step is to apply the allocation. End of Procedure. Applying Allocations Once an allocation has been defined, it needs to be applied. Allocations are used to distribute or transfer amounts from and to other planning centers, budget periods, and dimension members. Applying an allocation performs the system calculations and transfers the values to the accounts defined for the allocation. In this topic, you will apply an allocation. Procedure Page 287
292 1. Begin by navigating to the My Planning Workspace page. Click the Planning and Budgeting link. 2. Click the My Planning Workspace link. Page 288
293 3. Enter the desired information into the Role Name field. Enter "Preparer". 4. Click the Search button. 5. Use the My Planning Workspace page to perform and monitor budgeting and planning tasks, including reviewing the approval status of a plan or budget and preparing line item, position, and asset activities. Page 289
294 6. Click the Edit Allocations link. 7. Use the Allocation List page to add, edit, or delete an allocation ID and execute an allocation defined by an allocation ID. Page 290
295 8. Click the ALLOCATE101 option. 9. Use the Execute button to process the selected allocation IDs. The system updates the amounts for each line-item row to equal the sum of the method/adjustment amount and allocation target amount specified for the allocation ID. Click the Execute button. 10. Notice the allocation has been executed. Next, you will return to the My Planning Workspace page to review the allocation. 11. Click the Unlock link. 12. You have successfully applied allocations. End of Procedure. Using Position Budgeting For most organizations, position budgets make up a large part of the overall company budget. In this lesson, you will learn how to access position budgeting in order to enter budget data for new and existing positions. Page 291
296 Upon completion of this lesson, you will be able to: Discuss position budgeting. Add positions. Copy positions. Distribute position costs. Fill positions. Terminate positions. Delete positions. Apply compensation adjustments. Perform position budgeting analysis. Understanding Position Budgeting Position budgeting refers to the activity of budgeting for personnel costs by position. You use position budgeting to develop personnel line-item budgets for salaries, earnings, benefits, and employer-paid taxes. In this topic, you will learn about position budgeting. Procedure Page 292
297 Training Guide 1. PeopleSoft Enterprise Planning and Budgeting has several useful Position Budgeting features including: Budgeting for new and existing positions. Copying, editing and filling positions. Budgeting for salaries, benefits, earnings and employer taxes. 2. Planning and Budgeting uses position data imported from the PeopleSoft Enterprise HRMS system, including: Existing filled and unfilled positions. Job codes. Union codes. Salary plans. Benefit plans. Earning codes. Position and employee numbers. 3. If your organization shares the cost of a position across more than one budget center, you split the funding of the position by distributing the costs across multiple budget centers. If you belong to a budget center that is contributing to the cost of a shared position, but you are not the owner, you can view your share of the costs within your personnel line-item budgets. The budget center in which you create a new position is the owner of the new position. Page 293
298 4. Position budgets include filled and unfilled positions, unless the coordinator selected the option to exclude a specific position from budget calculation on the Position Data page. If a position is selected for exclusion, the costs and distributions are not included in the position budget amounts for position budgeting or within your personnel line-item budgets. Note that budget amounts in position budgeting represent annual figures, so adjustments must be made using an annual amount. Page 294
299 5. In Planning and Budgeting, you work with slices of your position budgets one at a time, based on your budget center definition. This increases the efficiency of the system and enables other budget users to access other data slices of the budgeting model at the same time. Therefore, when you want to work with position budgets, you check out a budget version for the position budgeting activity and select the type of position budgeting activity to perform. After working on the budgeting positions, you check in the activity. Position budgeting amounts are reflected in line-item budgets after you perform budgeting model recalculations. Page 295
300 6. In summary, Planning and Budgeting uses position data imported from the PeopleSoft HRMS system. Position budgeting includes budgeting for new and existing positions, personnel costs, and copying, editing, and filling positions. 7. This concludes the understanding position budgeting topic. End of Procedure. Adding Positions As your business changes, you may be required to add new positions. In this topic, you will add a new position. Procedure Page 296
301 1. Begin by navigating to the My Planning Workspace page. Click the Planning and Budgeting link. 2. Click the My Planning Workspace link. Page 297
302 3. Enter the desired information into the Role Name field. Enter "Preparer". 4. Click in the Activity field. 5. Enter the desired information into the Activity field. Enter "POSBUD". 6. Click the Search button. 7. Use the My Planning Workspace page to perform and monitor budgeting and planning tasks, including reviewing the approval status of a plan or budget and preparing line item, position, and asset activities. Page 298
303 8. Click the Edit link. 9. The Position Overview page provides the main menu used to access position budgeting pages in which you can manage, adjust, add, copy, delete, terminate, analyze, or inquire on position data. 10. Use the Menu section to: Access the pages to add, copy, delete, fill, or terminate a position. Access the pages to perform salary, benefit, and earnings adjustments by union code, job code, or position. View HR defaults. View position budgeting analysis for reporting. 11. Use the Search and Filter Options section to select what you want to display on the Position and Employee grid. Page 299

304 12. Use the Position field to select the action that you want to take to manage your position activity, and then click the Go button. Click the Position list. 13. Click the Add list item. 14. Click the Go button. 15. Use the Position Data page to define or update a position. The defaults associated with the new position, such as the position attributes and expense components (salary, earnings, benefits, and employer paid taxes), are retrieved based on the job code that you select. 16. The Position Number field displays DEFAULT when you add a position until you save the position record, at which time the system-generated number for the new position appears. 17. Since you cannot change the status to Inactive for a position, select the Exclude from Budget Calc option to eliminate the expense from line-items, or use the Delete action form the Position drop-down when available. For this example, you will leave the Exclude from Budget Calc as defaulted. 18. Use the Effective Date field to define when this added position is active. Page 300

305 Training Guide 19. All position data is effective-dated and the system picks up costs that are associated with the position in the personnel line-item activity in the periods that they occur. For this activity, accept the default value. 20. The Status field displays Active because only active positions are permitted in position budgeting. 21. Click in the Description field. 22. Enter the desired information into the Description field. Enter "Instructor Florida 101". 23. Click in the Short Desc field. 24. Enter the desired information into the Short Desc field. Enter "INST FL". 25. Click in the Job Code field. Page 301
306 26. Use the desired Job Code field to define the predefined job code associated with this position. The available options depend on the job code defaults that are defined at the coordinator level. The value that you select affects the distributions and compensation values of the position. You can view and override these details, when allowed, by clicking the Salary Distribution, Earnings/Allowance Defaults, Benefits Defaults, and Tax Default links. Enter the desired information into the Job Code field. Enter "U1013". 27. When you define the Job Code for a new position, the job code defaults are applied to the position including the attributes and expense components of salary, benefits, earnings, and tax. 28. Click the Save button. 29. Once the new position data is saved, notice the system has assigned a new position number. 30. When adding positions, you should review the Distribution Defaults to verify the default values are acceptable. Click the Salary Distribution link. 31. Use the Salary Distribution page to modify and distribute position salary costs. Amounts are in annual units. 32. You can enter the distribution for position expenses on the Salary Distribution page, then apply it to the rest of the distribution pages. If you select the Apply Salary Distribution check box, then it becomes the distribution for all of the other costs. 33. If a position is shared by two or more planning centers, you can distribute position costs across multiple planning centers. One planning center is the owner of the position. The planning center owner of the position must enter the distributions for other planning centers. Users of the other planning centers see the distributions in their personnel line-item activity after the planning center owner copies or submits their master version and the system recalculates the planning model. The system validates that the entered distribution percentage does not exceed 100 percent. 34. It is possible to override any salary distributions that were assigned on the Job Code Defaults page and the Position Data Defaults page on this page. You can add distributions to a new position. The distributions can be made among the dimension that you included in your planning model. You can apply the salary distribution to taxes, earnings, and benefits. Page 302
307 35. Click the Earnings/Allowance link. 36. Use the Earnings/Allowance page to modify or view the earnings/allowance distribution information. Enter earnings-related budget amounts by percentage of salary or a flat amount on this page. Earnings with the Add to Gross option selected are considered earnings. Those earning codes that do not add to the gross pay are considered allowances. Earning codes that are add to gross are added together with salary, used to derive a percentage of cost for benefits and taxes. 37. The One-time pay (OTP) field applies the expense to the period in which the effective dated expense occurs. It will not be carried forward into future periods. This field applies to expenses at the employee level, not the default. 38. The Distribution button enables you to distribute earnings and allowances across multiple budget centers. Page 303

308 39. Click the Benefits link. 40. Use the Benefit Plan page to add or modify benefits for a position. The benefit amounts are annualized amounts, like all other amounts, so you must make sure to calculate your benefit amounts in annual terms. Page 304
309 41. Click the Tax link. 42. Use the Tax Rate page to modify or add tax data for a position. 43. You can enter separation distributions for each row on a distribution page. For example, on the Tax Distribution page you can enter different distributions for federal unemployment taxes, state unemployment taxes, social security, and medicare taxes. Page 305

310 44. Click the Position Overview link. 45. You have successfully added a position. End of Procedure. Copying Positions Positions can be created by copying existing ones. This enables you to save time when creating positions that are similar to existing ones. In this topic, you will copy a position. Procedure Page 306
311 1. Begin by navigating to the My Planning Workspace page. Click the Planning and Budgeting link. 2. Click the My Planning Workspace link. Page 307
312 3. Enter the desired information into the Role Name field. Enter "Preparer". 4. Click in the Activity field. 5. Enter the desired information into the Activity field. Enter "POSBUD". 6. Click the Search button. 7. Use the My Planning Workspace page to perform and monitor budgeting and planning tasks, including reviewing the approval status of a plan or budget and preparing line item, position, and asset activities. Page 308
313 8. Click the Edit link. 9. The Position Overview page provides the main menu used to access position budgeting pages in which you can manage, adjust, add, copy, delete, terminate, analyze, or inquire on position data. Page 309
314 10. Use the Position field to select the action that you want to take to manage your position activity, and then click the Go button. Click the Position list. 11. Click the Copy list item. 12. Click the Go button. 13. Use the Position Copy page to identify the date the new position will become active, the number of positions you are creating with this copy action, and the source position you will be copying from. 14. Use the Effective Date field to define the date that this new copied position will become active. For this example, accept the default date. Page 310
315 15. Click in the Number of Positions to Create field. 16. Use the Number of Positions to Create field to create multiple copies from a single position source. Enter the desired information into the Number of Positions to Create field. Enter "1". 17. Click in the Copy From Position field. 18. Use the Copy from Position field to enter the User ID of the position that you want to copy. Enter the desired information into the Copy From Position field. Enter "NP_10819". 19. Click the Copy button. 20. The system assigns a default employee Position number to a new position. 21. After the add or copy process is complete, you can override the defaults and fill the position as necessary. Click the Position Data link. Page 311
316 22. Use the Position Data page to define or update a position. The defaults associated with the new position, such as the position attributes and expense components (salary, earnings, benefits, and employer paid taxes), are retrieved based on the job code that you select. 23. Click in the Description field. 24. Enter the desired information into the Description field. Enter "Instructor California 101". 25. Click in the Short Desc field. 26. Enter the desired information into the Short Desc field. Enter "INST CA". 27. Click the Save button. 28. Click the Position Overview link. 29. Notice the new copied position now appears on the Position Overview page. Page 312
317 Training Guide 30. You have successfully created a new position using copy. Note the position copy feature does not copy the existing employee (or incumbent) from the copied position into the new position. The new position is unfilled. End of Procedure. Distributing Position Costs After you have added a new position, you can use the distribution defaults links from the Position Data page to modify salary distributions, earnings and allowances, benefits, and taxes. Each of the default distribution pages has links to the other distribution pages for: Salaries Earnings allowances Benefits Taxes You can enter as many distribution rows as you need for the position. Procedure Page 313
318 1. Begin by navigating to the My Planning Workspace page. Click the Planning and Budgeting link. 2. Click the My Planning Workspace link. 3. Enter the desired information into the Role Name field. Enter "Preparer". 4. Click in the Activity field. 5. Enter the desired information into the Activity field. Enter "POSBUD". 6. Click the Search button. 7. Use the My Planning Workspace page to perform and monitor budgeting and planning tasks, including reviewing the approval status of a plan or budget and preparing line item, position, and asset activities. Page 314
319 8. Click the Edit link. 9. The Position Overview page provides the main menu used to access position budgeting pages in which you can manage, adjust, add, copy, delete, terminate, analyze, or inquire on position data. Page 315
320 10. Navigate to the Position Data page for a position by clicking on one of the position description links in the Positions and Employees section. Click the Instructor California 101 link. 11. Use the Position Data page to define or update a position. The defaults associated with the new position, such as the position attributes and expense components (salary, earnings, benefits, and employer paid taxes), are retrieved based on the job code that you select. Page 316
321 12. Click the Salary Distribution link. 13. Use the Salary Distribution page to modify and distribute position salary costs. Amounts are in annual units. Page 317
322 14. Click in the Total Salary field. 15. Use the Total Salary field to enter the salary amount for the position or an employee assigned to the position. Enter the desired information into the Total Salary field. Enter "75000". 16. Click the Save button. 17. Click the Earnings/Allowance link. 18. Use the Earnings/Allowance page to modify or view the earnings/allowance distribution information. Enter earnings-related budget amounts by percentage of salary or a flat amount on this page. Earnings with the Add to Gross option selected are considered earnings. Those earning codes that do not add to the gross pay are considered allowances. Earning codes that are add to gross are added together with salary, used to derive a percentage of cost for benefits and taxes. 19. If you are modifying earnings for a position, the earnings code displays the defaults for the position. If you are defining earnings for an employee who is assigned to the position, the earnings code displays for the employee ID, employee record number, and position. Page 318
323 20. Enter the earnings amount as a percentage of salary or as a fixed amount, but not both. Click in the Fixed Amount field. 21. Enter the desired information into the Fixed Amount field. Enter "2500". Page 319
324 22. Click the Save button. Page 320
325 23. Click the Benefits link. 24. Use the Benefit Plan page to add or modify benefits for a position. The benefit amounts are annualized amounts, like all other amounts, so you must make sure to calculate your benefit amounts in annual terms. 25. Click in the Fixed Amount field. 26. In this example, you will update the 401k benefit to $15,000. Enter the desired information into the Fixed Amount field. Enter "15000". 27. Click the Save button. 28. Click the Tax link. 29. Use the Tax Rate page to modify or add tax data for a position. 30. For this activity, no Tax changes will be made. Page 321
326 31. You have successfully distributed position costs. End of Procedure. Filling Positions After you have created positions, you can fill them with employees if you know who will occupy the position. If you do not fill positions with employees, the system uses the default position data, as indicated by a default employee for salary, allowances, benefits, and taxes so the positions are included in the budget calculations. Keep in mind there are two primary sets of information for a given position when it is filled: the default position (as indicated by default employee) and the employee records. There are three steps for filling positions: 1. Select an employee. 2. Assign an employee to a position. 3. Update employee job details. In this topic, you will fill a position. Procedure Page 322
327 Training Guide 1. Begin by navigating to the My Planning Workspace page. Click the Planning and Budgeting link. 2. Click the My Planning Workspace link. 3. Enter the desired information into the Role Name field. Enter "Preparer". 4. Click in the Activity field. 5. Enter the desired information into the Activity field. Enter "POSBUD". 6. Click the Search button. 7. Use the My Planning Workspace page to perform and monitor budgeting and planning tasks, including reviewing the approval status of a plan or budget and preparing line item, position, and asset activities. Page 323
328 8. Click the Edit link. 9. The Position Overview page provides the main menu used to access position budgeting pages in which you can manage, adjust, add, copy, delete, terminate, analyze, or inquire on position data. Page 324
329 10. Use the Position field to select the action that you want to take to manage your position activity, and then click the Go button. Click the Position list. 11. Click the Fill list item. 12. Click the Go button. 13. Use the Fill Position page to select an employee that you want to assign to a position. Page 325
330 14. Click in the Employee ID field. 15. Enter the desired information into the Employee ID field. Enter "EPU1010". 16. If the employee in step 1 holds a current position, you can perform an employee transfer by clicking the Employee ID displayed in 2. For this example, the employee from step 1 does not have a current position. 17. Click the Add New/Concurrent Job link. 18. Use the Employee Job History page to create, update, or view the employee record. View the total position costs for an employee. 19. Use the Effective Date field to define when this new position will be filled. For this example, accept the default value. Page 326
331 20. Click in the Position field. 21. Enter the desired information into the Position field. Enter "NP_10820". 22. Click the Save button. 23. Click the Details tab. 24. Review the Job History Details to verify compensation values. 25. You have successfully filled a position. End of Procedure. Terminating Positions Use the Terminate Positions procedure to terminate positions and employee jobs. Terminating the position means no expenses are recorded after the termination date. In this topic, you will terminate a position. Procedure Page 327
332 1. Begin by navigating to the My Planning Workspace page. Click the Planning and Budgeting link. 2. Click the My Planning Workspace link. Page 328
333 3. Enter the desired information into the Role Name field. Enter "Preparer". 4. Click in the Activity field. 5. Enter the desired information into the Activity field. Enter "POSBUD". 6. Click the Search button. 7. Use the My Planning Workspace page to perform and monitor budgeting and planning tasks, including reviewing the approval status of a plan or budget and preparing line item, position, and asset activities. Page 329
334 8. Click the Edit link. 9. The Position Overview page provides the main menu used to access position budgeting pages in which you can manage, adjust, add, copy, delete, terminate, analyze, or inquire on position data. Page 330
335 10. Use the Position field to select the action that you want to take to manage your position activity, and then click the Go button. Click the Position list. 11. Click the Terminate list item. 12. Click the Go button. 13. Use the Terminate Employee and Position page to terminate employee jobs and positions. 14. If you want to transfer something from one planning center to another, you must terminate or delete the position in the old planning center, then add it to the new planning center. There is no system delivered feature to perform automatic transfers of positions between planning centers. 15. Use the Effective Date field to enter the date that you want to terminate the employee jobs or positions. For this activity, accept the default value. 16. Use the Search Criteria area to enter the desired criteria to search for the employee job or position that you want to terminate. Page 331
336 17. Click in the Position field. 18. Enter the desired information into the Position field. Enter "NP_10820". 19. Click in the Employee ID field. 20. Enter the desired information into the Employee ID field. Enter "EPU1010". 21. You can select the Include Position Default Data check box so that the position default expense is also not picked up by the system. If you do not, the system treats it as an unfilled position for the remainder of the budget year. 22. Click the Search button. 23. Click the 1 option. 24. Click the Terminate button. 25. Use the Terminate Employee and Position page to verify you are terminating the intended employee and position. Page 332

337 26. Click the OK button. Page 333
338 27. Click the Position Overview link. 28. Notice the position is still listed on the Position Overview page. This is due to the effective date of the termination. The effective date, for this example, was future dated. 29. You have successfully terminated a position. End of Procedure. Deleting Positions Use the Delete Position procedure to permanently remove a position from the system. Deleting positions removes all position records from the planning center activity scenario. In this topic, you will delete a position. Procedure 1. Begin by navigating to the My Planning Workspace page. Click the Planning and Budgeting link. Page 334
339 2. Click the My Planning Workspace link. Training Guide 3. Enter the desired information into the Role Name field. Enter "Preparer". 4. Click in the Activity field. 5. Enter the desired information into the Activity field. Enter "POSBUD". 6. Click the Search button. 7. Use the My Planning Workspace page to perform and monitor budgeting and planning tasks, including reviewing the approval status of a plan or budget and preparing line item, position, and asset activities. Page 335
340 8. Click the Edit link. 9. The Position Overview page provides the main menu used to access position budgeting pages in which you can manage, adjust, add, copy, delete, terminate, analyze, or inquire on position data. Page 336

341 10. Use the Position field to select the action that you want to take to manage your position activity, and then click the Go button. Click the Position list. 11. Click the Delete list item. 12. Click the Go button. 13. Use the Delete Position page to permanently remove a position from the system. Deleting positions removes all position records from the planning center activity scenario. 14. If you want to transfer something from one planning center to another, you must terminate or delete the position in the old planning center, then add it to the new planning center. There is no system delivered feature to perform automatic transfers of positions between planning centers. Page 337
342 15. Click in the Position field. 16. Enter the desired information into the Position field. Enter "NP_10820". 17. Click the Search button. 18. The Position Details section displays all positions matching your search criteria. 19. Click the 1 option. 20. Click the Delete button. 21. Use the Delete Position page to confirm the position you are deleting. Page 338
343 22. Click the OK button. Page 339
344 23. Click the Position Overview link. 24. Notice the position is no longer listed on the Position Overview page. 25. You have successfully deleted a position. When you delete positions, the system removes all records associated with the position, including employee job records. There is no date associated with deletions and there will be no record or audit trail. End of Procedure. Applying Compensation Adjustments You can perform compensation adjustments by job code, position, or union code for earnings, salaries, or benefits. You can make adjustments to salary that increase or decrease the base salary amount. You cannot make mass adjustments to employer paid taxes using this option. Earnings and benefits adjustments are not applied against a base earnings or benefits amount: If you are using the percentage basis, you change the percentage that is applied to the salary to calculate the earnings and benefits amounts. If you are using the amount basis, you change the fixed amount used as the earnings and benefits amounts. In this topic, you will apply salary and earnings compensation adjustments. Procedure Page 340
345 1. Begin by navigating to the My Planning Workspace page. Click the Planning and Budgeting link. 2. Click the My Planning Workspace link. Page 341
346 3. Enter the desired information into the Role Name field. Enter "Preparer". 4. Click in the Activity field. 5. Enter the desired information into the Activity field. Enter "POSBUD". 6. Click the Search button. 7. Use the My Planning Workspace page to perform and monitor budgeting and planning tasks, including reviewing the approval status of a plan or budget and preparing line item, position, and asset activities. Page 342
347 8. Click the Edit link. 9. The Position Overview page provides the main menu used to access position budgeting pages in which you can manage, adjust, add, copy, delete, terminate, analyze, or inquire on position data. Page 343
348 10. Use the Adjust field to select the type of adjustment and category that you want to perform. Start by selecting the type of data you want to adjust. Values are: Benefits: to modify the benefit amount for employees and positions by job code, position number, union code, or all positions. Earnings: to modify the earning amount for employees and positions by job code, position number, union code, or all positions. Salary: to modify the salary amount for employees and positions by job code, position number, union code, or all positions. Click the Adjust list. 11. Click the Salary list item. 12. After selecting the type of data you want to adjust, use the By field to select the categories by which you want to perform the adjustments, and then click Go. Values are: All, Job, Position, or Union. Click the By list. 13. Click the Position list item. 14. Click the Go button. Page 344
349 Training Guide 15. Use the Salary Adjustment page to modify and distribute position salary costs. Amounts are in annual units. 16. Click in the Position Number field. 17. Enter the desired information into the Position Number field. Enter "NP_10819". 18. Select the Employee Data and Include Position Default Data check boxes to display employee data, position default data, or both, associated with the search criteria. Click the Include Position Default Data option. 19. Click the Find button. 20. The Adjustment Details grid displays the employees associated with this position number. 21. Click in the Percentage field. 22. Enter the desired information into the Percentage field. Enter "5.00". Page 345
350 23. Use the Select options to select the positions to apply this compensation adjustment. Click the NP_10819 option. 24. Use the Execute Adjustment button to execute the change after you are satisfied with your selected rows and adjustment amounts. Click the Execute Adjustment button. 25. Confirm your compensation adjustments. You cannot undo this adjustment once executed. Click the OK button. Page 346

351 26. Click the Position Overview link. Page 347

352 27. Next, in this example, you will adjust earnings. Click the Adjust list. 28. Click the Earnings list item. 29. Click the By list. 30. Click the Position list item. 31. Click the Go button. 32. Use the Earning Adjustment page to modify the earning amount for employees and positions by job code, position number, union code, or all positions. 33. Click in the Earnings Code field. Page 348
353 Training Guide 34. Enter the Earnings Code for the position you are adjusting. Each position can have a number of earnings codes associated with them. If you are not sure of the code value, use the lookup feature to select a code. Enter the desired information into the Earnings Code field. Enter "BNS". 35. Click in the Position Number field. 36. Enter the desired information into the Position Number field. Enter "NP_18019". 37. Click the Include Position Default Data option. 38. Click the Find button. 39. Click in the Percent of Pay field. 40. Enter the desired information into the Percent of Pay field. Enter "5.50". 41. Click the Execute Adjustment button. Page 349
354 42. Click the OK button. 43. You have successfully adjusted compensation values. End of Procedure. Performing Position Budgeting Analysis The Position Budgeting Analysis report enables you to view real-time position budgeting information online or on paper. It can be: Run for any combination of the reporting parameters on the Position Budgeting Analysis page. Viewed by job code, employee, or position. Downloaded to Microsoft Excel where you can format the report to suit your needs. In this topic, you will perform a position budgeting analysis. Procedure 1. Begin by navigating to the Position Budgeting Analysis page. Click the Planning and Budgeting link. Page 350

355 2. Click the Analysis and Reporting link. Training Guide 3. Click the Position Budgeting Analysis link. 4. Use the Position Budgeting Analysis inquiry page to access and load position activity data to an analytic grid for analysis. 5. Several of the Select Analysis Criteria fields are filled in by default based on your user preferences. You can updated these defaulted values if needed. For this activity, you will accept the defaulted values. 6. Role Names are associated with certain position budgets. There are six predefined Planning and Budgeting roles. The system administrator can also add roles as required by your business. 7. Use the Business Unit field to analyze position budgets associated with this business unit. A Business Unit is an identification code that represents a high-level organization of business information. Valid values depend on the business units associated with planning models. A planning model can be associated with only one business unit within your organization. However, a business unit can have multiple planning models. Page 351
356 8. Use the Planning Model ID field to analyze position budgets associated with this planning model id. The Planning Model ID refers to the name of a planning and budgeting model used to perform budget development of activities and scenarios for a business unit. 9. Use the Activity field to analyze position budgets associated with an activity. Activities are user-definable entities that you can associate with other activities, different scenarios, and different planning models. 10. Use the Scenario field to analyze position budgets associated with this scenario. Scenarios provide the time element to a budget or plan. You select a calendar to use that controls periodicity of the plan and specify the beginning and ending periods of the budget or plan. The scenario also includes a ledger that the system associates with a ledger template. Ledger templates (in conjunction with the general ledger scenario), dictate the physical source of the data the system uses to seed a budget or plan; this frames the actual dimensions (ChartFields) enabled for use. The dimensions must exist on the physical ledger table. For the planning scenario specifically, this dictates the target of the plan or budget data when it is exported. 11. Click in the Planning Center field. Page 352
357 Training Guide 12. Planning centers define the rollup and approval structure for a planning or budgeting development process. Enter the desired information into the Planning Center field. Enter "13000". 13. Click the Budget Version list. 14. Use the Budget Version field to select the budget model to perform the analysis on. Budget versions are used to create what-if examples of the budget. Each budget center can have a maximum of five versions. Click the Version 2 list item. 15. Use the Labels field to specify column label display for the analysis. Values are: Code Code and Description Description Click the Labels list. 16. Click the Code and Description list item. 17. Click to the Run button to access the Position Budgeting Analysis page and review the results of your search. Click the Run button. 18. Position budgeting refers to the activity of budgeting for personnel costs by position. When you execute the Position Budgeting Analysis report, the system displays the results in an analytic grid. 19. In the analytic grid you can modify the view of the data by dragging any dimension from the row axis to the slicer bar or column axis, and by dragging cubes from the column axis to the slicer bar or row axis. 20. You have successfully performed a Position Budgeting Analysis. End of Procedure. Using Asset Budgeting PeopleSoft Planning and Budgeting provides an asset budgeting functionality, which allows your organization to view existing assets or add new assets for budgetary purposes. If your organization plans to purchase assets during the coming budget year, you may need to account for the asset cost and depreciation when preparing the budget. The asset budgeting feature enables you to add new assets and view existing in-service assets that have been imported Page 353
358 from PeopleSoft Asset Management, or a third party system. The existing assets can impact your depreciation expense budgets. Upon completion of this lesson, you will be able to: Discuss asset budgeting. View in-service assets. Add an asset. Edit an asset. Perform asset analysis. Understanding Asset Budgeting Enterprise Planning and Budgeting provides asset budgeting functionality, which enables your organization to edit existing assets or add new assets for budgetary purposes. If your organization plans on purchasing assets during the coming budget year, you may wish to account for the asset cost and depreciation when preparing the budget. The system enables you to view running totals as you budget fixed assets within a standard or Commitment Control budget. In this topic, you will learn about asset budgeting. Procedure Page 354
359 Training Guide 1. A fixed asset is tangible property used in the operations of a business, but not expected to be consumed, or converted into cash in the ordinary course of events. Plant facilities, machinery and equipment, furniture and fixtures, and leasehold improvements constitute the fixed assets of most companies. They are normally represented on the balance sheet at their net depreciated value. 2. If your organization plans on purchasing assets during the coming budget year, you may wish to account for the asset cost and depreciation when preparing the budget. Page 355
360 3. The starting point for developing a capital budget includes existing assets and the depreciation expenses associated with them. You establish this starting point by importing existing assets and depreciation expense data from Enterprise Asset Management or another application. 4. Performing asset budgeting requires that you identify default asset related accounts, establish asset profiles, cost and depreciation defaults, and an asset's useful life and salvage value. 5. This concludes the understanding asset budgeting topic. End of Procedure. Viewing In-Service Assets In-service assets are those that were already purchased. They are important for planning and budgeting because they may still impact your depreciation expenses. Budgeted assets are entered in Planning and Budgeting and can be updated as needed. In-Service assets are imported from Asset Management and cannot be updated. In this topic, you will review an in-service asset. Procedure Page 356
361 1. Begin by navigating to the My Planning Workspace page. Click the Planning and Budgeting link. Page 357
362 2. Click the My Planning Workspace link. Page 358
363 3. Enter the desired information into the Role Name field. Enter "Preparer". 4. Click in the Activity field. 5. Enter the desired information into the Activity field. Enter "ASSETS". 6. Click the Search button. 7. Use the My Planning Workspace page to perform and monitor budgeting and planning tasks, including reviewing the approval status of a plan or budget and preparing line item, position, and asset activities. Page 359
364 8. Click the View link. 9. Use the Asset Overview page to add, edit, and display assets meeting your criteria. Page 360
365 10. Select the desired Asset Status. Values are: Budgeted - These are assets that are entered in Planning and Budgeting. In-Service - These are assets that are entered in Asset Management. Click the Asset Status list. Page 361
366 11. Click the In Service list item. Page 362

367 12. Click the Search button. 13. Click the US_ link. 14. Use the Asset Data page to enter details about a new asset, update an asset already added, or review the details of an in-service asset. 15. In-service assets are not created in Planning and Budgeting. They are imported from Asset Management. Therefore, the asset data fields cannot be updated. 16. Use the scrollbar to view the rest of the asset details. Click the vertical scrollbar. 17. You have successfully viewed in-service assets. End of Procedure. Adding an Asset Asset budgeting has been designed to make the entry of new assets into the budget as efficient as possible, while still giving the budget coordinator the control to ensure accuracy of asset data Page 363
368 entry. If you are using Enterprise Asset Management, you can import asset data from Asset Management for use in Enterprise Planning and Budgeting. In this topic, you will add new assets. Procedure 1. Begin by navigating to the My Planning Workspace page. Click the Planning and Budgeting link. Page 364

369 2. Click the My Planning Workspace link. Page 365
370 3. Enter the desired information into the Role Name field. Enter "Preparer". 4. Click in the Activity field. 5. Enter the desired information into the Activity field. Enter "ASSETS". 6. Click the Search button. 7. Use the My Planning Workspace page to perform and monitor budgeting and planning tasks, including reviewing the approval status of a plan or budget and preparing line item, position, and asset activities. Page 366
371 8. Click the View link. 9. Use the Asset Overview page to add, edit, and display assets meeting your criteria. Page 367
372 10. Click the Add Asset button. Page 368

373 11. Enter the desired information into the Catalog Item field. Enter "LAPTOP101". 12. Click the Add button. 13. Use the Asset Data page to enter details about a new asset, update an asset already added, or review the details of an in-service asset. 14. Several Asset Data fields are defaulted from the Catalog Item information entered in the previous page. 15. Catalog Items, or Asset Profile IDs, are defined on the Asset Catalog page. When adding a new item, you select an existing catalog item on the Asset Data search page Asset Account values are defined on the Asset Accounts page. Asset Accounts are associated with Catalog Items. Asset Account values are display-only on the Asset Data page. 17. Depreciation Account values are defined on the Depreciation Accounts page. Depreciation Accounts are associated with Catalog Items. Depreciation Account values are display-only on the Asset Data page. 18. Click in the Budget Period field. Page 369
374 19. The Budget Period field identifies when the asset will be acquired. Enter the desired information into the Budget Period field. Enter "2006M1". 20. Click in the Quantity field. 21. Enter the desired information into the Quantity field. Enter "100". 22. Click in the Cost field. 23. The Cost field is the per unit cost of the asset. It is populated, by default, with the Catalog Item. You can edit this default value. Enter the desired information into the Cost field. Enter "1349". 24. Useful Life is the number of years for the asset to depreciate before reaching its salvage value. For this example, accept the default of 3 years. 25. The Salvage Value is the amount the asset will be valued, or can be sold, at when it reaches the end of its Useful Life. For this example, accept the default value. 26. Use the Depreciation Method field to select a depreciation method (based on the asset catalog item selected by the coordinator using the Asset Catalog page) if the coordinator enabled override capability on the Depreciation Accounts page. Values are: Straight Line Sum of the Years' Digits Declining Balance Double Declining Balance For this example, accept the default value. 27. Use the Budget Period From field to select a depreciation start period for depreciation calculations. Click in the Budget Period From field. Page 370
375 Training Guide 28. If you specify a depreciation start period, the system calculates the depreciation based on the specified cost, depreciation method, useful life, and budget period from. If you use a multiple-year budget, the system calculates the depreciation for all remaining periods within the budget, taking into account the life of the asset. If you do not want the system to calculate depreciation in the current budget year, do not enter a value into this field. If you use a multiple year budget, specify a start period for a year subsequent to the acquisition year as long as the period is contained within the proposed budget. Enter the desired information into the Budget Period From field. Enter "2006M1". 29. Click the vertical scrollbar. 30. Click in the Operating Unit field. 31. Enter the desired information into the Operating Unit field. Enter "QUEBEC". 32. Click the Save button. 33. You have successfully added an asset. End of Procedure. Editing an Asset Asset budgeting enables your organization to edit existing assets or add new assets for budgetary purposes. Asset information can be imported from Enterprise Asset Management or input directly into Planning and Budgeting. Budgeting uses existing (or inservice) assets to calculate depreciation. Budget users do not modify these assets. In this topic, you will edit asset information. Procedure Page 371
376 1. Begin by navigating to the My Planning Workspace page. Click the Planning and Budgeting link. 2. Click the My Planning Workspace link. Page 372
377 3. Enter the desired information into the Role Name field. Enter "Preparer". 4. Click in the Activity field. 5. Enter the desired information into the Activity field. Enter "ASSETS". 6. Click the Search button. 7. Use the My Planning Workspace page to perform and monitor budgeting and planning tasks, including reviewing the approval status of a plan or budget and preparing line item, position, and asset activities. Page 373
378 8. Click an entry in the Edit column. 9. Use the Asset Overview page to add, edit, and display assets meeting your criteria. Page 374
379 10. Click the Search button. 11. Click the NEW_ link. 12. Use the Asset Data page to enter details about a new asset, update an asset already added, or review the details of an in-service asset. Page 375
380 13. Click in the Quantity field. 14. Enter the desired information into the Quantity field. Enter "200". 15. Click the vertical scrollbar. 16. Click the Save button. 17. You have successfully opened and edited an asset. End of Procedure. Performing Asset Analysis Part of the planning and budgeting process is analyzing your budget. You should analyze your budget before and after you make modifications. Planning and Budgeting has an interactive Asset Analysis report that can be run from the Asset Overview page. In this topic, you will analyze an asset budget. Procedure Page 376
381 1. Begin by navigating to the Asset Analysis page. Click the Planning and Budgeting link. Page 377
382 2. Click the Analysis and Reporting link. 3. Click the Asset Analysis link. 4. Use the Asset Analysis page to specify the parameters for an Asset Analysis report for a selected planning center in a planning model and activity-scenario. Based on these parameters, you can view asset cost and depreciation details for new and inservice assets sorted by capital acquisition plans, sequence, or asset catalog items. 5. Several of the Select Analysis Criteria fields are filled in by default based on your user preferences. You can updated these defaulted values if needed. For this activity, you will accept the defaulted values. Page 378
383 6. Role Names are associated with certain asset budgets. There are six predefined Planning and Budgeting roles. The system administrator can also add roles as required by your business. Click the Role Name list. 7. Click the Preparer list item. 8. Use the Business Unit field to analyze asset budgets associated with this business unit. A Business Unit is an identification code that represents a high-level organization of business information. Valid values depend on the business units associated with planning models. A planning model can be associated with only one business unit within your organization. However, a business unit can have multiple planning models. 9. Use the Planning Model ID field to analyze asset budgets associated with this planning model id. The Planning Model ID refers to the name of a planning and budgeting model used to perform budget development of activities and scenarios for a business unit. 10. Use the Activity field to analyze asset budgets associated with an activity. Activities are user-definable entities that you can associate with other activities, different scenarios, and different planning models. 11. Click in the Scenario field. Page 379
384 12. Use the Scenario field to analyze asset budgets associated with this scenario. Scenarios provide the time element to a budget or plan. You select a calendar to use that controls periodicity of the plan and specify the beginning and ending periods of the budget or plan. The scenario also includes a ledger that the system associates with a ledger template. Ledger templates (in conjunction with the general ledger scenario), dictate the physical source of the data the system uses to seed a budget or plan; this frames the actual dimensions (ChartFields) enabled for use. The dimensions must exist on the physical ledger table. For the planning scenario specifically, this dictates the target of the plan or budget data when it is exported. Enter the desired information into the Scenario field. Enter "2007SCE101". 13. Click in the Planning Center field. 14. Click in the Planning Center field. 15. Planning centers define the rollup and approval structure for a planning or budgeting development process. Enter the desired information into the Planning Center field. Enter "13000". Page 380
385 16. Click the Budget Version list. 17. Budget versions are used to create what-if examples of the budget. Each budget center can have a maximum of five versions. Click the Master Version list item. Page 381
386 18. Use the Labels field to specify column label display for the analysis. Values are: Code Code and Description Description Click the Labels list. Page 382
387 19. Click the Code and Description list item. Page 383
388 20. Click to the Run button to access the Asset Analysis page and review the results of your search. Click the Run button. 21. When you execute the Asset Analysis report, the system displays the results in an analytic grid. 22. In the analytic grid you can modify the view of the data by dragging any dimension from the row axis to the slicer bar or column axis, and by dragging cubes from the column axis to the slicer bar or row axis. 23. You have successfully performed an asset analysis. End of Procedure. Running Reports Process Scheduler's primary role is to support the PeopleSoft application environment. It is used to run PeopleSoft processes, including programs, batch programs, reports, and so on. More specific examples of processes include running reports, posting journal entries, loading benefit enrollment forms, and calculating payroll deductions. All of these are performed behind the scenes of your online system. There are several advantages to using Process Scheduler to run reports. This lesson focuses only on running reports and not on any other types of processes. Because a report is a type of process, these two terms may be used interchangeably, depending upon the context in which they are used. Process Scheduler Advantages: System Efficiency: Data-centric processes can run close to the database on high-powered servers. Non-data-centric processes can run anywhere. Low Administration Overhead: User accounts on servers are unnecessary. Users don't need to know additional passwords to run processes. End-User Productivity: Users don't need to know the syntax of running a report or any process for that matter. Workstations remain available for other tasks while a process runs in the background on a server. Process Scheduler enables you to run processes one at a time, per your request. For example, you may want to run a report that generates a list of employees hired last month. If it fits your needs, you can also schedule a recurring report to run at specified times, such as every Friday at 6:00 p.m. Process Scheduler enables you to run reports easily and efficiently, without interruption to your workstation. A report may be running at the same moment you are reconciling financial data in a spreadsheet or entering personnel data into a database -- whatever the case may be for your particular position. In short, you can continue your daily work routine while Process Scheduler takes care of running your reports. Page 384

389 Upon completion of this lesson, you will be able to: Run a report using Process Scheduler. Monitor a report using Process Monitor. Manage a report using Report Manager. Training Guide Running EPM Reports Using Process Scheduler, running a report is a simple process. Before beginning, it is important to understand a few basic Process Scheduler terms. Process Request: A single "run request," such as an SQR or Crystal report. Run Control ID: A unique ID, associating each operator with his or her own run control table entries. Process Instance: A unique number that identifies each process request. This value is automatically incremented and assigned to each requested process when the process is submitted to run. In this topic, you will run the Budget Comparison report. Procedure 1. Begin by navigating to the Budget Comparison page. Click the Planning and Budgeting link. Page 385
390 2. Click the Analysis and Reporting link. 3. Click the Budget Comparison link. 4. Notice that there is a blank Run Control ID field. A Run Control ID is an identifier that, when paired with your User ID, uniquely identifies the process you are running. The Run Control ID defines parameters that are used when a process is run. This ensures that when a process runs in the background, the system does not prompt you for additional values. 5. You can run this report by searching for an existing Run Control ID or you can add a new value, thus creating your own Run Control ID. The advantage of creating your own is that you can create one that makes sense to you, and one that you will most likely remember and be able to use again and again. For example, you can create a Run Control ID that is the same as your name so you can easily identify and remember it. Click the Add a New Value tab. Page 386

391 Training Guide 6. By creating your own Run Control ID, you will be able to save it and all assigned parameters so that you can easily access this report again in the future. For this example, you will create a new Run Control ID called "BUDJ_COMP". Enter the desired information into the Run Control ID field. Enter "BUDJ_COMP". 7. Click the Add button. 8. Use the Budget Comparison page to enter the request parameters. These parameters will be used to define the processing rules and data to be included when the process is run. 9. Click in the Description field. 10. Enter the desired information into the Description field. Enter "Budget Comparison for MOD102". 11. Click the Role Name list. Page 387
392 12. Click the Preparer list item. 13. Click in the Business Unit field. 14. Enter the desired information into the Business Unit field. Enter "US002". 15. Click in the Planning Model ID field. 16. Enter the desired information into the Planning Model ID field. Enter "MODEL102". 17. Notice, as you enter report parameters, dependent fields are activated. 18. Click in the Activity field. 19. Enter the desired information into the Activity field. Enter "REV101". 20. Click in the Scenario field. 21. Enter the desired information into the Scenario field. Enter "2007SCE101". 22. Click the Analysis Base list. 23. Click the Current Year Forecast list item. 24. Click in the Planning Center field. 25. Enter the desired information into the Planning Center field. Enter "13000". 26. Click the Currency Inquiry Option list. 27. Click the All Entry in a Single Target list item. 28. Click the Target Currency list. 29. Click the USD list item. 30. Click the vertical scrollbar. 31. Click the View by list. 32. Click the Account list item. Page 388
393 33. Use the Save button to save these report parameters. Click the Save button. Training Guide 34. Click the Run button. 35. Use the Process Scheduler Request page to enter or update parameters, such as server name and process output format. 36. You must select a Server Name to identify the server on which the process will run. If you use the same Run Control ID for subsequent processes, the server name that you last used will default in this field. Click the Server Name list. 37. Click the PSNT list item. 38. Use the Run Date field to specify the date you want the process to run. This gives you the ability to set a report to run on a future date. Page 389
394 39. Use the Recurrence field to specify the recurring time intervals for a process request to run. For instance, if you need to run a process every week day at 5 pm that resolves all the transactions managed by your web site, you could select the run recurrence definition of M-F at 5 pm to schedule this process to run at the appropriate time. 40. Use the Run Time field to specify the time you want the process to run. This gives you the ability to set a report to run at a future time. 41. Use the Reset to Current Date/Time button to sets the Run Date and Run Time to the present date and time. 42. Use the Time Zone field to select the time zone in which the process will run. For example, you might be in Eastern Standard Time (EST) and schedule a process to run in Pacific Standard Time (PST). 43. The Description field helps to uniquely identify a process. You should be familiar enough with the processes that you run as part of your daily tasks to identify them by this description. 44. The Process Name field displays the name of the process as it appears in the definition. 45. The Process Type field displays the type of process, such as SQR, Crystal, and so on. 46. Use the Type field to select the type of output you want to generate for this job. Your four choices are File, Printer, , or Web. File: This enables you to write the output to a file that will appear in the Output Destination. Printer: You can enter a custom printer location if you have the appropriate security access. You can enter the destination information to send to a particular recipient(s). Note that is available only for SQR, PS/nVision, and Crystal. Web: Sends all output of the process to the report repository, including log and trace files. Click the Type list. 47. Click the File list item. 48. Use the Format field to define the output format for the report. The values are dependent upon the Process Type you have chosen. For example, the default format for Crystal and PS/nVision is HTML. For this example, accept the default value of PDF. Page 390
395 49. Click the OK button. 50. The report is now running. Notice that your report has been assigned a Process Instance number. It is a good idea to make a note of the Process Instance number for future tracking. 51. Now that you have used Process Scheduler to run your report, you next will use Process Monitor to monitor the status of your report. You use Process Monitor to: Check the status of your submitted process requests. Cancel process requests that have been initiated or are currently processing. Hold process requests that are queued, and queue process requests you have put on hold. Click the Process Monitor link. 52. Process Monitor supplies you with two pages, the Process List page and the Server List page. Use the Process List page to view the status of submitted report/process requests. 53. You use the fields in the View Process Request For section to display specific processes based on the criteria entered in these fields. Page 391
396 54. Use the User ID field to view the processes submitted by a user ID. Usually, you view your own user ID. Leave this field blank to view all of the processes that you are authorized to view. 55. Use the Type field to view by a process type, such as Application Engine, Crystal, COBOL, SQR, or Application Engine processes. 56. Use the Last fields to specify an interval of time by which to limit the process requests that appear in the list. Enter a custom numerical value in the field, and then select a unit type: Days, Hours, or Minutes. 57. Use the Server field to view processes that are run on a particular server. 58. Use the Name field to view all processes for a specific process name. 59. Use the Instance fields to display results based on the process instance number. This number is automatically generated when a process is requested. 60. Use the Run Status field to view processes by status, such as Completed or Error. 61. Use the Distribution Status field to view processes by distribution status, such as Generated, Posted, or Not Posted. 62. The Process List itemizes all the requested processes for the user, in this example STA101. Page 392
397 Training Guide 63. The current status of the report is Processing. The report is finished when the status is Success. Continue to click the Refresh button until the status is Success. Click the Refresh button. 64. The Run Status of your report is now Success. 65. You can get details about a particular process request by clicking the Details link in the Details column. This opens the Process Detail page where you can view such details as request parameters and message logs. Click the Details link. 66. Most of the items on the Process Detail page are display-only; however, you can use some controls to manipulate the program run, as needed. 67. The Process group box contains general information to help you identify the process request. This is a display-only group, showing basic descriptive information about this process. 68. The Run group box shows specific run information, such as the run control ID and the run location. If the process runs on the server, the server name appears in the Server field and any run recurrence that you have selected appears in the Recurrence field. 69. The Update Process group box displays the actions you can take for this field depend upon your user authorizations and the current status of the request. If you are authorized, you have the following options for your request: Hold, Queue, Cancel, Delete, or Restart. 70. The s group box contains links to other pages that provide additional details about the process parameters. 71. Click the Parameters link to view additional information about the process parameters, such as runtime definition variables, the path and program used to run the process, the location of the completed output, and additional information about the process status. 72. Click the Message Log link to view messages that are inserted into the message log by the program that is running. 73. The Batch Timings link is only available for process requests with a process type of Application Engine. The Batch Timings report contains a set of statistics that system administrators can use to tune the system to gain better performance. This report relates specifically to PeopleSoft Application Engine program performance. Page 393

398 74. When you click the View Log/Trace link, a new browser window opens, displaying links that enable you to view the message log and trace file in a browser. The View Log/Trace link appears on the Process Monitor Detail page when at least one of the following conditions is met: The output destination for the process request is Web, and the report and log files were successfully posted to the Report Repository by the Distribution Agent. The process has a run status of Success. The process request ran from a PeopleSoft Process Scheduler Server Agent that was set up using the Server Definition page with a distribution node. 75. Return to the Process List page. Click the OK button. Page 394
399 76. Now that your report has finished running, you are ready to use Report Manager to view your report. Click the Go back to Budget Comparison link. Page 395

400 77. Report Manager is like your own personal "in box" of reports and process output. It provides a secured means to view report content, check the posting status of your output, and see content detail messages. Click the Report Manager link. 78. The List page displays the reports from multiple databases to which you have access. Unlike the Administration page, the List page lists reports when both of the following events occur. First, the Distribution Agent has successfully posted the report to the report repository. Once the report has posted, the Distribution Agent publishes a message to have an entry added to the report folder table for the new report. Second, the local message node has subscribed to the message that was sent by the Distribution Agent by adding an entry for the report in the report folder table. 79. The Explorer page displays a hierarchical view of folders and reports. Unlike the Administration page, the Explorer page lists reports when both of the following events occur. First, the Distribution Agent has successfully posted the report to the report repository. Once the report has posted, the Distribution Agent publishes a message to have an entry added to the report folder table for the new report. Second, the local message node has subscribed to the message that was sent by the Distribution Agent by adding an entry for the report in the report folder table. 80. You use the Administration page to view the report, view details about the report, and delete unwanted reports from the system. New reports that have been scheduled or are in the process of being posted to the report repository are viewed only through the Administration page. Page 396
401 Training Guide 81. Use the Archives page to view reports that have been archived. 82. For this example, you need to go to the Administration page to view the report. Click the Administration tab. 83. The reports are listed in the Report List section of the page. You can sort this list by using the fields in the View Reports For section of the page. 84. The Budget Comparison - Total Year report with the instance number 197 is at the top of the list, and the status is Posted. 85. In Report Manager, there are several status possibilities. Knowing what they mean will help you to understand the progress of your job without having to check the Process Monitor. Page 397

402 86. Because the status of your report is Posted, you may now view your report. Notice the Details link on the right side of your screen. Click the Details link. 87. Use the Report Detail page to access the report output. Page 398

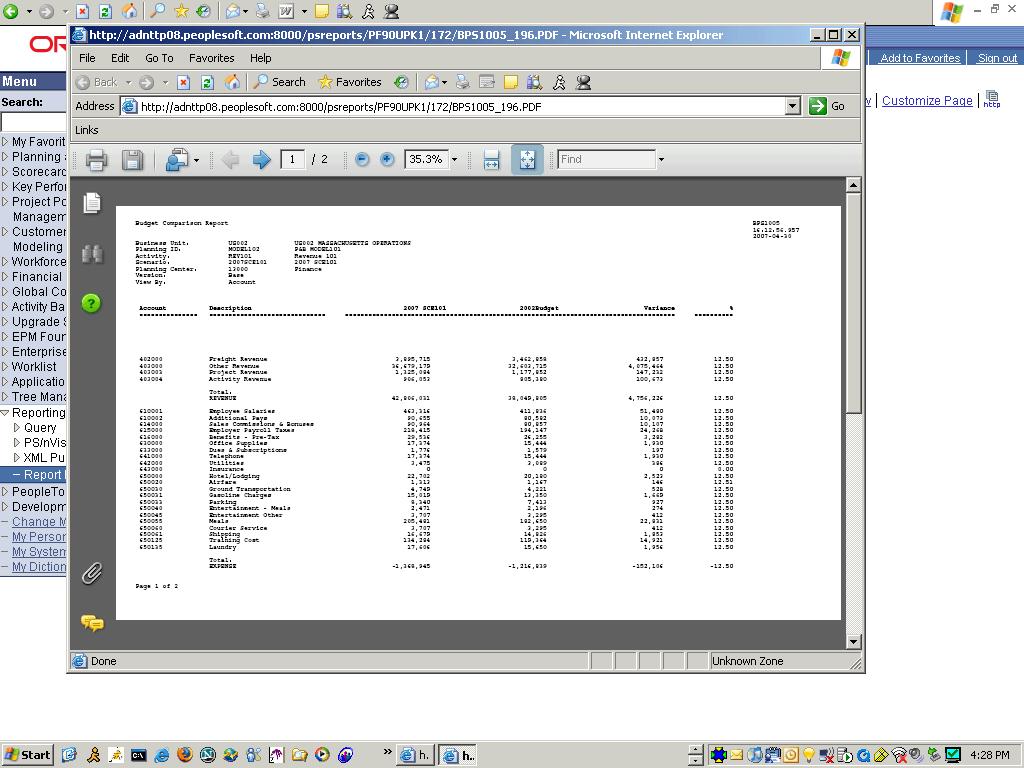
403 88. Click the BPS1005_197.PDF link. Page 399
PC130 Create and Maintain Project Budgets Training Guide
 Training Guide COPYRIGHT & TRADEMARKS Copyright 1998, 2009, 2010 Oracle, IBM and Grant MacEwan University and/or its affiliates. All rights reserved. Oracle is a registered trademark of Oracle Corporation
PeopleSoft Enterprise ebenefits 9.1 PeopleBook
 PeopleSoft Enterprise ebenefits 9.1 PeopleBook November 2010 PeopleSoft Enterprise ebenefits 9.1 PeopleBook SKU hrms91hebn-b1110 Copyright 1988, 2010, Oracle and/or its affiliates. All rights reserved.
PeopleSoft Manage Base Benefits 9. Thrift Savings Plan Enhancement. Act of 2009
 PeopleSoft Manage Base Benefits 9 Thrift Savings Plan Enhancement Act of 2009 PeopleBook Update Thrift Savings Plan Enhancement Act of 2009 PeopleSoft HCM 9.0 PeopleBook Update: PeopleSoft Manage Base
Oracle. Financials Cloud Implementing Tax. Release 13 (update 17D)
") Oracle Financials Cloud Release 13 (update 17D) Release 13 (update 17D) Part Number E89160-01 Copyright 2011-2017, Oracle and/or its affiliates. All rights reserved. Authors: Mary Kalway, Asra Alim, Reshma
Oracle Financials Cloud Release 13 (update 17D) Release 13 (update 17D) Part Number E89160-01 Copyright 2011-2017, Oracle and/or its affiliates. All rights reserved. Authors: Mary Kalway, Asra Alim, Reshma
Oracle Project Portfolio Management Cloud Using Project Performance Reporting
 Oracle Project Portfolio Management Cloud Using Project Performance Reporting Release 9 This guide also applies to on-premise implementations Oracle Project Portfolio Management Cloud Part Number E53157-01
Oracle Project Portfolio Management Cloud Using Project Performance Reporting
 Oracle Project Portfolio Management Cloud Using Project Performance Reporting Release 10 This guide also applies to on-premise implementations Oracle Project Portfolio Management Cloud Part Number E61454-02
Materials Control. Purchase Budget. Product Version Joerg Trommeschlaeger. Date: Version No. of Document: 1.
 MICROS Product Version 8.8.00.61.1491 : : Date: 16.08.2013 Version No. of Document: 1.2 Copyright 2015, Oracle and/or its affiliates. All rights reserved. This software and related documentation are provided
Financial Statements Guide
 Financial Statements Guide November 8, 2017 2017.2 Copyright 2005, 2017, Oracle and/or its affiliates. All rights reserved. This software and related documentation are provided under a license agreement
PeopleSoft Enterprise Commitment Control 9.1 Reports
 PeopleSoft Enterprise Commitment Control 9.1 Reports March 2011 9.1 PeopleSoft Enterprise Commitment Control 9.1 Reports SKU fscm91fscc-r0311 Copyright 1992, 2011, Oracle and/or its affiliates. All rights
Oracle Financials. for Australia Documentation Update. RELEASE June, Enabling the Information Age
 Oracle Financials for Australia Documentation Update RELEASE 11.0.1 June, 1998 Enabling the Information Age Copyright 1998, Oracle Corporation. All rights reserved. The Programs (which include both the
Oracle. Financials Cloud Using Assets. Release 13 (update 17D)
") Oracle Financials Cloud Release 13 (update 17D) Release 13 (update 17D) Part Number E89150-01 Copyright 2011-2017, Oracle and/or its affiliates. All rights reserved. Author: Gail D'Aloisio This software
Oracle Financials Cloud Release 13 (update 17D) Release 13 (update 17D) Part Number E89150-01 Copyright 2011-2017, Oracle and/or its affiliates. All rights reserved. Author: Gail D'Aloisio This software
Advanced Real Estate Forecasting Implementation Guide Release 9.1.x
 [1]JD Edwards EnterpriseOne Applications Advanced Real Estate Forecasting Implementation Guide Release 9.1.x E15137-06 June 2018 JD Edwards EnterpriseOne Applications Advanced Real Estate Forecasting Implementation
Oracle. Financials Cloud Implementing Tax. Release 13 (update 18B)
") Oracle Financials Cloud Release 13 (update 18B) Release 13 (update 18B) Part Number E94349-01 Copyright 2011-2018, Oracle and/or its affiliates. All rights reserved. Authors: Naini Khajanchi, Mary Kalway,
Oracle Financials Cloud Release 13 (update 18B) Release 13 (update 18B) Part Number E94349-01 Copyright 2011-2018, Oracle and/or its affiliates. All rights reserved. Authors: Naini Khajanchi, Mary Kalway,
Oracle. Financials Cloud Using Financials for EMEA. Release 13 (update 17D)
") Oracle Financials Cloud Release 13 (update 17D) Release 13 (update 17D) Part Number E89164-01 Copyright 2011-2017, Oracle and/or its affiliates. All rights reserved. Authors: Asra Alim, Vrinda Beruar,
Oracle Financials Cloud Release 13 (update 17D) Release 13 (update 17D) Part Number E89164-01 Copyright 2011-2017, Oracle and/or its affiliates. All rights reserved. Authors: Asra Alim, Vrinda Beruar,
Created on 1/7/2011 3:49:00 PM
 Created on 1/7/2011 3:49:00 PM COPYRIGHT & TRADEMARKS Copyright 1998, 2009, Oracle and/or its affiliates. All rights reserved. Oracle is a registered trademark of Oracle Corporation and/or its affiliates.
Project Budgets! Stay in Control of Your Projects' Finances with. Project Budget Quick Reference WHAT CAN THE PROJECT BUDGETS FEATURE DO FOR ME?
 Stay in Control of Your Projects' Finances with Project Budgets! HOW DOES THE PROJECT BUDGETS FEATURE WORK? The Project Budget feature displays planned billings or costs. Actuals versus Planned View compares
Vivid Reports 2.0 Budget User Guide
 B R I S C O E S O L U T I O N S Vivid Reports 2.0 Budget User Guide Briscoe Solutions Inc PO BOX 2003 Station Main Winnipeg, MB R3C 3R3 Phone 204.975.9409 Toll Free 1.866.484.8778 Copyright 2009-2014 Briscoe
PeopleSoft Enterprise Human Resources 9.1 PeopleBook: Administer Salary Packaging
 PeopleSoft Enterprise Human Resources 9.1 PeopleBook: Administer Salary Packaging November 2010 PeopleSoft Enterprise Human Resources 9.1 PeopleBook: Administer Salary Packaging SKU hrms91hhsp-b1110 Copyright
Oracle. Project Portfolio Management Cloud Using Project Performance Reporting. Release 13 (update 17D)
") Oracle Project Portfolio Management Cloud Release 13 (update 17D) Release 13 (update 17D) Part Number E89308-02 Copyright 2011-2017, Oracle and/or its affiliates. All rights reserved. Authors: Sandeep
Oracle Project Portfolio Management Cloud Release 13 (update 17D) Release 13 (update 17D) Part Number E89308-02 Copyright 2011-2017, Oracle and/or its affiliates. All rights reserved. Authors: Sandeep
Oracle. Project Portfolio Management Cloud Using Project Performance Reporting. Release 13 (update 18B)
") Oracle Project Portfolio Management Cloud Release 13 (update 18B) Release 13 (update 18B) Part Number E94696-05 Copyright 2011-2018, Oracle and/or its affiliates. All rights reserved. Authors: Sandeep
Oracle Project Portfolio Management Cloud Release 13 (update 18B) Release 13 (update 18B) Part Number E94696-05 Copyright 2011-2018, Oracle and/or its affiliates. All rights reserved. Authors: Sandeep
Oracle Fusion Applications Asset Lifecycle Management, Assets Guide. 11g Release 6 (11.1.6) Part Number E
 Part Number E") Oracle Fusion Applications Asset Lifecycle Management, Assets Guide 11g Release 6 (11.1.6) Part Number E22894-06 September 2012 Oracle Fusion Applications Asset Lifecycle Management, Assets Guide Part
Oracle Fusion Applications Asset Lifecycle Management, Assets Guide 11g Release 6 (11.1.6) Part Number E22894-06 September 2012 Oracle Fusion Applications Asset Lifecycle Management, Assets Guide Part
Oracle Financials Cloud Using Financials for Asia/Pacific. Release 13 (update 18C)
") Release 13 (update 18C) Release 13 (update 18C) Part Number E98438-01 Copyright 2011-2018, Oracle and/or its affiliates. All rights reserved. Authors: Asra Alim, Vrinda Beruar, Barbara Kostelec, Robert
Release 13 (update 18C) Release 13 (update 18C) Part Number E98438-01 Copyright 2011-2018, Oracle and/or its affiliates. All rights reserved. Authors: Asra Alim, Vrinda Beruar, Barbara Kostelec, Robert
Oracle Banking Digital Experience
 Oracle Banking Digital Experience Retail Term Deposits User Manual Release 17.1.0.0.0 Part No. E83887-01 March 2017 Retail Term Deposits User Manual March 2017 Oracle Financial Services Software Limited
Oracle Project Portfolio Management Cloud Defining and Managing Financial Projects Release 12 This guide also applies to on-premises implementations
 Oracle Project Portfolio Management Cloud Defining and Managing Financial Projects Release 12 This guide also applies to on-premises implementations Oracle Project Portfolio Management Cloud Part Number
PeopleSoft Risk Management 9.1 Reports
 PeopleSoft Risk Management 9.1 Reports January 2012 PeopleSoft Risk Management 9.1 SKU fscm91fp2ftrm- 0112 Copyright 1992, 2012, Oracle and/or its affiliates. All rights reserved. Trademark Notice Oracle
Oracle. Project Portfolio Management Cloud Defining and Managing Financial Projects. Release 13 (update 18B)
") Oracle Project Portfolio Management Cloud Defining and Managing Financial Projects Release 13 (update 18B) Release 13 (update 18B) Part Number E94418-02 Copyright 2011-2018, Oracle and/or its affiliates.
Oracle Project Portfolio Management Cloud Defining and Managing Financial Projects Release 13 (update 18B) Release 13 (update 18B) Part Number E94418-02 Copyright 2011-2018, Oracle and/or its affiliates.
Oracle General Ledger Documentation Update. RELEASE October 1998
 Oracle General Ledger Documentation Update RELEASE 11.0.2 October 1998 Copyright 1998, Oracle Corporation. All rights reserved. The Programs (which include both the software and documentation) contain
Oracle Financials Cloud Implementing Assets. Release 13 (update 18C)
") Release 13 (update 18C) Release 13 (update 18C) Part Number E98425-01 Copyright 2011-2018, Oracle and/or its affiliates. All rights reserved. Author: Gail D'Aloisio This software and related documentation
Release 13 (update 18C) Release 13 (update 18C) Part Number E98425-01 Copyright 2011-2018, Oracle and/or its affiliates. All rights reserved. Author: Gail D'Aloisio This software and related documentation
Oracle Banking Digital Experience
 Oracle Banking Digital Experience Retail Term Deposits User Manual Release 18.1.0.0.0 Part No. E92727-01 January 2018 Retail Term Deposits User Manual January 2018 Oracle Financial Services Software Limited
Oracle Hospitality Cruise Shipboard Property Management System Currency Exchange User Guide Release 8.0 E
 Oracle Hospitality Cruise Shipboard Property Management System Currency Exchange User Guide Release 8.0 E84872-01 October 2017 Copyright 1995, 2017, Oracle and/or its affiliates. All rights reserved. This
Oracle. Financials Cloud Using Assets. Release 13 (update 18A)
") Oracle Financials Cloud Release 13 (update 18A) Release 13 (update 18A) Part Number E92169-01 Copyright 2011-2018, Oracle and/or its affiliates. All rights reserved. Author: Gail D'Aloisio This software
Oracle Financials Cloud Release 13 (update 18A) Release 13 (update 18A) Part Number E92169-01 Copyright 2011-2018, Oracle and/or its affiliates. All rights reserved. Author: Gail D'Aloisio This software
Oracle. Project Portfolio Management Cloud Defining and Managing Financial Projects. Release 13 (update 17D)
") Oracle Project Portfolio Management Cloud Defining and Managing Financial Projects Release 13 (update 17D) Release 13 (update 17D) Part Number E89313-02 Copyright 2011-2017, Oracle and/or its affiliates.
Oracle Project Portfolio Management Cloud Defining and Managing Financial Projects Release 13 (update 17D) Release 13 (update 17D) Part Number E89313-02 Copyright 2011-2017, Oracle and/or its affiliates.
PeopleSoft Enterprise EPM 9.1 Applications Fundamentals for Financial Services Industry PeopleBook
 PeopleSoft Enterprise EPM 9.1 Applications Fundamentals for Industry PeopleBook April 2010 PeopleSoft Enterprise EPM 9.1 Applications Fundamentals for Industry PeopleBook SKU epm91pfsi-b0410 Copyright
Oracle Fusion Applications Project Management, Project Performance Reporting Guide. 11g Release 1 (11.1.3) Part Number E
 Part Number E") Oracle Fusion Applications Project Management, Project Performance Reporting Guide 11g Release 1 (11.1.3) Part Number E22601-03 December 2011 Oracle Fusion Applications Project Management, Project Performance
Oracle Fusion Applications Project Management, Project Performance Reporting Guide 11g Release 1 (11.1.3) Part Number E22601-03 December 2011 Oracle Fusion Applications Project Management, Project Performance
Oracle Banking Digital Experience
 Oracle Banking Digital Experience Retail Transfer and Payments User Manual Release 15.1.0.0.0 Part No. E66313-01 October 2015 Retail Tranfer and Payments User Manual October 2015 Oracle Financial Services
Oracle. Financials Cloud Using Tax. Release 13 (update 18B)
") Oracle Financials Cloud Release 13 (update 18B) Release 13 (update 18B) Part Number E94376-02 Copyright 2011-2018, Oracle and/or its affiliates. All rights reserved. Authors: Naini Khajanchi, Mary Kalway,
Oracle Financials Cloud Release 13 (update 18B) Release 13 (update 18B) Part Number E94376-02 Copyright 2011-2018, Oracle and/or its affiliates. All rights reserved. Authors: Naini Khajanchi, Mary Kalway,
Oracle Banking Digital Experience
 Oracle Banking Digital Experience Mortgage Originations User Manual Release 17.1.0.0.0 Part No. E83887-01 March 2017 Mortgage Originations User Manual March 2017 Oracle Financial Services Software Limited
Advanced Stock Valuation Implementation Guide Release 9.2
 [1]JD Edwards EnterpriseOne Applications Advanced Stock Valuation Implementation Guide Release 9.2 E63952-02 October 2015 Describes the JD Edwards EnterpriseOne Advanced Stock Valuation system from Oracle,
Oracle Financials Cloud Implementing Financials for Asia/ Pacific. Release 13 (update 18C)
") Implementing Financials for Asia/ Pacific Release 13 (update 18C) Release 13 (update 18C) Part Number E98429-01 Copyright 2011-2018, Oracle and/or its affiliates. All rights reserved. Authors: Asra Alim,
Implementing Financials for Asia/ Pacific Release 13 (update 18C) Release 13 (update 18C) Part Number E98429-01 Copyright 2011-2018, Oracle and/or its affiliates. All rights reserved. Authors: Asra Alim,
Oracle FLEXCUBE Direct Banking Release Retail Inquiries User Manual. Part No. E
 Oracle FLEXCUBE Direct Banking Release 12.0.1.0.0 Retail Inquiries User Manual Part No. E52306-01 Retail Inquiries User Manual Table of Contents 1. Transaction Host Integration Matrix... 3 2. Introduction...
Withholding Tax Reporting for Italy
 ERP CLOUD Withholding Tax Reporting for Italy Oracle Financials for EMEA Table of Contents 1. Purpose of the document... 2 2. Assumptions and Prerequisites... 2 3. Feature Specific Setup... 2 Create a
Amortization Guide. November 8,
 November 8, 2017 2017.2 Copyright 2005, 2017, Oracle and/or its affiliates. All rights reserved. This software and related documentation are provided under a license agreement containing restrictions on
Oracle Banking Digital Experience
 Oracle Banking Digital Experience Unsecured Personal Loans Originations User Manual Release 17.2.0.0.0 Part No. E88573-01 July 2017 s Originations User Manual July 2017 Oracle Financial Services Software
Oracle Banking Digital Experience
 Oracle Banking Digital Experience Corporate Foreign Exchange User Manual Release 18.3.0.0.0 Part No F12056-01 December 2018 Corporate Foreign Exchange User Manual December 2018 Oracle Financial Services
Oracle FLEXCUBE Direct Banking
 Oracle FLEXCUBE Direct Banking Corporate E-Factoring User Manual Release 12.0.2.0.0 Part No. E50108-01 September 2013 Corporate E-Factoring User Manual September 2013 Oracle Financial Services Software
Withholding Tax Reporting for Israel
 ERP CLOUD Withholding Tax Reporting for Israel Oracle Financials for EMEA Table of Contents 1. Purpose of the document... 2 2. Assumptions and Prerequisites... 2 3. Feature Specific Setup... 3 Create a
Oracle Banking Digital Experience
 Oracle Banking Digital Experience US Originations Unsecured Personal Loans User Manual Release 18.2.0.0.0 Part No. E97823-01 June 2018 US Originations Unsecured Personal Loans User Manual June 2018 Oracle
Oracle Banking Digital Experience
 Oracle Banking Digital Experience Auto Loans Originations User Manual Release 17.2.0.0.0 Part No. E88573-01 July 2017 Auto Loans Originations User Manual July 2017 Oracle Financial Services Software Limited
Oracle Banking Digital Experience
 Oracle Banking Digital Experience US Originations Auto Loans User Manual Release 18.2.0.0.0 Part No. E97823-01 June 2018 US Originations Auto Loans User Manual June 2018 Oracle Financial Services Software
Oracle FLEXCUBE Direct Banking
 Oracle FLEXCUBE Direct Banking Corporate Inquiries User Manual Release 12.0.3.0.0 Part No. E52543-01 April 2014 Corporate Inquiries User Manual April 2014 Oracle Financial Services Software Limited Oracle
PeopleSoft EPM 9.1 Risk Weighted Capital PeopleBook
 PeopleSoft EPM 9.1 Risk Weighted Capital PeopleBook April 2012 PeopleSoft EPM 9.1 Risk Weighted Capital PeopleBook SKU epm91prwc-b0412 Copyright 1988, 2012, Oracle and/or its affiliates. All rights reserved.
Oracle Banking Digital Experience
 Oracle Banking Digital Experience Unsecured Personal Loans Originations User Manual Release 18.1.0.0.0 Part No. E92727-01 January 2018 s Originations User Manual January 2018 Oracle Financial Services
Oracle Financial Services Liquidity Risk Management
 Oracle Financial Services Liquidity Risk Management Analytics User Guide Oracle Financial Services Liquidity Risk Management Analytics User Guide, Copyright 2017, Oracle and/or its affiliates. All rights
Oracle FLEXCUBE Core Banking
 Oracle FLEXCUBE Core Banking Originations Reports Manual Release 11.5.0.0.0 Part No. E52876-01 July 2014 Originations Reports Manual July 2014 Oracle Financial Services Software Limited Oracle Park Off
Oracle Financial Services Liquidity Risk Management
 Oracle Financial Services Liquidity Risk Management Analytics User Guide Oracle Financial Services Liquidity Risk Management Analytics User Guide, Copyright 2018, Oracle and/or its affiliates. All rights
Oracle GoldenGate Director 11g Release 2 (11.2.1) Release Notes E
 Release Notes E") Oracle GoldenGate Director 11g Release 2 (11.2.1) Release Notes E35700-01 Copyright 2008, 2009, 2010, 2011, 2012 Oracle and/or its affiliates. All rights reserved. This software and related documentation
Oracle GoldenGate Director 11g Release 2 (11.2.1) Release Notes E35700-01 Copyright 2008, 2009, 2010, 2011, 2012 Oracle and/or its affiliates. All rights reserved. This software and related documentation
Oracle Banking Digital Experience
 Oracle Banking Digital Experience US Originations Auto Loans User Manual Release 18.1.0.0.0 Part No. E92727-01 January 2018 US Originations Auto Loans User Manual January 2018 Oracle Financial Services
Oracle Banking Digital Experience
 Oracle Banking Digital Experience US Originations Unsecured Personal Loans User Manual Release 17.2.0.0.0 Part No. E88573-01 July 2017 US Originations Unsecured Personal Loans User Manual July 2017 Oracle
Oracle Banking Digital Experience
 Oracle Banking Digital Experience Corporate Term Deposit User Manual Release 18.2.0.0.0 Part No. E97823-01 June 2018 Corporate Term Deposit User Manual June 2018 Oracle Financial Services Software Limited
Oracle FLEXCUBE Core Banking
 Oracle FLEXCUBE Core Banking Bills User Manual Release 11.6.0.0.0 Part No. E65544-01 January 2016 Bills User Manual January 2016 Oracle Financial Services Software Limited Oracle Park Off Western Express
Oracle Banking Digital Experience
 Oracle Banking Digital Experience Islamic Banking Retail Term Deposit User Manual Release 17.2.0.0.0 Part No. E88573-01 July 2017 Islamic Banking Retail Term Deposit User Manual July 2017 Oracle Financial
Oracle Fusion Applications Asset Lifecycle Management, Assets Guide. 11g Release 5 (11.1.5) Part Number E
 Part Number E") Oracle Fusion Applications Asset Lifecycle Management, Assets Guide 11g Release 5 (11.1.5) Part Number E22894-05 June 2012 Oracle Fusion Applications Asset Lifecycle Management, Assets Guide Part Number
Oracle Fusion Applications Asset Lifecycle Management, Assets Guide 11g Release 5 (11.1.5) Part Number E22894-05 June 2012 Oracle Fusion Applications Asset Lifecycle Management, Assets Guide Part Number
Advanced Revenue Management
 April 11, 2018 2018.1 Copyright 2005, 2018, Oracle and/or its affiliates. All rights reserved. This software and related documentation are provided under a license agreement containing restrictions on
Golden Tax Adaptor for China
 ERP CLOUD Golden Tax Adaptor for China Oracle Financials for Asia Pacific Table of Contents 1. Purpose of the document... 2 2. Assumptions and Prerequisites... 3 3. Feature Specific Setup... 3 Financial
Oracle FLEXCUBE Core Banking
 Oracle FLEXCUBE Core Banking Safe Deposit Box User Manual Release 5.1.0.0.0 Part No. E57304-01 September 2014 Safe Deposit Box User Manual September 2014 Oracle Financial Services Software Limited Oracle
Corporate Loan Origination User Guide Oracle FLEXCUBE Universal Banking. Release Part No. E
 Corporate Loan Origination User Guide Oracle FLEXCUBE Universal Banking Release 12.0.2.0.0 Part No. E49740-01 September 2013 Corporate Loan Origination User Guide September 2013 Oracle Financial Services
Oracle. Financials Cloud Implementing Assets. Release 13 (update 17C)
") Oracle Financials Cloud Release 13 (update 17C) Release 13 (update 17C) Part Number E84478-03 Copyright 2011-2017, Oracle and/or its affiliates. All rights reserved. Author: Gail D'Aloisio This software
Oracle Financials Cloud Release 13 (update 17C) Release 13 (update 17C) Part Number E84478-03 Copyright 2011-2017, Oracle and/or its affiliates. All rights reserved. Author: Gail D'Aloisio This software
Oracle Banking Digital Experience
 Oracle Banking Digital Experience Corporate Loans User Manual Release 17.1.0.0.0 Part No. E83887-01 March 2017 Corporate Loans User Manual March 2017 Oracle Financial Services Software Limited Oracle Park
Oracle Banking Digital Experience
 Oracle Banking Digital Experience Corporate Loans and Finances User Manual Release 18.3.0.0.0 Part No. F12056-01 December 2018 Corporate Loans and Finances User Manual December 2018 Oracle Financial Services
Oracle Financials Cloud Implementing Receivables Credit to Cash
 Oracle Financials Cloud Implementing Receivables Credit to Cash Release 9 This guide also applies to on-premise implementations Oracle Financials Cloud Part Number E55641-02 Copyright 2011-2015, Oracle
Oracle Banking Digital Experience
 Oracle Banking Digital Experience Retail Loans User Manual Release 18.1.0.0.0 Part No. E92727-01 January 2018 Retail Loans User Manual January 2018 Oracle Financial Services Software Limited Oracle Park
Oracle. SCM Cloud Using Fiscal Document Capture. Release 13 (update 17B)
") Oracle SCM Cloud Release 13 (update 17B) Release 13 (update 17B) Part Number E84337-03 Copyright 2011-2017, Oracle and/or its affiliates. All rights reserved. Author: Sathyan Nagarajan This software and
Oracle SCM Cloud Release 13 (update 17B) Release 13 (update 17B) Part Number E84337-03 Copyright 2011-2017, Oracle and/or its affiliates. All rights reserved. Author: Sathyan Nagarajan This software and
Oracle FLEXCUBE Core Banking
 Oracle FLEXCUBE Core Banking Safe Deposit Box User Manual Release 11.6.0.0.0 Part No. E65544-01 July 2016 Safe Deposit Box User Manual July 2016 Oracle Financial Services Software Limited Oracle Park Off
PeopleSoft Enterprise Commitment Control 9.1 PeopleBook
 PeopleSoft Enterprise Commitment Control 9.1 PeopleBook November 2009 PeopleSoft Enterprise Commitment Control 9.1 PeopleBook SKU fscm91pbr0 Copyright 1992, 2009, Oracle and/or its affiliates. All rights
Oracle Communications Billing and Revenue Management
 Oracle Communications Billing and Revenue Management Managing Accounts Receivable Release 7.4 E25079-01 March 2013 Oracle Communications Billing and Revenue Management Managing Accounts Receivable, Release
Oracle Banking Digital Experience
 Oracle Banking Digital Experience Retail Term Deposits User Manual Release 18.2.0.0.0 Part No. E97823-01 June 2018 Retail Term Deposits User Manual June 2018 Oracle Financial Services Software Limited
Oracle FLEXCUBE Core Banking
 Oracle FLEXCUBE Core Banking Term Deposit Reports Manual Release 11.6.0.0.0 Part No. E65544-01 November 2016 Term Deposit Reports Manual November 2016 Oracle Financial Services Software Limited Oracle
Sage Bank Services User's Guide
 Sage 300 2017 Bank Services User's Guide This is a publication of Sage Software, Inc. Copyright 2016. Sage Software, Inc. All rights reserved. Sage, the Sage logos, and the Sage product and service names
Project Budgeting Release 2015
 Project Budgeting Release 2015 Disclaimer This document is provided as-is. Information and views expressed in this document, including URL and other Internet Web site references, may change without notice.
Oracle. Financials Cloud Implementing Financials for EMEA. Release 13 (update 18B)
") Oracle Financials Cloud Release 13 (update 18B) Release 13 (update 18B) Part Number E94321-01 Copyright 2011-2018, Oracle and/or its affiliates. All rights reserved. Authors: Sampriti Singha Roy, Mary
Oracle Financials Cloud Release 13 (update 18B) Release 13 (update 18B) Part Number E94321-01 Copyright 2011-2018, Oracle and/or its affiliates. All rights reserved. Authors: Sampriti Singha Roy, Mary
Oracle FLEXCUBE Core Banking
 Oracle FLEXCUBE Core Banking Loan Reports Manual Release 11.5.0.0.0 Part No. E52876-01 July 2014 Loan Reports Manual July 2014 Oracle Financial Services Software Limited Oracle Park Off Western Express
Oracle Banking Digital Experience
 Oracle Banking Digital Experience US Originations Auto Loans with OFSLL User Manual Release 17.2.0.0.0 Part No. E88573-01 July 2017 US Originations Auto Loans OFSLL User Manual July 2017 Oracle Financial
Oracle Banking Digital Experience
 Oracle Banking Digital Experience Retail Recurring Deposits User Manual Release 18.2.0.0.0 Part No. E97823-01 June 2018 Retail Recurring Deposits User Manual June 2018 Oracle Financial Services Software
Oracle Financials. for the Netherlands Documentation Updates. RELEASE 11 August, Enabling the Information Age
 Oracle Financials for the Netherlands Documentation Updates RELEASE 11 August, 1998 Enabling the Information Age Copyright 1998, Oracle Corporation. All rights reserved. The Programs (which include both
Oracle FLEXCUBE Core Banking
 Oracle FLEXCUBE Core Banking Collection Transaction User Manual Release 11.6.0.0.0 Part No. E65544-01 October 2015 Collection Transaction User Manual October 2015 Oracle Financial Services Software Limited
PeopleSoft 8.8 Budgeting PeopleBook
 PeopleSoft 8.8 Budgeting PeopleBook December 2002 PeopleSoft 8.8 SKU EPM88BPD-B 1202 PeopleBooks Contributors: Teams from PeopleSoft Product Documentation and Development. Copyright 1999-2002 PeopleSoft,
Oracle Banking Digital Experience
 Oracle Banking Digital Experience Islamic Banking Retail Islamic Finance User Manual Release 17.2.0.0.0 Part No. E88573-01 July 2017 Islamic Banking Retail Islamic Finance User Manual July 2017 Oracle
JD Edwards EnterpriseOne Applications
 JD Edwards EnterpriseOne Applications 1099 Year-End Processing Guide 2017 E38288-11 December 2017 Describes the Accounts Payable programs to produce information for Internal Revenue Service (IRS) Form
Oracle Fusion Applications Order Fulfillment, Receivables, Payments, Cash, and Collections Guide. 11g Release 1 (11.1.2) Part Number E
 Part Number E") Oracle Fusion Applications Order Fulfillment, Receivables, Payments, Cash, and Collections Guide 11g Release 1 (11.1.2) Part Number E22896-02 August 2011 Oracle Fusion Applications Order Fulfillment, Receivables,
Oracle Fusion Applications Order Fulfillment, Receivables, Payments, Cash, and Collections Guide 11g Release 1 (11.1.2) Part Number E22896-02 August 2011 Oracle Fusion Applications Order Fulfillment, Receivables,
Oracle Banking Digital Experience
 Oracle Banking Digital Experience Islamic Banking Retail Islamic Finance User Manual Release 17.1.0.0.0 Part No. E83887-01 March 2017 Islamic Banking Retail Islamic Finance User Manual March 2017 Oracle
Oracle Fusion Transactional Business Intelligence
 Oracle Fusion Transactional Business Intelligence 11.1.1.8.0 Workforce Management - Accrual Real Time Subject Area August 2014 Contents Workforce Management - Accrual Real Time... 3 Description... 3 This
Sage Abra HRMS Abra Workforce Connections. Benefits and Planning Guide
 Sage Abra HRMS Abra Workforce Connections Benefits and Planning Guide 2010 Sage Software, Inc. All rights reserved. Sage, the Sage logos, and the Sage product and service names mentioned herein are registered
Oracle. Global Human Resources Cloud Using Absence Management. Release 13 (update 17D)
") Oracle Global Human Resources Cloud Release 13 (update 17D) Release 13 (update 17D) Part Number E89035-01 Copyright 2011-2017, Oracle and/or its affiliates. All rights reserved. Authors: Suchandra Dutta
Oracle Global Human Resources Cloud Release 13 (update 17D) Release 13 (update 17D) Part Number E89035-01 Copyright 2011-2017, Oracle and/or its affiliates. All rights reserved. Authors: Suchandra Dutta
Oracle Banking Platform
 Oracle Banking Platform Functional Upgrade Guide Release 2.6.0.0.0 E87094-01 May 2017 Oracle Banking Platform Functional Upgrade Guide, Release 2.6.0.0.0 E87094-01 Copyright 2011, 2017, Oracle and/or its
Budget planning. Dynamics 365 for Finance and Operations
 Budget planning This document walks you through an annual budget process in Microsoft Dynamics 365 for Finance and Operations. Demo script May 2018 Send feedback. Learn more about Finance and Operations.
Foreclosure of Retail Term Deposit Account Oracle FLEXCUBE Universal Banking Release [December] [2012] Oracle Part Number E
![Foreclosure of Retail Term Deposit Account Oracle FLEXCUBE Universal Banking Release [December] [2012] Oracle Part Number E](/thumbs/96/127326280.jpg "Foreclosure of Retail Term Deposit Account Oracle FLEXCUBE Universal Banking Release [December] [2012] Oracle Part Number E") Foreclosure of Retail Term Deposit Account Oracle FLEXCUBE Universal Banking Release 12.0.1.0.0 [December] [2012] Oracle Part Number E51465-01 Table of Contents Foreclosure of Retail Term Deposit Account
Foreclosure of Retail Term Deposit Account Oracle FLEXCUBE Universal Banking Release 12.0.1.0.0 [December] [2012] Oracle Part Number E51465-01 Table of Contents Foreclosure of Retail Term Deposit Account
Oracle Banking Digital Experience
 Oracle Banking Digital Experience Corporate Trade Finance User Manual Release 17.2.0.0.0 Part No. E88573-01 July 2017 Corporate Trade Finance User Manual July 2017 Oracle Financial Services Software Limited
Oracle FLEXCUBE Direct Banking
 Oracle FLEXCUBE Direct Banking Retail Loans-Islamic Finance User Manual Release 12.0.3.0.0 Part No. E52543-01 April 2014 Retail Loans-Islamic Finance User Manual April 2014 Oracle Financial Services Software
Oracle Banking Digital Experience
 Oracle Banking Digital Experience Retail Credit Cards User Manual Release 18.3.0.0.0 Part No. F12056-01 December 2018 Retail Credit Cards User Manual December 2018 Oracle Financial Services Software Limited
PeopleSoft Enterprise CRM Enterprise Pricer 9.1 PeopleBook
 PeopleSoft Enterprise CRM Enterprise Pricer 9.1 PeopleBook October 2009 PeopleSoft Enterprise CRM Enterprise Pricer 9.1 PeopleBook SKU crm91pbr0 Copyright 2001, 2009, Oracle and/or its affiliates. All