Quicken. For Farm/Ranch Financial Records
|
|
|
- Rosa Paul
- 5 years ago
- Views:
Transcription


1 Quicken For Farm/Ranch Financial Records Quicken Deluxe 2011
2 i
3 QUICKEN COMPUTER WORKSHOP EVALUATION Please evaluate this workshop by filling in the appropriate space for each pair of phrases. What is your overall evaluation of this workshop? (Fill in appropriate space.) Excellent Poor CONTENT: In general, how do you rate the content of this workshop? What I expected Different than expected Good style and delivery Poor style and delivery Organized Unorganized Too complex Too simple Informative Uninformative MATERIALS: In general, how do you rate the materials handed out? Very effective Ineffective Well prepared Useless HOW DID THIS WORKSHOP CHANGE: Your knowledge? Improved No change Your interest in topic? Increased Decreased Your confidence in using skills? Increased Decreased Comments helpful to instructors and conference planners: Would you be interested in participating in an advanced Quicken workshop? Potential topics of interest (fill in all that apply): Developing budgets Livestock inventory options More on reports and graphs Financial calculator features (refinancing, college savings, retirement planning) Investment Accounts Online Banking Other ii
4 iii
5 Table of Contents Using Quicken for Farm/Ranch Financial Records...1 Introduce Manual Text Conventions, Keyboard Shortcuts and desktop setup...2 Set up a Data File and Add a Checking Account...5 Add Savings and Cash Accounts...9 Modify the Category List...9 Import a Farm Category List...10 Add Categories...12 Delete Categories...14 Add Subcategories...14 Set Up Tags...16 Add Loan Accounts...17 Enter Transaction Data Using Categories, Subcategories, and Tags...21 Record Loan Payments...26 Create Reports to Summarize Data Entered...28 View a Graph of Income and Expenses...35 Back Up Data...37 Category Lists...40 Standard Category...40 Business Categories...42 Investment Categories...43 Rents and Royalties...44 Farm Categories...45 Transactions...47 Reports...50 Cash Flow...50 London Monthly Cash Flow Q London Cash Flow by Enterprise Deere Transactions...56 Tax Schedule 2010 (sample report, pages 1-4)...57 Tax Schedule Totals...61 London Monthly Budget, Jan-Feb Reconciling the Bank Statement...64 Using the Budget Features...71 iv
6 Using Quicken for Financial Planning...78 Retirement Calculator...78 College Calculator...81 Refinance Calculator...82 Savings Calculator...83 Loan Calculator...84 Various Topics...87 Line of Credit/Credit Card Accounts and Alerts...87 Saving and Locating Information for 1099s...90 Recording Futures Market Transactions...94 Scheduled Transactions...95 Writing Checks with Quicken...96 Year End Copy: Start New Year and Archive...98 Category Clean Up Merge Categories Retrieving a Deleted Quicken File Backing Up Quicken Files Restoring a Backup From a CD Building A Farm/Ranch Balance Sheet Develop a Complete Inventory Of Farm/Ranch Assets and Liabilities Import Asset Accounts Enter Beginning Balances in Asset Accounts Recording the Purchase of an Asset Recording Additions to Capital Assets Recording the Sale of an Asset Recording Changes in Inventory Recording Changes in Values of Assets Recording a Loan Payment Estimating and Recording Accrued Expenses Generating a Balance Sheet Report Backing Up Your Data Accounts List Glossary of Quicken and Financial Terms v
7 Using Quicken for Farm/Ranch Financial Records 1 (Quicken Deluxe 2011) December 2010 This tutorial demonstrates a hands-on session to develop a simple set of financial records and reports for a case farm with a cow/calf herd and wheat for grain and pasture. Although our case farm is a simple one, you will be able to practice many of the steps that you might use in adapting Quicken Deluxe 2 to keep records on your farm or ranch. This tutorial is intended to be a step-by-step reference that can be used when working on computerized personal records at home or to supplement instructions in a workshop setting. An overview of what we do in an introductory workshop follows: 1. Introduce text conventions in the manual, keyboard shortcuts and desktop setup. 2. Create a data file and add checking, savings and cash accounts. 3. Work with category lists. a. Import Farm Categories to match tax Schedule F. b. Add categories. c. Delete categories. d. Add subcategories. 5. Set up tags. 6. Add loan accounts to be used in the file. 7. Enter transaction data using the categories, subcategories and tags specified. 8. Record loan payments. 9. Create reports to summarize the data entered. 10. View a graph of income and expenses. 11. Back up data. Specific instructions for accomplishing each of these steps are included in this tutorial. Additional instructions for common or farm-related procedures follow the basic instructions. A glossary of financial and Quicken terms are at the end of the tutorial. If you are using this tutorial at home, the new user setup in Quicken will prompt you to set up a file and your accounts as described in the first three sections of this tutorial. Additional farm management information and Quicken tips for usage can be viewed online at The Quick Tips newsletter is a helpful companion to this tutorial. 1 Damona Doye, Extension Economist, and Lori J. Shipman, Extension Paraprofessional. Please visit our website, to access additional topics and instructions, including the Quick Tips newsletter 2 Quicken Deluxe 2011 is a registered trademark and will be written as Quicken or Quicken 2011 throughout the rest of the tutorial. 1
8 Introduce Manual Text Conventions, Keyboard Shortcuts and desktop setup Text Conventions Throughout this tutorial, you will notice some information is printed differently than the surrounding text. This enhanced text requires special attention as it generally signifies an action to be performed. If, for instance, we want you to type the words My programs, you will see this: Type My programs. Buttons that you need to click, selections that you need to make, or text that is referenced in a document on screen appear in bold text: Click the Customize button. Select Expense. File and folder names are referenced in italics and use the case conventions for the operating system in which you are working. For example, a computer file name might appear like this: Document1 Keyboard and keyboard combinations that you may need to apply appear like this: Press [ENTER]. Press [CTRL+A]. A keyboard/mouse combination such as [CTRL+A] means to press and hold down the first key (Control) while pressing the second key (A), then release. Text that appears within parentheses refers to steps that may be necessary depending on your computer s settings or steps in an alternate approach to the same task. Parenthetical steps appear like this: (Click the Close button.) Titles of screens, programs, etc. will be underlined such as the name of the following Quicken screen: Create Quicken File Notes and helpful hints are in italics and sometimes enclosed in parentheses, for example: Note: The note may appear this way. (The note may appear this way.) 2
 on specialized buttons in the toolbar. b. Using the mouse, move the cursor to the appropriate line in a drop-down menu and left-click.")
9 Keyboard Shortcuts and Desktop Setup You may select an item from Quicken in one of four ways: a. Using the mouse, left-click (click using the left button of your mouse) on specialized buttons in the toolbar. b. Using the mouse, move the cursor to the appropriate line in a drop-down menu and left-click. c. Use a shortcut key by simultaneously pressing [Ctrl] or [Ctrl+Shift] and the designated letter. For example, [Ctrl + S] takes you to the split transaction screen. d. In the check register, simultaneously press [Alt] and the letter key underlined in the word or phrase. For example to open the menu line File, select [Alt+F]. In our instructions we typically use mouse clicks and the menu bar for selections. We occasionally mention the shortcut keys. 1 2 Desktop navigation options are as follows: Main Menu Bar. Using the mouse, move the cursor to the appropriate item in the Main Menu Bar and left-click. To select an option from within that menu 3
10 heading, move the cursor to select it. For example, to create a new file within Quicken, select File from the main menu and move the cursor to New. 2. Toolbar. Toolbar buttons provide quick access to options such as returning to the previous screen (Back button), accessing the Internet for stock quotes and news (One Step Update button) or the Quicken website (Quicken.com button). If the toolbar isn t available, click on View, Show Tool Bar. 3. Account Bar. The Account Bar allows easy access to accounts by center. The centers display account summary information in one easy-to-read place. You can customize what appears on each of the centers by deleting, rearranging, or adding new components. You can also create different views of the center. When an account is selected, the account register appears. 4. Shortcut Tabs. When you become more familiar with Quicken, you may want to try using the shortcut features. They take you to the different centers within Quicken and have an overview screen that appears for each tab. We will typically use the Main Menu Bar for navigation. To move around in the register or menu screens, press [Tab] to move forward to the next field (area for input). Press [Shift+Tab] to move backwards one field. The step-by-step instructions that follow will not note every [Tab] needed to move through screens. Assume that if the cursor doesn t move to the next field, you should [Tab] to navigate to enter the next piece of information. Later in this tutorial, we will use the sample files provided on the Quicken Sample Files compact disc (CD) to review some of Quicken s features. For these files to run efficiently, follow these instructions to copy them to the hard drive of your computer. Place the CD labeled Quicken Sample Files into the appropriate computer drive (for our example, we will use CD drive, D:). Open the Windows Explorer program [ Windows Key + E] or right-click on Start, Explore or click Start All Programs (You may need to click Accessories.) Windows Explorer From the options on the left, double-click My Computer (D:) 11 Quicken Sample Files File names Asset Acct, Farm Categories, and LOND11 should be displayed on the right. From the taskbar at the top of Windows Explorer, click 4
11 Edit Select All (The shortcut for Edit, Select All is to press [Ctrl+A]). Then, click Edit Copy Now, click Local Disk (C:) (from the menu on the left) From the Drop-Down Menu Bar, click File New Folder To name the folder, type Workshop Files and press [Enter]. Open the Workshop Files folder by double-clicking it. Then click Edit Paste (The shortcut for Edit, Paste is to press [Ctrl+V]). Click X in the top right corner to close Windows Explorer. You have completed the task of copying the Quicken Sample Files to your computer. Later in the tutorial, you will be using these files. Now we will create a new file for your practice. Set up a Data File and Add a Checking Account Just as a file cabinet can contain family and farm financial information, one Quicken computer file can contain both farm and family financial information. Income and expenses are recorded in one or more accounts (checking, credit card, etc.). Reports can be developed to summarize information across all accounts, by individual account, or by tag if you specify tags when you enter transactions. We will use tags to represent the different enterprises of our farm (for example, Wheat, Stockers, Overhead, and Family Living). This tutorial touches on the basic features of Quicken, Previous Quicken Users: Quicken 2011 will automatically uninstall previous versions of Quicken. Make a backup of all current data files before installing 2011! Follow the installation instructions as prompted after inserting your program CD or downloading Quicken from the Intuit website. You will be asked if you are a new or previous user. Then, you will be asked if you want to open the data file most recently used, use a different data file or start over and create a new file. If you choose start over, you can create a file name that you choose and select the directory in which you want to save it. 5

12 Note: For tutorial purposes, if so prompted, select Start over and create a new data file even if you are already a Quicken user. Or, if you are prompted to Convert your data file, click Cancel. If you see this screen, select New Quicken File. Click OK. Now is a good time to sketch out a list of accounts you might want to set up for your farm and home. Types of accounts include checking, savings, investment, credit card, brokerage, IRA or Keogh, 401(k) or 403(b), 529, individual mutual fund, house, vehicle, other assets, and liability accounts. Note: We offer instructions on investment accounts in a separate publication. For a new file, click the Get Started button. 6

13 Add your Primary Checking Account: Enter the name of your bank: 1 st National Bank Click on Advanced Setup at the bottom of the window. Choose: I want to enter my transactions manually Next Account Setup now guides you to set up your primary checking account. For this tutorial, we will enter all account information manually and assume that you do not want to have online access. Some financial institutions offer online setup, but we do not demonstrate this option as individual institutions have different sign up requirements. Note: If you wish to use online banking for your checking account, click I want to select the connection method used to download my transactions. You will need to contact your bank to gain access to your account. Be sure to ask what file transfer format is used for Quicken. The OFX data exchange format is currently used in Quicken. Most financial institutions use this format. Once you have determined that your bank is Quicken-compatible, you can use this feature to set up your account and later download transactions. Enter the Account Name/Nickname: Farm Checking Click Next. Ideally, you will have a bank statement at hand to use in establishing an account balance as of a specific date. 7

14 Statement Ending Date: 1/1/2011 Statement Ending Balance: Next Add another account Now add a family checking account by clicking Checking. Next Enter the name of your bank: 1 st National Bank Click on Advanced Setup Next Then click on I want to enter my transactions manually. Enter information for the family checking account, again using a current bank statement if possible. For our example, we have: Account Name/Nickname: Family Checking Next Next Statement Ending Date: 1/1/2011 Statement Ending Balance: Add another account 8
15 Add Savings and Cash Accounts Now we will add the savings and cash accounts. Click on Add Account Savings Next Enter the name of your bank: 1 st National Bank Click on Advanced Setup Next Then click on I want to enter my transactions manually Next Enter information for the savings account, again using a current statement if possible. For our example, we have: Next Account name/nickname: Savings Statement Ending Date: 1/5/2011 Statement Ending Balance: Click on Add another account button. Using this account will help you keep track of where you spend cash and can point out some budget breakers or costly habits. Don t kid yourself using cash for transactions and failing to tally them periodically can hide some problems. Account name/nickname: Cash Date to start tracking: 1/1/2011 Amount of cash you have: Click Next, then Finish. We are going to postpone adding other accounts to establish the category list. Modify the Category List 9

16 Spend some time thinking about the kinds of income and expenses that you need to track. In the beginning, you may want to start with categories for tax reports or match an existing chart of accounts or record system. Start simple and add new levels of detail as needed for management purposes. The category list is shared (accessible) across all accounts within your Quicken file. Access the current category list to view it by clicking Tools Category List Note: To show a description of each category click on the Options button and click on Show Description. Scroll through the list to see the default categories. Tables showing the built-in Category lists that come with Quicken are included in this manual. Click on the X in the upper right corner to close the Category List window. Import a Farm Category List A printed list of farm categories built to match farm income tax Schedule F is included in this manual (Farm Categories). This list can be imported into Quicken from a file named Farm Categories on the CD with purchased copies of the tutorial. This file is also available on the website from which you downloaded the instructions (agecon.okstate.edu/quicken, download sample files). The farm income and expense category list provided is by no means sacred. It is 10

17 intended to serve as a beginning point for your own personalized list. You may add, delete, or modify items in the list to make it useful for your operation. We will now import the farm income and expense categories to our current file to facilitate farm financial record keeping and tax reporting. If you copied sample files to your computer using the earlier instructions, the Farm Categories file is located in the C:\Workshop Files folder. From the main menu, click File File Import QIF File Click Browse to locate the Farm Categories file in the C:\Workshop Files folder. Click OK. Use the mouse or space bar to select Category List (and deselect the other items if necessary). Click Import Click Done. Click Tools in the main menu line at the top of the Quicken window and select Category List to verify that your category list now contains Capital Sales, Farm, plus CCC Loans Forfeited, CCC Received, Co-op Distributions, and other farm categories in addition to the original default list (you may need to click on All Categories on the left to see these). Scroll through the list to become familiar with the names and descriptions of the categories. Income items are listed first in alphabetical order, followed by Expense items, again in alphabetic order. Note: Quicken includes the Farm Categories as Personal Income and Personal Expenses to preserve Business Expenses for its internal Schedule C items. Don t 11

18 let this stress you as the categories are appropriately linked with Schedule F and will show up in Tax Schedule reports correctly. The view of the category list may be altered by clicking on the Options button in the lower left side. We do not use the Type and Group part of the category list. When creating new categories designate tax-related items as such and select the correct tax form and line (check with your accountant or tax preparer if you need guidance you can make corrections later if necessary). Even if you select the tax line item for a category, it will not be recognized in the preset tax reports unless the tax-related box is checked. Add Categories If you need to add additional categories that are already in one of the Quicken preset life event lists, you can do so by clicking on the Options button in the lower left corner of the category list and choose Manage Categories. From here, select from the Available Categories (Standard, Business, Investment, etc.) in the drop-down list. The associated categories in that grouping are listed in the box below it. You can Mark All or individually check the categories needed. Note: You will only be able to add from Category groups not already included in your category list. If Add cannot be clicked on because it is in gray scale, those categories are already included. Once the categories are selected, click Add (middle of the window) 12

19 OK To add categories that are not on any of the built-in lists, click on the New button Let s assume that we want to create a new category that is a legitimate farm expense, that is, something we will want to link to a Schedule F tax line item. For schedule F categories, it is best to complete this screen in the following order: 1. Enter the Name, Crop advisory service. 2. Select Expense. Click on the Tax Reporting tab. 1. Select the Tax-related box. This box must be marked to allow transactions associated with this category to appear in tax schedule and tax summary reports. 2. Select Extended line item list. Schedule F line items will now be made available in the Tax Line Item box. You have to scroll down through a long list to select the appropriate line. 3. In this case, select Schedule F: Other farm expenses from the Tax line item: drop-down menu. 13

20 OK The category has now been added as you can see if you scroll down to the expense section in the category list on your screen. Delete Categories You can easily remove categories that aren t needed. Let s delete the Auto and Transport: Public Transportation category by selecting the category:subcategory and then click the Delete button to the right of the category name. Note: If you delete a category, the linked subcategories will be deleted simultaneously. Click OK Add Subcategories Setting up subcategories adds a second level of detail for reports and summaries. Fertilizer purchase records, for example, can track lime and separately rather than as one item 14

.")
21 under the Fertilizer & Lime category. At the same time, they will be subtotaled in the Fertilizer & Lime main category. Note: Start with a simple category list and don t get carried away adding subcategories. Subcategories should only be used for detailed information that is needed for financial reporting or management decisions. Otherwise, use the memo field or notes for recording data needed as a note or reminder. In the category list window, click New (lower left). Click OK Note: If a subcategory has different tax attributes from the category, select the correct tax line item. For example, if Office is the category, subcategories for farm office and business office would be attached to different tax schedules, Schedule F and Schedule C, respectively. Repeat the procedure above to add another subcategory for Close the category list by clicking on Done (bottom right) or the X in the upper right corner of the Category List window. Don't stress about making mistakes in setting up categories you may rename or edit categories as needed. To make corrections, go to the Category List and highlight the category name and click Edit (on the right side). Changes made to an existing category are immediately reflected in previously recorded transactions. 15
.")

22 Set Up Tags By using tags, you can add important report possibilities. We highly recommend using tags as a means to associate income and expenses for different farm enterprises (or perhaps crop years or partnership shares). This will allow you to print reports summarizing income and expenses for specific components of the farm operation, for example, the cow/calf, wheat, or alfalfa enterprise. When you imported the farm income and expense categories, several tags CowCalf, Family Living, Hay, Milo, Oats, Overhead, Stocker, and Wheat were also imported. Let s add an Alfalfa tag. From the main menu, click Tools Tag List (or press Ctrl+L) New (located in the lower left of the Tag List window) Click OK Note: A Description may be added. Copy Check Number: is used only if you are filing multiple copies of a particular tax form because you have more than one business and need to identify with which business this tag is associated. Add any other tags needed. Recording a tag along with a category for a transaction documents more specifically how the income was earned or how the expense item was used. 16
23 To edit a tag, highlight the appropriate tag name by clicking on it, and then click on the Edit button at the right. Note: If the selected tag name has been used in transactions and you change it, all previously recorded transactions will automatically change. To delete a tag, highlight the tag line and click on the Delete button to the right. Note: We recommend that you run a report sorted by Tag before deleting one to make sure there are no transactions which use it. For tags that will not be used in the future, we suggest clicking on the Hide field next to the tag. This will not remove it from previously recorded transactions, but will remove it from the tag list in normal view. Deleting a tag that has been used will cause those transactions to have a blank tag field. We have decided we don t need the Oats tag since we do not raise oats. Click on the Oats tag. Delete Close the Tag List by clicking on the X in the upper right corner or clicking the Done button in the lower right corner. Add Loan Accounts Even if you do not use Quicken for maintaining a balance sheet, you may still want to amortize and/or record loans using the liability account features. Note: Line of credit notes are best handled as credit card accounts in Quicken. See the line of credit account instructions under Various Topics for more details. Note: Users may want to evaluate Quicken features for tracking net worth. However, the balance sheet features in Quicken are not designed to maintain cost and market value information nor can you calculate and record depreciation from within Quicken. If you use Quicken to maintain a balance sheet, use the appropriate asset/debt accounts and be sure to update asset values periodically. If tracking assets at cost basis, use purchase price minus adjustments for depreciation as the beginning balance. See Balance Sheet instructions for more information. We have a land loan with a remaining balance of $73, The land note at origination was for $94,936 to be repaid over 15 years at 8.5% interest with annual payments (9 years of payments remain). 17


24 Add liability accounts Tools Add Account Loan Next Add information as in the following screens. Next Next 18


25 In the Payment section, click Calculate if you do not have your Payment Amount. Quicken will calculate an estimated payment amount (principal and interest). Done OK 19

26 Note that a payment amount, $11,556.50, has been calculated and now appears Payment Amount (P+I) field in the Loan Setup window. Click Done again to accept the estimate. A Set Up Loan Payment screen appears to prompt you to specify details about the payment. Enter the additional information. We will use one of the farm categories that we imported earlier. Category and subcategory should be entered exactly as Farm Interest Expense:Farm Mortgage. The loan payment requires a split transaction, as the principal paid is applied to the loan balance in the appropriate loan liability account (Land Note) while interest paid is recorded in the checking register as an interest expense (Farm Interest Expense:Farm Mortgage). We will add the tag, Overhead, when we make the first payment (see the Loan Payment instructions). Click on the Payment Method button. Because we have two checking accounts, we need to make sure the payment is coming from the correct account. 20

27 OK to close the Loan Payment window. A window will open asking if you would like to create an asset account associated with the loan account you just set up. Click No. Finish Note: If you want to create a balance sheet in Quicken and have an asset account for each piece of property, you would respond Yes. If you choose No, you can always add asset information later. See the balance sheet instructions for more information. Enter Transaction Data Using Categories, Subcategories, and Tags Payments, transfers, and deposits are generally referred to as transactions in Quicken. We will begin by entering payments and deposits in the checking account. Each field in the register is described following the screen capture in which fields are numbered: 21

28 The name of the account register that is currently open is displayed here. In this case, we are viewing the Checking account register. 2. The Flag button allows you to add flags or notes to mark a transaction. 3. Click on the Attach button to insert attachments such as check images, bills, or other graphics. 4. The Date appears in the first column of the register. The Quicken default is the current date. Simply type the date (01/01/2011), or click on the calendar icon and highlight the correct date, or press the [+] or [-] keys to select the correct date. 5. The Check Number (if applicable) may be typed in the second column. If the checks are in consecutive order, you may simply press the [+] or [-] key on your keyboard to increase or decrease the check number by one, respectively. Entering DEP for a deposit automatically moves the cursor to the Deposit column when entering the amount. Other choices include EFT (Electronic Funds Transfer), ATM (Automatic Teller Machine) transaction, or TXFR (Transfer) to another account. 6. The name of the Payee (for payments) and the Paid by (for receipts/deposits). 7. To add further details about the transaction, for example, pounds used or application rate, enter information in the Memo field. Memos are useful for recording quantities, signaling the potential need for a 1099, and for noting more detail about the transaction that might be beneficial for filtering reports. 8. The name of the category and subcategory goes in the next column. To be able to create reports summarizing income and expenses by category, you must specify a category for each transaction. The format for labeling a transaction is 22
29 Category:Subcategory. The : " after the category name signals that a subcategory will follow. Thus, at the Category prompt for a transaction involving the purchase of lime for the wheat enterprise, you could type Fertilizer & Lime:Lime where Fertilizer & Lime is the category and Lime is a subcategory. 9. Here the Tag is used to denote an enterprise for which cost and return information is of interest. In the example described in Check Numbered 6, we would use Wheat as the tag as the lime was used for the wheat enterprise. 10. The Split button allows you to divide payments and deposits among more than one category and/or tag. An example is demonstrated later in the instructions. 11. A payment made to someone is recorded in the Payment column. If a payee name has been used previously, Quicken will recall the previous transaction amount (Quickfill). To enter the correct amount, highlight and type in the Check Number. Credits or deposits to the account are recorded in the Deposit column. 12. The Clr column shows each transaction as uncleared when blank, cleared with a c or an R when the transaction has been reconciled (see reconciliation section). 13. The Save button is what you will click once the transaction information is recorded. This saves the information to the file automatically. Press the F11 button on your keyboard to expand the register to full screen. Go to the checking register by clicking on Farm Checking under Banking (on the left sidebar). Practice a sample entry using the information below. Remember to use the [Tab] key to move from one field to another. Date: 1/4/11 Check Number: 1001 Memo: Winch on pickup Payee: Yukon John Deere Category: Repairs and Maintenance Tag: CowCalf Payment: Once you type in a letter, Quicken will complete the word (QuickFill) by recalling from an internal list (the category and tag lists were created earlier; the payee list is developed as you record transactions). Once enough distinguishing letters are typed to get the correct Category name, [Tab] to the Tag field and enter the first letter of the tag name. Again, once enough distinguishing letters are typed to get the correct word, press [Tab] to move to the next field. When you have finished typing in the information, click the Save button on the screen or press [Enter] on your keyboard. 23
![Note: [Tab] is the default used to move between fields. If you see a pop-up window asking if you want to use the [Enter] key, you can decide which is most comfortable.](/docs-images/87/97377544/images/30-0.jpg "If you choose to use [Enter], you will have to use [Ctrl + Enter] or use your mouse to click the [Save] button on the screen to record the transaction.")
30 Note: [Tab] is the default used to move between fields. If you see a pop-up window asking if you want to use the [Enter] key, you can decide which is most comfortable. If you choose to use [Enter], you will have to use [Ctrl + Enter] or use your mouse to click the [Save] button on the screen to record the transaction. Note: If you want to record and display the Memo after the Category, choose Edit, Preferences, Register and remove the check mark on Show Memo before Category. To have the payment amount precede the Category and Tag, click on Account Actions, Register Views and Preferences and check Two-line Display. Often a transaction with a particular company or payee will include items that should be allocated to different categories and tags. In this case, you will split the transaction as needed. For instance, the co-op bill might include Feed purchased for the CowCalf enterprise as well as Gas, Fuel & Oil used in the Wheat enterprise. First, enter the total amount of the check: Date: 1/4/11 Check Number: 1002 Payee: Klondike Co-op Payment: 421 Now, click on Split (or click on the Split icon on the right of the line, or press [Ctrl+S]). Type in the following responses: Note: Make sure the Split Total and Transaction Total match (bottom right of the screen). Otherwise, you will need to recalculate the splits or Adjust the Transaction Total that appears in the register. Click OK after entering split information, then press [Enter] to record the transaction. 24

31 The screen appears Click OK If you are writing a check to a business or individual for whom an earlier check was a split transaction, Quicken assumes that you want to use the same format as before. Let s say that you now want to enter a check to the Klondike Co-op which is for lime only. Let s practice this: Date: 1/5/11 Check Number: 1003 Payee: Klondike Co-op Click the red X (clear split lines) near the middle of the screen: Click Yes to clear the split lines. Enter in the category field, Fertilizer & Lime:Lime, and the tag, Wheat. Payment: 355 Press [Enter]. (You may need to press [Enter] a second time.) Review all split transactions, particularly those where the amount allocated to different categories varies each time. Deposits, as well as checks written to discount stores or the co-op, 25
32 are good candidates for mistakes. If you don t clear all previous amounts and categories when you enter a new transaction, you can end up with unintended amounts in categories. Now, to record a deposit... Let s say that our farmer had some alfalfa hay in storage and recently sold some to a neighbor, Paul Bunyan. Go to a blank line and enter Date: 1/11/11 Check Number: DEP (This will help ensure that your entry is made in the deposit column after you enter the Paid by name and [Tab]) Payee: Paul Bunyan Memo: 8 tons hay Category: Raised Sales:OtherProducts Tag: Alfalfa Deposit: 800 (If you didn t enter DEP in the Check Number column, be sure to [Tab] over so the cursor is in the Deposit column!) Save. Now begin entering the transactions for our farmer using the printed transaction register (in the Reports following these instructions) from the checking account. Begin at the top of the sheet and practice recording transactions until you feel comfortable with the process. Record Loan Payments Let's assume it is now August 2011 and time to record a payment on the amortized land loan. Click Tools (from the drop-down menu) Loan Details If the Land Note is not the loan in view, click Choose Loan and select it. Click the Make Payment button. You are asked if this is a regular scheduled loan payment or extra payment. Click Regularly scheduled loan payment. Make Regular Payment screen is opened. First, click on the Split button in the middle. We need to make sure the tag to label interest as an Overhead expense is inserted. 26

 to open the Split Transaction window, or you may simply hover the cursor over - - Split- -, which will show a pop up window with the split information.")
33 OK Make sure the rest of the payment screen is correct and add the Check Number. OK You can view how the amounts applied to principal and interest are handled by viewing the land note payment line in the Farm Checking register and looking at the splits. Highlight the Farm Credit transaction by clicking anywhere within the transaction. Click Split (or press [Ctrl+S]) to open the Split Transaction window, or you may simply hover the cursor over - - Split- -, which will show a pop up window with the split information. You will see that Quicken has recorded the appropriate amounts to principal ($5, to the Land Note) and interest ($6, to Farm Interest Expense:Farm Mortgage). Done If you opened the Split Transaction window, click OK to leave the split. If you are in the Farm Checking account you can also view the principal payment applied to the outstanding loan balance by selecting the Farm Credit transaction, right-click (click the right button of your mouse) and select Go To matching transfer. You will see a Balance Adjustment entry was made for earlier principal payments. The principal portion of the current payment from the checking account has been applied to the loan balance. (If you get a message that the transaction is not a transfer, you didn't click Enter to record the payment information and it was not posted.) 27
34 Right-click the Farm Credit transaction and select Go To matching transfer to return to the Farm Checking account. Click OK if the Split Transaction window appears. Create Reports to Summarize Data Entered Let s look at some sample reports that you might want to use in monitoring your financial performance: Cash flow summaries, including one by tag/enterprise (which also gives the overall total) A summary of payments made to a payee A tax schedule report Because you may have entered only a few transactions in this file, we will close the file with your name and open the sample file, LOND11. Click File Open Quicken File Click the small arrow next to the Look in: box to reveal the drop-down list. Click Local Disk (C:). Double click Workshop Files. Click LOND11. Click OK. Click Reports (from the menu bar) Banking Cash Flow Note: You may receive a message that data is not available. Click Yes to change the date range. Select Yearly and 2010 as the date range. Click Don t Subtotal in the column field. (The fields are circled in the screen below). 28
![Scroll through the report to view individual inflow and outflow items as well as totals using the arrow keys or [Page Up] or [Page Down] keys on your keyboard.](/docs-images/87/97377544/images/35-0.jpg "A copy of the report (London Cash Flow Yearly 2010) is included in this tutorial.")

35 Scroll through the report to view individual inflow and outflow items as well as totals using the arrow keys or [Page Up] or [Page Down] keys on your keyboard. A copy of the report (London Cash Flow Yearly 2010) is included in this tutorial. The annual cash flow statement provides a summary of cash income and expenses for the year using the categories associated with individual transactions. The cash flow report documents sources and uses of funds and can be useful in developing budgets for future years. When you have the cursor over a number in a report and see a magnifying glass, a QuickZoom report is available. Double click to reveal the transactions that make up that number. Click on the Back button in the upper left to return to the Cash Flow report. Perhaps your lender requires a monthly cash flow report. Click the Customize button (the icon with the hammer at the right) to edit the Title: London Monthly Cash Flow and Column: Month. 29
 Save in: use drop-down arrow to select create new report folder Name: Lender Reports")
36 OK If you think you might want to use this report again, you can memorize its features by clicking Save Report (a disk icon in the taskbar). Report Name: Monthly Cash Flow Description: (optional) Save in: use drop-down arrow to select create new report folder Name: Lender Reports 30

37 OK Click OK. Note: If you select Save report history, you can track each step in developing this report. Now, let's develop a cash flow report by tag (farm enterprise). You may want to change the title of the report. Click Customize at right. Type the Title, London Cash Flow by Enterprise and for the Column select Tag, as shown below. 31
 for last year appears.")
.")
38 Click OK. A report showing a summary of cash inflows and outflows by tag (farm enterprise) for last year appears. Review it to see the cash generated and used by the CowCalf enterprise relative to the Wheat enterprise and to note totals by category for Family Living expenses (a printed copy is in the Reports section). You may memorize this report for future use by clicking the Save Report button. Create a new folder for Financial Reports. 32

39 Check Save report history Click OK What if you want a summary of payments made to the Yukon John Deere dealer during the year? Click the Customize button. Type the Title, Deere Transactions Summary. Click the Payees tab. Type Yukon John Deere in the Payee contains field. The spelling must be the same in all transactions or they will not be included in this report. Click OK. Or, a better option may be to click on Clear All, then scroll through the list of Payees at left to Yukon John Deere and mark it. This assures that you have the correct spelling (and also have the opportunity to see similarly spelled words in case you have misspelled the name at some time and need to find/replace errors). You will now have a summary of expenses at the Yukon John Deere dealership by category and tag (printed version in the Reports section). Click the X to close the window (or press [Esc]) to leave the Deere Transactions Summary. Don t Save 33

40 All of the previous reports have been examples of cash flow reports. We will now switch to a different kind of report, the tax schedule report. When you begin gathering information to take to the tax preparer, consider the differences between the tax schedule and tax summary reports. Tax schedule reports list all transactions (or splits of a transaction) assigned to a category that is attached to a specific tax form or schedule. Tax summary reports include transactions with categories that have been noted as tax-related, whether or not a specific tax schedule has been assigned. For example, capital sales items are noted as tax-related as they are needed for use in calculating capital gains but are not transferred directly to a tax schedule. Click Reports Tax Tax Schedule Select Yearly and 2010 as the date range This report lists every transaction assigned to a category attached to a tax schedule. To prepare a report showing totals only (not individual transactions), click Customize. Modify the Title: Tax Schedule Totals Only. In the Show section (as circled in the center of the Customize Tax Schedule screen below), select Totals only. We have also removed the fields for Num, Description, and Memo since they are not needed for this report. 34
41 Click OK. You now have a summary of the information needed for tax reporting purposes by schedule. In our example, the report begins with Schedule A (deductions including charitable contributions), Schedule B (interest income), and continues to Schedule F (farm income and expense items) and ends with a W-2 (wages and salary) summary. Exit the Reports window by clicking on the X in the upper right corner. You can choose whether to save the report or not. View a Graph of Income and Expenses It's said that a picture is worth a thousand words. Quicken makes it easy for you to get a quick picture of income relative to expenses, as well as income and expense composition. Click Reports Graphs Income and Expense by Category Select the date range, Yearly and 2010 and Month for the interval. 35

, Name: Farm Reports.")
42 You will see a bar chart showing monthly income and expenses. By double clicking on an individual bar, you can see the categories, amounts, and percentage of the total for that month. Click X to close the Income Comparison window. As with the reports, you may memorize useful graphs. Click the Save Report button. Report Name: Monthly Income/Expense Chart Save in: use the drop down arrow and select (create new report folder), Name: Farm Reports. OK To view a chart showing how money has been spent throughout the year, close the open Report window and click Reports Spending Spending by Category Select the Date range: Yearly and 2010 with the Column: None. To focus on farm expenditures, click on 36

43 Customize Title: Farm Spending by Category Click on the Tags tab Remove the check mark from Family Living. OK Click on the Collapse All button to show totals only. Click on Save Report and choose the Farm Reports Folder. Close the Spending Report Category window. To view your saved reports and graphs, click Reports Reports and Graph Center (or My Saved Reports & Graphs) Back Up Data Quicken automatically saves the data that you have entered in the file on which you have been working as you enter transactions. However, you will want to regularly save a backup copy on a compact disc (CD), DVD, or thumb drive in the event of computer hardware problems. 37

44 Instructions for backing up your data on a CD are given later in the manual. Since we copied the LOND11 file to the C: drive earlier and have been working from that file, we will back up our data on the D: drive. To back up your data, be sure your CD is in the computer and complete the information as indicated on the following screen. You can utilize the browse buttons to select both the file you want to back up and the backup location. Select File Backup and Restore Back up Quicken File (or press Ctrl+B) Click OK. Note: Clicking the Add the date to backup file name attaches the date to the file name for easier reference. This may not work if you are using removable data storage (zip, thumb drive) as it may not be able to handle a file name of more than 8 characters. You should receive a message that the file has been backed up successfully. Click OK Now, click File 38
45 Exit (This closes the Quicken program.) Note: It would be wise to back up your information on multiple CDs and back up often. Alternate the disks that you use so that you minimize the potential loss of information due to faulty disks CONGRATULATIONS! You have now completed the basic Quicken workshop for farm financial records! Hopefully, you will want to apply your newly learned skills to your own farming operation. Refer to this tutorial and the Quicken manual for assistance in setting up your own record keeping system. 39
46 Standard Category Category Lists 40
47 Standard Category (cont.) 41
 Business")
48 Standard Categories (cont,) Business Categories 42

49 Investment Categories 43

50 Rents and Royalties 44

51 Farm Categories 45

52 Farm Categories (cont.) 46

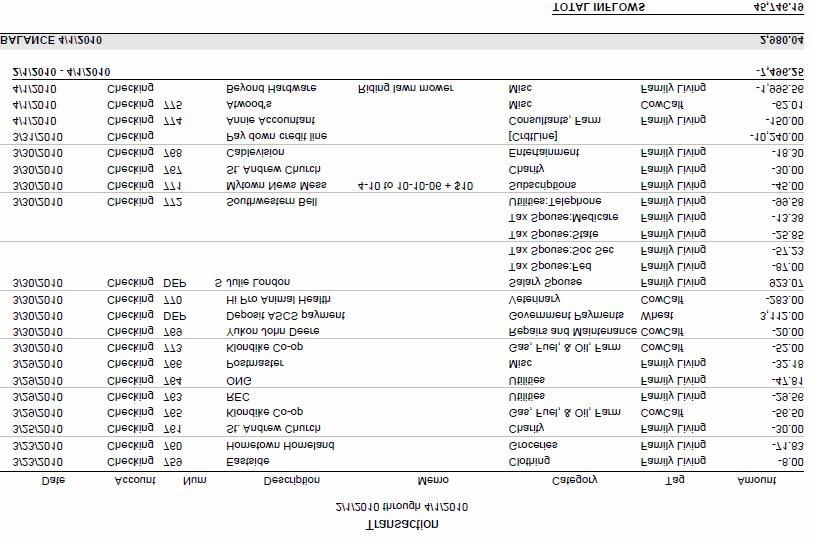
53 Transactions 47
54 Transactions (cont.) 48
55 Transactions (cont.) 49
56 Cash Flow Reports 50
57 Cash Flow (cont.) 51
58 London Monthly Cash Flow Q
59 London Monthly Cash Flow Q (cont.) 53
60 London Cash Flow by Enterprise
61 London Cash Flow by Enterprise 2010 (cont.) 55

62 Deere Transactions 56

63 Tax Schedule 2010 (sample report, pages 1-4) 57

64 Tax Schedule 2010 (sample report, pages 1-4 cont.) 58

65 Tax Schedule 2010 (sample report, pages 1-4 cont.) 59

66 Tax Schedule 2010 (sample report, pages 1-4 cont.) 60

67 Tax Schedule Totals 61
68 London Monthly Budget, Jan-Feb
69 Monthly Budget (cont.) 63

70 Reconciling the Bank Statement Reconciling a Quicken account with a bank statement serves as a good check on the completeness and accuracy of your data entries. The reconciliation process includes: Entering information from your bank statement. Marking cleared transactions in the Statement Summary window. You may add missing transactions or edit existing transactions as you go. Comparing the cleared balance with your bank ending balance to see whether a difference exists. If you are not currently reconciling your bank statements in Quicken, you should be! This is why: Banks can make mistakes. It is possible to type numbers incorrectly, duplicate transactions, or forget to record a transaction. Identity theft is on the rise. Reconciling your account may help you to catch irregular activity on your account, for example, transaction(s) you did not make, misuse of an ATM card, or incorrect electronic transfers. Transactions must be reconciled for the Year-End Copy feature in Quicken to work properly. Using the LOND11 file with the Checking register open, click the Account Actions button at the top right of the check register screen then select Reconcile (or click Tools, Reconcile an account.). Using the bank statement on the next page, enter the requested information on the screen: OK 64
71 N NOWATER NATIONAL BANK AND TRUST COMPANY Sixth and Main Streets P.O. Box 2157 Nowata, Oklahoma (555) Offices in Nowater, Tulsa, Oklahoma City, and Chickasha Member F.D.I.C. Statement Date: 07/05/11 Services available. Call for details. Jack and Julie London Account No Rt. 1, Box 23 Nowater, OK Checking Statement Summary Previous Statement 6/5/11, Balance of $9, Deposits or other credits totaling Checks or other debits totaling 1, Current Balance as of 7/05/11 $8, Deposits and other Credits Date Cleared Amount Transaction Description 6/ Direct deposit 6/ Direct deposit 7/ Interest earned Miscellaneous Debits Date Cleared Amount Transaction Description 7/ Service Fee Check No. Amount Date Check No. Amount 06/ / / / / / * / / / / / / / / / / /

72 The entries you made for service charge and interest earned in the opening screen are recorded as transactions and marked as cleared in the reconciliation screen that follows. Payments and Checks are listed at left and Deposits at right: Continue the reconciliation process by using the space bar or clicking with the mouse to add a check mark by transactions that cleared the bank. Use the bank statement on the previous page to identify and mark cleared transactions. It may help to change the view. To do this, click View at the top right of the window and select the appropriate option (such as, Sort by Check Number or Sort by Date). You may add missing transactions, delete duplicate transactions or edit entries with mistakes as you reconcile. If you find that you forgot to enter a transaction, click New (top left of the Reconcile window) to be taken to the Checking register. Enter the transaction and click Save. You can get back to reconcile by clicking the Return to Reconcile button in the upper right of the register window. Note: If you begin to reconcile the bank statement but are unable to complete it at the time, you can click Finish Later. Your work will be saved and you can finish the reconciliation at your convenience. Clicking Cancel will not save the work you have done. Continue verifying entries with the Nowater National Bank Statement. If you ve managed to enter a transaction twice (you may want to view the duplicate entries in the Checking register, 66

73 then edit one transaction to be sure all the appropriate information is stored in one transaction), highlight the duplicate entry and click Delete. Confirm that you want to delete the current transaction by clicking Yes. Have you ever transposed a number in your entry or recorded the wrong amount? With the transaction highlighted, click Edit in the reconcile window. You are taken to the original entry in the checking register and can make the necessary changes in the register and record the entry by clicking Save. Again, click Return to Reconcile, which will return you to the Reconcile window. Once you have marked all cleared payments, checks, and deposits, the difference listed in the bottom right corner should be 0.00 (see below). If it is correct, congratulations! Finished 67


74 Yes (Workshop participants may not be able to print.) Enter the fields needed and select OK. Adjust the print settings to match your needs. You can click Preview to see how it will appear on paper. Print 68
 can cause problems with the reconciliation feature.")
75 Note: One of the unique features of Quicken is the ability to change transactions. However, be advised that changing a previously reconciled transaction (date, amount, or reconciled clear status) can cause problems with the reconciliation feature. A popup window will ask you if you wish to change a reconciled transaction. Quicken 2011 handles an altered amount from a previously reconciled transaction by automatically adjusting the starting reconciliation balance the next time you reconcile. This may be a good situation to use the flag or note feature to notate the change for future reference. If you track an account online, you can also choose to reconcile the account online. You should choose either manual or online reconciliation and stick with one method. It will be hard to switch back and forth as the online reconciliation works each time you download and a paper statement is generally monthly. Reconciling Other Types of Accounts The process for reconciling savings accounts is the same as for checking. Credit card accounts have a different opening screen (as shown below), but the rest of the process is similar to the other cash flow center accounts. Cash accounts do not have a reconcile process. You should record transactions as they happen to keep the account up-to-date. However, if you forget to record transactions or get 69

76 terribly behind and can t find documents of cash expenses, the balance can be updated. From the Cash account click the Account Action button and select Update Balance. Enter the amount of cash in the account, and an adjusting entry will be made. OK 70
77 Using the Budget Features Quicken budgets can be used to summarize expected income and expenses for planning purposes. The budget can later be used in comparisons to actual income and expenses to determine whether expectations are being met. If expenses are "over budget", measures can be taken to rein in costs before financial problems are out of control. In this "hands on" session we will use a previously developed file of records for the London farm to practice generating budgets. You will be able to practice many of the steps that you might use in summarizing your own records. While using these instructions, you will: Develop a whole farm budget for the current year based on last year s transactions Compare actual records to the budgeted amounts In Quicken, click File Open Quicken File Double-click C:\Workshop Files LOND11 OK To access the budget features in the file, click the tab Planning. Click Planning Tools button to the right Budget Click on the Setup tab at the upper left corner of the Budget screen. Select Automatic. (A budget is created using your existing information.) Note: If this is the first time a budget has been created in the file, the default name is Budget. You can click on Rename in the setup screen if you want a more personal title. Click Create Budget. 71


78 Complete the screen: This will base the budget for the coming year on the transactions entered for the most recent full year of data, 2010, maintaining the same monthly pattern for income and expenses. Since the amounts are not likely to be exactly the same, we chose to round the values to the nearest $10 for planning purposes. 72


79 Click OK. Click OK A budget screen will be opened that contains: 1. A budget by category on the left side. You can select the tabs across the top for Income, Expenses, Savings, or Summary. 2. A window to allow you to change the monthly amounts for each category at the right. 3. A Show category groups box. Deselect it to eliminate the discretionary/nondiscretionary labels and sorting. 4. The Totals sum for the Monthly, Quarterly, or Yearly averages. 5. The Choose Categories button at the bottom left of the screen allows you to select specific categories for a budget. Click it to open the following popup window. 4 73

80 OK Click on Clear 0 amounts to exclude previously unused categories, but include all categories that have an amount recorded. OK To view the annual total rather than the monthly or quarterly total, select Yearly from the Totals drop-down menu at the bottom of the screen. At the right of the screen, you can change the monthly amount for the item that is selected at the left (as shown, Government Payments): 74
81 The Londons expect a few items to be significantly different this year and want to edit those amounts: 1. Government payments are currently budgeted for March. The Londons plan to split government payments between March and December. Click Government Payments, click the box next to the appropriate month and enter the new numbers: $1,100 in March and $2,000 in December. Click Apply (button at top right of column). Note that the totals are automatically updated. 2. Jack has taken a part-time job and expects to earn $1000 each month. Move the cursor to the Salary row at the bottom of the Income section, and then update the January amount to To copy the first month and paste to the other months, copy using [Ctrl+C]. Move to the next month, paste [Ctrl+V]. Repeat the pasting until all 12 months are filled. Then click Apply. 3. In the Salary Spouse row, enter 1850 in each month needed in the same manner. Remember to click Apply to retotal. Note: You can right click on the box to Cut, Copy, and Paste numbers in this screen. In the Expenses section (you may need to click on the associated tab): 4. Jack and Julie know fuel is more expensive than last year, so they want to budget more for fuel expenses in the coming year. Click on the Gas, Fuel, & Oil, Farm line. For January and February, the amount should be 330. Other fuel expense entries should be: March, 410; April, 420; May, 260; June, 4450; July, 3380; August, 760; September, 1110; October, 260; November, 260 and December, 300. Enter these numbers in the appropriate cells and click Apply. Continue to edit items in the budget to reflect your planning assumptions for the year. Make the changes to each category line, clicking Apply after the monthly detail is updated. Click the Summary tab at the top left of the Budget window to view your information. You will now see a summary of your anticipated income and expenses for the coming year by month. 75

82 The note at the top alerts us that we may have to use savings or draw on a line of credit to cover expenses in some months this coming year. OK Note: If you have a printer, you can print the budget by clicking Print at the top right of the budget window. Once you have created and saved a customized monthly budget, actual year-to-date income and expenses can be compared with the budget. Note: If you closed the Budget window, click Planning, Planning Tools, and Budget to open it. Click Reports Monthly Budget Report (Or from the main menu line, click Reports, Spending, And Monthly Budget.) Click Customize Complete the screen fields as shown below: 76
 and expenses (outflows) to budgeted amounts by studying the Difference column.")
83 OK This report can be used to see whether expected income and expenses are being realized. Scroll through the report to compare actual income (inflows) and expenses (outflows) to budgeted amounts by studying the Difference column. If income is below budget or expenses are above budget, changes in management may be needed to avoid financial problems. To save this report for future use, click on the Save Report icon at the top center. Look at the graphical presentation of budget variances (if the graph is not showing, click on the Show Graph button to the right of the report). A blue bar above the zero line shows favorable variances, that is, cash inflows are above budgeted amounts and/or cash expenses are below budgeted amounts. Point at one of the bars and you ll see that a magnifying glass appears, meaning you can zoom in on the transactions that support the graph. Double click on the bar and you ll get a report listing the transactions for the month. To return to the original graph, click on the Back button. Click on the X in the upper right corner to exit. If you get a prompt, click on Don t Save. Click OK. 77

84 Using Quicken for Financial Planning Quicken has a number of features that facilitate financial planning. From the menu line at the top of the Quicken program screen, click Planning Planning Tools You will see the following calculators listed: Retirement, College, Refinance, Savings, and Loan. Click Retirement Calculator to view an example. Retirement Calculator In the Retirement Calculator, you choose between calculating for: Current savings needed to have a certain level of income at retirement Annual contribution to determine savings needed to achieve a certain level of income Expected Annual retirement income given current savings and expected annual contributions 78
, the Tax Information of the investment whether taxsheltered or not, current and retirement tax rates, and Inflation rates. Julie London is 45 and her husband, Jack, is 48.")
85 Information that is required includes the Annual yield on savings, Current age of the candidate for retirement, Retirement age, the Withdrawal until age (stop benefit payout), Other income (Social Security income, etc.), the Tax Information of the investment whether taxsheltered or not, current and retirement tax rates, and Inflation rates. Julie London is 45 and her husband, Jack, is 48. Their children are now (mostly) selfsupporting. Julie and Jack have started to wonder whether they are adequately preparing for retirement. Julie is a teacher and Jack manages their family farm. They have $16,000 in a savings account and expect to be able to add $4,000 to their savings each year. Their non-tax sheltered investments yield an average of 8% per year and economists expect inflation to continue at a modest 3% annually. Let s calculate Jack and Julie s expected retirement income. Planning Planning Tools Retirement Income Select Annual retirement income. Enter the information as shown on the following screen: Click Calculate. 79

86 Expected annual income after taxes in this scenario is only $7, if you choose to click on Annual income in today s $. This offers insights into the buying power after inflation. Delaying retirement for even a couple of years can increase significantly the amount of annual income after taxes. For instance, at the $4,000 contribution level, delaying retirement until age 70 increases the annual income after taxes in today s dollars to $10,982. What if they want to retire at age 65 but are able to double their annual contribution to $8,000? What does that mean for annual income after retirement? It increases to $11,948, still not a very comfortable level of support. The moral of the story is save early and save often! In the above analysis, we focused solely on the cash savings. Assume the family farm is paid for and half of the assets are sold at retirement (not given to children). Let s assume that half of the owned farm assets are expected to generate $200,000 after taxes when sold. This time focus solely on earnings from the farm assets at retirement. Again, select Annual retirement income at the bottom left of the screen. Enter the following information and click Calculate: Thus, selling half of the farm assets at retirement and putting them into an alternative investment earning 8% annually will generate about $13,805 in annual income. A caution: While an 8% return may be possible in a long run investment with some risk, it may be difficult to find an investment with an annual 8% return for the short term. A combination of savings to generate income from off-farm investments in combination with the sale or lease of farm assets 80
 where tuition currently averages $3,000 per semester ($6,000 annually). She will study hard and graduate in 4 years.")
87 may generate the income needed in retirement but careful planning is needed to ensure that income objectives can be met. Click Done. College Calculator Jamie is 13 and plans to attend college (OSU, of course) where tuition currently averages $3,000 per semester ($6,000 annually). She will study hard and graduate in 4 years. She is a smart girl and knows that she should start saving money now for her college expenses. She can determine how much she and her parents need to save each year. Click Planning Planning Tools College Calculator In the College Calculator window, select the calculation that you want to make at the bottom right of the screen. In this case, it is the Annual Contribution. Enter: Because college expenses have recently risen faster than the general consumer price index, we use 4% predicted inflation. Click Calculate to see the needed Annual contribution of $3,

88 This is the amount that Jamie and her family will need to save and invest annually to pay the tuition for Jamie to attend college. Click Schedule to see the deposit schedule. Click Done to return to the College Calculator. Click Done to leave the College Calculator. Refinance Calculator Interest rates moved lower in recent months and Jack and Julie are wondering whether they should refinance the house they bought 5 years ago. Click Planning Planning Tools Refinance Calculator 82

89 Click Calculate. The refinance analysis indicates that approximately 21 months are needed to recoup the refinancing costs and break even. Monthly principal and interest payments are $355.07, and total closing costs are $4,200. If the family plans to remain in the house at least this long, then refinancing looks like a good deal. Click Done to leave the Refinance Calculator. Savings Calculator Your family wants to be able to pay $100,000 cash for a different combine in 6 years. Currently you have $4,000 in savings. How much do you need to save each year to meet this goal if savings are earning 5% interest? Click Planning Planning Tools Savings Calculator Calculate For: Regular contribution Then enter the following information: 83

90 Click Calculate. The Quicken calculator indicates that $16, per year must be saved to meet this goal. Click Schedule to see the deposit schedule. Click Close to return to the Investment Savings Calculator. Click Done to leave the savings calculator. Loan Calculator The loan calculator allows you to estimate either a loan amount (given an interest rate, number of years, periods per year, compounding periods, and payments per period) or payment per period (given a loan amount, interest rate, number of years, compounding periods, and periods per year). Click Planning Planning Tools Loan Calculator Look at the top of the Loan Calculator screen. When Payment per period is selected, Quicken calculates the regular payments for a loan of a given amount based on your entries for the loan amount, annual interest rate, number of years (loan repayment period), interest compounding periods, and the number of payments per year. For instance, let's say that you are 84


91 considering purchasing a new truck. The truck that you have chosen, a four-wheel drive, has a sticker price of $35,000, but you talk the salesman down to $33,000. You have saved $4,000 to be used for a down payment so you need to borrow $29,000. The loan will be for 5 years at 6.5% interest with monthly payments. Enter the following information: The anticipated Payment per period is $ monthly. You can see how much of your total payment is principal and how much is interest in a given month by clicking View Schedule to display the payment schedule. To leave the schedule, click the X. A different question to answer with Quicken's loan calculator is "How much can you afford to pay for a new truck?" If you know how much you have available for regular payments, the 85

92 loan calculator can also be used to solve for the amount you could afford. Let's say that you have around $350 per month to apply toward the purchase of a new truck. The expected interest rate is 6.0%. On the Loan Calculator screen, you want to calculate the loan amount instead of the payment, so select Loan amount, and enter the following information: Calculate The maximum principal amount you could borrow with these repayment terms is approximately $18, You can see the breakdown for principal and interest by clicking on View Schedule. To leave the loan calculator, click Done. 86
93 Various Topics In this section of instructions, we will use the LOND10 file. Click File Open (or press [Ctrl+O]) C:\ Workshop Files\LOND11 Click OK Line of Credit/Credit Card Accounts and Alerts A line of credit or short-term operating note is often best tracked using a credit card account. Money can be transferred into checking and payments made as money becomes available. You can also set alerts to warn you when you are approaching the account limit. To set up a line of credit note/credit card account, click Tools Account List Add an Account (bottom right of Account List window). In the Quicken Account Setup window, choose Credit Card Click Next Click on: Advance Setup at bottom I want to enter my transactions manually. Click Next Type Line of Credit to name this account. Click Next Enter 1/1/11 as the Statement Ending Date and 75, as the Statement Ending Balance. Click Next Finish Now choose the Line of Credit from the account list and click on Account Actions (upper right corner) Click on Edit Account Details. 87

94 Set the Credit Limit at $100,000. OK If you now click on the Account listing to go to the register for that account, the credit remaining relative to the maximum will be displayed at the bottom of the register. To have Quicken warn when you are approaching your credit limit, click Tools Alerts Center Click on the Setup tab and choose Banking. Click on the plus sign to expand the list. Choose Credit card limits 88


95 Select the Line of Credit and place 90,000 in the Remind Me At box. (See the screen below.) Click OK. If you exceed your account alert limit, a notice is placed in the Alert section of the home page and a pop up message appears the next time Quicken is opened. OK To record a transfer of funds into the Checking account from the Line of Credit, open the Line of Credit account, if not already open, and click Account Actions, on far right corner, click Transfer Money. Enter information from the following screen. 89

96 Click OK. To record a transfer of money from the checking account to the Line of Credit to pay down the balance, select the Checking account from the Accounts list on the left. Then, select Account Actions, click Transfer Money. Transfer Money From: Checking To Account: Line of Credit Finish the transaction by entering the appropriate date and amount. This account can be reconciled with a loan statement just as the credit card account can be reconciled with the credit card statement. Information needed from the loan statement includes charges and cash advances, interest charges, payments and credits to the account, and the ending balance. Saving and Locating Information for 1099s One means of noting that a transaction may contribute to the need for a tax form 1099 is to type 1099 on the memo line in appropriate transactions in the account register. You can then generate reports that list or summarize all transactions with this notation in the memo line. For instance, let's say that you write check number 3267 on June 12 for $ to Joe Bob Baling for custom baling of alfalfa hay. Click Tools Account List Click on Checking Register will appear Type the following information into the checking register: Date: 06/12/11 Num:

97 Click Save. Payee: Joe Bob Baling Payment: Category: Custom Hire Tag: Alfalfa Memo: 1099 Future payments should follow the same format with the payee spelled exactly the same and 1099 entered in the memo line. This allows Quicken to recognize transactions as a match when filtered reports are developed at the end of the year. You can then determine how much was paid to a specific payee where 1099 is in the memo field. You will develop a filtered cash flow report summarized by payee to show the amount. Let s look at last year s information. To generate the report, click: Reports (top of the screen) Banking Cash Flow Click the Customize button (top right of screen), Date: Yearly Change the title of the report to 1099 Report, and select Payee for the Row heading. Click the Categories tab. Under the Matching column at the right in the Memo contains: field, type Click OK 91

 on the report task bar.")
98 The report will pick up any memo notations (for example, invoice numbers, dates, weights) that include 1099, so thoroughly check the report. Click on the individual payees to review the supporting transactions. Our sample report demonstrates the importance of being consistent in how names are entered because Hepplers and Heppler s Machine Shop are viewed as different vendors. To correct this error, click the Find & Replace button (at top right) on the report task bar. Enter the information as follows: Click Find Click Replace All 92

99 To save this report, click on the Save Report button on the task bar. If you want, create a Tax folder in which to save it. You can do this by clicking the dropdown arrow for Save in, click on create new report folder, name the folder, then click OK. Click OK Close the window by clicking on the X in the upper right corner. OK 93
100 Recording Futures Market Transactions Options An option allows a producer to pay a premium for a type of commodity price insurance. Many producers use put options to provide a floor price for their stocker cattle. For example, let s say you have 75 head of stocker steers that will weigh approximately 650 pounds in May and want to insure a $90 floor price for their May sale. A feeder cattle contract is 50,000 pounds or 500 cwt, so one contract could protect the price for your 75 steers. You call a broker and purchase a $90 May feeder cattle put option for $1.20/cwt premium. The cost of the option purchase would be $600 ($1.20 x 500 cwt) plus a commission of $75. To record the purchase of the put using funds from the checking account, go to the Checking register and enter Date: 1/7/11 Num: 3456 Payee: ABC Brokerage Payment: 675 Category: Marketing Expense Tag: Stocker Memo: $90 $1.20 for 500 cwt & $75 commission Click Save. Often your option will expire without any value. However, if you realize any income from the option, you would record it as Marketing Income. This income is tax-related and should be linked to the tax form and line, Schedule F: Other Farm Income. You would then make the appropriate deposit entry. For example, in May, feeder cattle are trading at $88 and your $90 put is now worth $2/cwt or $1,000. You would sell your put and enter the deposit in the Marketing Income category. Date: 5/6/11 Num: DEP Payee: ABC Brokerage Deposit: 1000 (the Quickfill payment value of $ should be removed when you enter the deposit amount) Category: Marketing Income Tag: Stocker Memo: Settlement of put option Click Save Hedges Hedges can be a bit more complicated to record because daily changes in market prices may also affect the margin money required for the trade. Enter your realized gain or loss after you have offset your hedged position in Margin Income or Margin Expense categories as appropriate. 94

101 Scheduled Transactions If you want to be reminded of due dates for monthly bills, you can set up one or more scheduled transactions. For example, each month you get utility and cable television bills which are due on the first of the month. There are several ways to set up a scheduled transaction for a payment that has not been previously entered in the register. Click Tools Manage Bills and Income Reminders List (or press [Ctrl+J]) Click Create New from Dropdown Menu Select Bill reminder Click OK to close the Scheduled Bill & Deposit Options window. Click OK to record and close the scheduled transaction. You will be taken back to the summary reminder screen for the scheduled transactions. 95

102 Repeat the process for other scheduled transactions. If you open Quicken within three days of the date on which the bills are due, you will be reminded that you have bills to pay. Close the Scheduled Bills and Deposits window by clicking on the X in the upper right corner. Writing Checks with Quicken Quicken acts as a register for transactions and also allows you to write and print checks from the computer (with the appropriate paper form). The check writing feature allows you to write the check as well as record a memo, category and tag. Before you print out checks, choose the appropriate printer settings. Click File Printer Setup For Printing Checks Click OK 96
![Click Tools (from the menu line) Write and Print Checks (or [CTRL+W]) As seen above, enter the Date, Pay to the Order of (payee), and $ (dollar amount); the written dollar amount fills in](/docs-images/87/97377544/images/103-0.jpg "automatically. The Address and Memo are optional. The category is entered below the check.")
103 Click Tools (from the menu line) Write and Print Checks (or [CTRL+W]) As seen above, enter the Date, Pay to the Order of (payee), and $ (dollar amount); the written dollar amount fills in automatically. The Address and Memo are optional. The category is entered below the check. To enter a tag, either type a slash / directly after the category name or click on the Split button to reveal the tag field. Clicking the Split button or pressing [Ctrl+S] will allow you to enter information for a split transaction as well. Click the Record Check button to enter the transaction in the register. Select the appropriate page and printing style for the type of checks you will use. OK 97
.")
104 Go to the Checking register and find the check you recorded earlier using Write Check. It has Print in the Num field of the register until printed or replaced with a check number. To print the checks that are prepared, click on Account Actions, Write Checks. This takes you to the same screen in which you entered the checks. Click on Print button (lower right). (Or, you can choose File, Print Checks.) Click Cancel since we do not actually wish to print this check. Close Write Checks by clicking the X. Use the Help menu by pressing the F1 button on your keyboard, for additional information on how to print checks on partial pages, to add logos, etc. Year End Copy: Start New Year and Archive At the beginning of a new year or when files start getting large, people wonder whether they should reduce the size of their files or remove some data. Now that large files can be backed up on CD-ROM, this is a less frequent concern. We encourage you to maintain several years of data in the current file so that comparison reports showing performance by year can be easily created. However, if you must shrink the file size, the Year-End Copy feature allows you to reduce the size of your working file and/or archive older information. Click: File File Operations Year-End Copy 98
. Under the ArchiveData File: select Give the archive file a name and location.")
105 Archive file only Choose from the Current Data File Do nothing, your current file will remain the same. You can create an archive copy to backup your data (good for storing in a different place for emergency purposes). Under the ArchiveData File: select Give the archive file a name and location. Then select the end date for the archive file (all transactions up to this date will be copied). OK Click OK to continue using the Current file. 99

106 Note: Archiving differs from making a backup copy as you have control over the dates included in the file. Like a backup copy, the transactions are saved first. Attachments are included only if space is available. Reduce current file and archive Let s say that you ve been entering financial records in Quicken since 2001 in a file called FARM. Now you want to modify the current file to include data starting January 1, Click File File Operations Year-End Copy To modify the current data file, click on I only want transactions as in the screen that follows and indicate the 1/1/2006 starting date. Click OK. The new file created will be reduced to transactions for the date selected and forward (see note below) and will be given a new name that matches the archive file name. An archive file will automatically be created at the same time with the name and location you choose. The archive file includes everything in the current file. 100
 and the archive file has been created, you will choose which file to use.")
107 Note: If you have not reconciled your accounts, the transactions will transfer with the file even if they are outside of the date range selected. Investment transactions will transfer regardless of cleared status. When the data file has been updated (if selected) and the archive file has been created, you will choose which file to use. In our example, we created a new file using the last five years only, so we will select the File for New Year. OK We recommend keeping several years of data in one file for comparison purposes, but if information becomes dated, this is a good way to move forward without starting a new file. Category Clean Up Have you checked your category list lately? You may need to clean it up by eliminating unused categories and removing duplication so that your reports will be clear and meaningful. One way to determine the categories you do use is to print a Itemized Categories report. Click Reports Spending Itemized Categories Customize the Date Range: Include all dates. Print the report and have it at hand while you view the category list on screen. Leave the report screen open while cleaning up the category list so you can QuickZoom to the associated transactions. Now open the Category list by going to Tools, Category List (or press Ctrl+C]). Delete unused categories 101


108 Delete any categories in the list that do not appear in the printed category report and that you do not intend to use in the future. A Quicken default category can always be retrieved later if you need it. Highlight the category and then click the Delete button to the right. Click OK. Merge Categories If you have created two or more categories that should be under one name, you can merge the duplicate category titles and assign the associated transactions to one category. In our Itemized Categories report, we see that we have both Home Repair and Home Rpair. We can click on the report symbol sign to the left of each of these categories to reveal the transactions. (You may want to print the list of transactions out as a backup or reference.) Go back to the Category List. (You should be able to click the Category List button at the bottom of the screen if you did not close it earlier). If you did, go to Tools in the main menu and select Category List. Select Home Rpair in the category list, begin typing Home and the option will appear on the list.. With Home Rpair still highlighted, click on the Merge button to the right. Because we do not want two categories for Home Repair, check the Delete the category for Home Rpair. 102

109 Click OK Click Done to close Category List OK Now open the Recategorize List by selecting Tools, Recategorize Find category: type or choose Entertainment. We had used this category for our cable TV bills. We have decided we would rather have these transactions attached to the category, Utilities: Cable TV. 2. Click on Find to bring up all the transactions with Entertainment as the category. 3. Check Show matches in split transactions are included. 4. Check the transactions (be sure to scroll through the whole list) that have Cablevision as the payee. 5. Recategorize selected transaction(s) with: Utilities:Cable TV. (The tag Family Living will stay the same so we do not need to include it in the recategorize. If you change tags, enter as Utilities:Cable TV/Overhead). The / character signals that a tag will follow the category and subcategory. 6. Click Replace Selcted and you should see the selected transactions have changed categories. Click Done. 103

110 Checking your category list is like a spring-cleaning task. It s not something you enjoy doing, but it does provide benefits in the long run. If your category list is in order, you will have more accurate reports and/or budgets. You can close the Category List and Itemized Categories Reports windows. The user is prompted: Do you wish to save this report for later use? No. Retrieving a Deleted Quicken File Quicken automatically saves a backup copy of your working data file on a regular basis (the default is every seven days and saves up to five backup files). This can be adjusted by going to: Edit Preferences Setup Backup 1. The Maximum number of backup copies refers to the automatic backups. Note: attachments are not included in the automatic backups at all. 104

111 2. The Remind me after running Quicken: refers to how often you want to be reminded to create a manual backup. We recommend every time if it will encourage you to make a backup and especially if you enter transactions infrequently. Click OK OK If a Quicken data file is accidentally deleted or isn t functioning, a current backup file that you have created should be your first line of defense. If you don t have a manual backup file that is current, then find the Quicken automatic backup. Click File Backup and Restore Restore from Backup File Note: It is important to note that the automatic backup is not a reliable backup method. This type of backup can be useless if the computer hardware is damaged. The best backup method is to manually back up to a series of different compact discs (CD) or other media and store at least one copy off-site. Select the most current automatic backup and click on Restore Backup. 105


112 Choose the option that best suits your situation; however, it is probably best not to overwrite an existing file. Determine what is going on and then proceed. Delete the file that isn t needed. Restore Backup OK 106

113 Yes Backing Up Quicken Files A pat on the back to those who back up Quicken data on a regular basis. It is important to ensure backup files will be valid and not corrupted if you need them in the event of hardware or software failure. Quicken offers some suggestions for ensuring backup files will be there when you need them. Backing Up to Compact Disc (CD) or DVD Quicken files may be backed up onto compact discs (CDs) or DVDs. CDs/DVDs are a long lasting source of data storage when handled properly. (From this point forward, CD will be used to refer to both CDs or DVDs.) Windows XP is able to create CDs without third-party software (it is built in), but earlier Windows versions will require third-party software (for example, Roxio or Easy CD Creator). The software needs to be compatible with your CD burner hardware. Note: For previous versions of Windows, format the CD for data using the CD software before attempting to backup files on an empty CD for the first time. Generally, the preferred format style needs to be drag and drop which allows you to copy and paste files directly to a CD. Formatting can vary among CD players, so you may want to make sure that the file is compatible for play on most CD drives. This may come from an additional step in the software or you may have to make a selection from a file menu. Some CD burning software is not capable of handling file names that are more than 8 characters so name files carefully. Otherwise, the file name may be automatically shortened by the software or cause an error (true of some jump/thumb drives). The steps in this section may not be exactly the same as what you will need to do, so use them as a guideline and read up on CD formatting in the Help for Windows or the computer s 107


114 CD burner software. For non-xp versions of Windows, insert the CD and a window similar to this may open: OK Name the CD and click Start: You will get a warning that any files on the CD will be lost and then a message that the CD has been formatted. For Windows XP you can go directly to My Computer, select CD Drive (D): and click on File, Format. 108

115 Once your CD is prepared, in Quicken, click File Backup & Restore Back up Quicken File When you receive the message File backed up successfully, click OK. At this point, your CD burner software may ask how to handle the closing of the CD. Generally, you will want to be able to open the files with any CD player, but keep the CD open to allow additional files to be written to it until it is full. If backing up directly to CD does not work, you may need to back your file up to a staging area such as a temporary folder, then drag and drop it to the formatted CD. 109

116 Storing Compact Discs CDs need to be protected from scratches and bending and need to be handled properly. Damage to CDs can be caused by: Dust. Dust on the CD can cause scratching, so keep in a jewel case or CD jacket. Flexing. Store CDs in a case and store vertically to minimize bending/flexing of the CD. Fingerprints. Fingerprints or smudges can distort how information is read. Handle CDs from the edges and wipe off smudges with a soft lint-free cloth. Restoring a Backup From a CD If you find it necessary to use a manual backup copy of a Quicken file, follow these instructions. To restore the file, go to the Quicken drop-down menu and click File Backup and Restore Restore from Backup File Browse my computer Click Restore Backup 110
117 Building A Farm/Ranch Balance Sheet To develop a fairly complete picture of an individual business' financial situation, a cash flow statement, an income statement and two balance sheets (beginning and ending) are needed for an accounting period. The balance sheet shows what is owned and what is owed at a point in time. Since Quicken is a cash accounting program and not intended for accrual accounting, some effort is required to record capital sales and purchases, change in values of assets owned or liabilities owed, and change in inventory, all of which are essential to generate an accurate balance sheet. And, because Quicken is designed to record financial data and not physical data (e.g. number of head or bushels, weight and price per cwt of livestock sold), it may be more difficult to record and summarize unit information in a Quicken balance sheet than it would be in a spreadsheet or hand record system. 3 The instructions that follow suggest one way of developing a balance sheet using market values for assets within Quicken. 4 You should: Inventory assets and liabilities Establish asset and liability accounts in Quicken with accurate beginning balances Adjust asset accounts to reflect: o Asset purchases and additions to assets o Asset sales o Changes in inventories o Changes in asset values Adjust liability accounts to reflect o Repayment of liabilities o Accrued expenses Step-by-step instructions follow for entering data and making adjustments during or at the end of the year. Develop a Complete Inventory Of Farm/Ranch Assets and Liabilities OSU Fact Sheet AGEC-752 explains the development of a balance sheet and contains a worksheet which will help you develop an inventory list. Be sure your list of assets owned and 3 Integrated Farm Financial Statements (IFFS), an Excel spreadsheet-based program created at Oklahoma State University, is an alternative for creating balance sheets and other financial statements. IFFS is designed specifically for farm financial planning. While also lacking the ability to maintain a depreciation schedule, it has better features for maintaining and updating balance sheets and whole farm financial statements. Cash flow information from Quicken records can be imported into IFFS. For more information go to: 4 The Farm Financial Standards Council ( recommends that both cost and market value of some assets should be documented in the balance sheet. In Quicken, you cannot record both cost and market values for an individual item in the same account (the investment accounts are an exception). Two separate asset account series would need to be developed to record both cost and market values. 111
118 liabilities owed is complete and as accurate as possible. Document sources for prices of assets (for example, local auction or trade magazine ad) and balances of liabilities (for example, loan statement from a lender). We will use the LOND11 sample file. Click File Open (or [Ctrl+O]) Select C:\ Files\LOND11 Import Asset Accounts To develop a balance sheet, you will first establish a variety of asset and liability accounts. The types of accounts in Quicken include: checking savings credit card cash brokerage IRA, SEP, Keogh 401(k), 403(b) single mutual fund house (with or without mortgage) vehicle (with or without loan) asset liability Several accounts of one type can be developed, for instance, one liability account for each outstanding debt. A sample Quicken farm account list is included with accounts receivable, buildings and improvements, capital leases, purchased feed, market livestock and so on. In our sample list, the accounts are labeled with letters so that they are listed from most to least liquid, that is, accounts with items most easily converted to cash are listed first, the traditional order for balance sheet items. Note: Current assets are assets expected to be used up or sold in one year and are listed first. Examples include marketable securities, market livestock, and inventory. Noncurrent assets are ones that are used for longer periods of time in the farm operation. Examples include breeding livestock, machinery and equipment, vehicles, land, buildings and improvements. These designations were developed by the Farm Financial Standards Council. The account, h Other Farm Current Assets, is for farm current assets not included in other labeled lines. The account, r Other Farm Noncurrent Assets, is for non-current (both intermediate and fixed) farm assets. For additional information, see OSU Facts AGEC-751, Developing a Cash Flow Plan ; AGEC-752, Developing a Balance Sheet ; AGEC-753, Developing an Income Statement ; AGEC-791, Schedule of Assets ; and AGEC-792, Liabilities Schedule. These can be found at 112
119 Click File File Import QIF file Complete the information as shown on the following screen: Click Import Quicken will give you a message verifying that items have been successfully imported. Click Done. Click Tools, Account List (or press [Ctrl+A] and scroll through the Asset Accounts list to verify that it contains the accounts a Marketable Securities, b Raised Market Livestock, etc. The accounts will be listed under Asset and part of the Net Worth Tab The account list can be modified easily. Let's say that you don't expect to use the Capital Leases account and want to delete that account from the list. In the Account List, click the account n Capital Leases, click on Edit, then click Delete Account, type Yes to confirm, and click OK. Enter Beginning Balances in Asset Accounts The beginning balance in an asset account may be the sum of the market values of all assets in that group or an entry may be made for the beginning balance of each individual asset. The latter form ensures that you have a record of the values assigned to each item. Then, if an asset (for example, a disk harrow) is sold during the year, the harrow's market value is subtracted from the asset account so that the end-of-year balance sheet will be accurate. 113
120 Begin updating the beginning balances in the London's individual asset accounts. Double click on the account b Raised Market Livestock. On a blank transaction line, enter the value of raised market livestock on hand January 1: Press Enter. Date: 1/1/11 Ref: Payee: Mixed stockers Increase: (Be sure to [Tab] over to the Increase column.) Category: (make sure to remove the category if one appears) Memo: 45 6 $100/cwt Note: If you want to change the order so that the memo appears before the category in the register, in the main menu line, click Edit, Preferences, Quicken Program, Register, in Register Fields: Show Memo before Category, OK. You may get a message asking if you want to select a category. Select Don t show this message again at the bottom of the screen, and click No. Now choose c Purchased Market Livestock from the account list at left. On a blank transaction line, enter the value of purchased market livestock on hand: Press Enter. Date: 1/1/11 Ref: Payee: Stocker Steers Increase: (Be sure to [Tab] over to the Increase column.) Memo: $95/cwt Category: Note: If you want to later create a report listing number of head of livestock, you must be consistent in the use of labels in the memo field. For instance, you must always use head (or hd) for a filtered report to include this information. If you purchase more than one lot of stockers, you may want to give different names to the lots in the Payee line. When you are finished entering values for purchased market livestock, choose d Inventory from the account list at left.. In this account, you will enter the value of stored crops, feed and supplies. For example, on a blank transaction line, enter Date: 1/1/11 Ref: Payee: Stored Wheat Increase: (Be sure to [Tab] over to the Increase column.) Memo: 1025 $3.75/bu 114
121 Press Enter. Values for growing crops should include expenses incurred to date in the production of the crop. Choose g Growing Crops from the account list at left.. On a blank transaction line, enter Date: 1/1/11 Ref: Payee: Wheat Increase: Memo: 450 $60/a Category: Press Enter. As with the market livestock accounts, two accounts are included for breeding livestock, one account used for raised and one for purchased. Here the market value of raised breeding livestock-cows, sows, replacement heifers or gilts, boars and bulls-is recorded. For example, select j Raised Breeding Livestock from the account list at left. Enter Press Enter. Date: 1/1/11 Ref: Payee: 5-Year-Old Cows Increase: Memo: $1100 ea Category: Note: You may add additional accounts if you have several livestock enterprises and want to maintain separate accounts for different species. Select k Purchased Breeding Livestock from the account list. Enter the values of purchased breeding livestock--purchased cows or sows, replacement heifers or gilts, herd bulls or boars. For example, on a blank transaction line, enter Press Enter. Date: 1/1/11 Ref: Payee: OBI Herd Bull Increase: 4500 Memo: 3 year $4500 Category: Select l Machinery-Equipment from the account list. Enter market values for each piece of owned machinery and equipment. 115
122 Press Enter. Press Enter. Date: 1/1/11 Ref: Payee: 1995 Allis Tractor Increase: Memo: Category: Date: 1/1/2011 Ref: Payee: 1994 Disk Increase: 500 Memo: Category: Select p Land from the account list. Record market values for each piece of land owned. Press Enter. Date: 1/1/2011 Ref: Payee: Smith Place Increase: Memo: 80 a. $1200/a. Category: Select q Buildings-Improvements from the account list. On a blank transaction line, enter: Press Enter. Date: 1/1/2011 Ref: Payee: Barns Increase: Memo: Home place Category: Continue until all assets owned are listed in the appropriate accounts. 116
123 Recording the Purchase of an Asset Cash purchase Paying cash for the full purchase price of an asset results in the conversion of one asset, cash from either a cash account or bank account, into another. For example, let's say the Londons purchase a used pickup on January 12 from My Town Motors using money in their checking account. Select the Checking account from the upper left account list (or press [Ctrl+A], highlight the checking account name and press [Enter]). In the check register, type: Press Enter. Date: 1/12/2011 Num: 3414 Payee: My Town Motors Payment: 9000 Memo: 2005 Ford Ranger Category: [m Vehicles] (or press [Ctrl+C] for the category list, scroll to the bottom and click m Vehicles) Tag: Note: The brackets around the "category" name indicate that an account, m Vehicles, is involved in the transaction as a transfer of funds. To verify that the purchase price has been listed as an increase in value in the m Vehicles asset account, right-click the transaction and choose Go to Matching Transfer to switch to the asset account. Right-click on this entry and then choose Go to Matching Transfer again to return to the checking account. Credit purchase When credit rather than cash is used to purchase an asset, the purchase will result in an increase in a liability account equal to the increase in an asset account. If the Londons purchase a chisel with financing from Yukon John Deere, a new liability account must be established and an increase in an existing equipment asset account (in our list, l Machinery-Equipment) must be recorded. Setting up a loan is an activity facilitated by Quicken. Information is entered about the amount borrowed, payment period, interest rate, etc. Loan payments are then recorded using a split transaction with one line for principal and another for interest. The principal payment amount is automatically applied to the loan balance when the appropriate loan liability account is listed as the category for the principal payment. 117


124 Let's practice recording a credit purchase for the Londons. The Londons are buying a new John Deere chisel for $11,000 and repaying the loan over 3 years with semi-annual payments at 7.00% interest. Begin by setting up the liability account. From the main menu bar, located at the top screen, click: Tools Add Account Loan Click Next 118

125 Next Click Done. You will get a message that Quicken has estimated the amount of the next payment for this loan. Now that the loan repayment terms have been specified, you need to indicate how the payments will be made. Type in the payee, select the category Farm Interest Expense and the subcategory (Farm Interest Other) and add the Overhead tag for interest by adding a / after Other. Note: Because there is no tag field, you use a technique from previous versions (add a / and the tag name) to add the tag or later add it. 119

126 Once the data entry is complete, click OK. A screen will appear asking if you would like to create an asset account to go along with this loan. We have an existing account for machinery and equipment assets so we will choose No. Click Finish. Close the loan register by clicking Done or the X at the top right of the loan register window to leave the loan setup process. Now, since the Londons own more assets (title has changed hands even though the equipment has been purchased with credit), the balance in the machinery and equipment account needs to be updated. Click l Machinery-Equipment (press [Ctrl+A] if necessary to get the account list) and enter Press Enter. Date: 1/13/2011 Ref: Payee: John Deere Chisel Increase: Memo: Category: 120
127 Recording Additions to Capital Assets Improvements on capital assets such as terracing or major renovations or repairs to buildings would be handled in the same way as the purchase of an asset. What about additions to capital assets? Let's say that the Londons build an addition onto an existing barn. Cash expenses are recorded in the cash or checking account as appropriate. Click Checking in the account list. On a blank transaction line, enter Press Enter. Date: 2/15/2011 Num: 3598 Payee: Nutherlands Payment: Memo: Barn addition materials Category: [Buildings-Improvements] (The brackets around the name indicate a transfer to an account.) Recording the Sale of an Asset Cash received for the sale of an asset is recorded in the checking or cash account register as appropriate. A second entry should be made to remove the value of the asset sold from the appropriate asset account. Procedures for recording sales of capital assets will differ slightly from those of current assets such as market livestock. For example, on March 21, 108 of the 112 purchased stocker steers were sold and the cash deposited in the checking account (four head died-we'll deal with them later). On a blank transaction line in the checking account register, enter Press Enter. Date: 3/21/2011 Num: DEP Payee: Fred Feedlot Deposit: Memo: $90/cwt Category: Livestock Resale:Stocker Steers Tag: Stockers Choose the c Purchased Market Livestock account from the list and record the decrease in assets on hand. Subtract the per head market value used at the beginning of the year times the number of live head. (Do not use the amount of cash deposited after the sale). 121
128 Press Enter. Date: 3/21/2011 Ref: Payee: Stocker Steers Decrease: Memo: $95/cwt Category: We will use a separate income category for proceeds from sales of capital assets (it can be set up on the fly if necessary). This is important so that the total amount is in a separate line in the cash flow statement and can be analyzed separately for tax purposes. Remember that not all income from the sale of capital assets is taxable (check with a tax consultant for details). Note: No tax schedule is selected since only capital gains or losses are reported for tax purposes. The total sales value will be used to calculate the gains or losses to be reported on Schedule D. However, the Tax-related box should be selected on the Capital Sales category so that transactions with this category will appear in a tax summary report. Now, let's say that a used tandem disk was sold for cash on July 31. Two entries would be made: one to record the deposit in the checking account with the proceeds assigned to the capital sales category and a second to reflect the decrease in the value of assets owned. Click Checking on the account list. On a blank transaction line, enter Date: 7/31/11 Num: DEP Payee: Tom Jones Deposit: 600 Memo: 1995 Disk Category: Capital Sales, Farm Tag: Overhead Press Enter. Now choose l Machinery-Equipment from the account list. On a blank transaction line, enter Press Enter. Date: 7/1/2011 Ref: Payee: 1994 Disk Decrease: Memo: Category: 500 (This is the value entered at the beginning of the year, not the amount for which the asset was sold.) 122
129 Recording Changes in Inventory To generate an accurate balance sheet on a specific date, each asset account must be updated to reflect changes in inventory including both physical quantities and changes in values of the existing quantities. Let's say the Londons used 500 bushels of their stored wheat for feed. It is now the end of the year and they want to update the balance in the d Inventory account. Click d Inventory in the account list. Press Enter. Date: 12/31/2011 Ref: Payee: Stored wheat Decrease: 1550 Memo: 500 $3.75/bu used for feed (Use the price at which the inventory was valued in the beginning inventory, not the current market price.) Category: What about those four purchased stockers that died before being sold? Click c Purchased Market Livestock in the account list. Press Enter. Date: 3/1/11 Ref: Payee: Stocker Steers Decrease: 2660 Memo: Died: 4 7 $95/cwt (Again, note that we used the per head value used in the beginning balance, not the current market weight or price.) Category: Aunt Minnie purchased and gifted the Londons two bred heifers for Jack s birthday on October 24. From the account list, click k Purchased Breeding Livestock. 5 Press Enter. Date: 10/24/2011 Ref: Payee: Bred heifers Increase: 2400 Memo: 2 $1200/hd, Aunt Minnie Category: 5 Remember that these instructions are designed for a market-value balance sheet. Records for tax purposes are kept separately. For more information on estimating taxes, see OSU CR
130 Recording Changes in Values of Assets At the end of an accounting period, the balance sheet may need to be updated to reflect changes in market values. For instance, if land values increased 3% during the year, an entry reflecting the inflation in value should be recorded. One transaction for price adjustments could be entered that reflects the total increase in value for all land or an adjustment could be entered for each piece of property: Press Enter. Click p Land in the account list. Date: 12/31/2011 Ref: Payee: Smith Place Increase: 2880 Memo: 3% increase in land values Category: Repeat the process as necessary so that the total values reflect market conditions on the date that the balance sheet will be generated. The same process would be followed if the market price of an asset were to decrease during the year, only the dollar amount of change would be entered in the decrease rather than increase column. Recording a Loan Payment Let's assume it is time to record a payment to Yukon John Deere for the chisel purchased. Click Tools Loan Details Choose Loan (at the bottom of the screen) and select JD Chisel, OK (if you have more than one loan) Make Payment Regularly scheduled loan payment Enter the check number and any other information not already on screen. 124
.")
131 OK Close the View Loans screen by clicking on the X in the upper right corner of that window. In the checking account register, click the loan transaction you just recorded. You can view the amounts applied to principal and interest by clicking Split (or press [Ctrl+S]). You will see that Quicken has allocated the appropriate amounts of the fixed total payment to principal in the liability account ($1,622.29) and interest ($536.25). To verify that the principal payment has been subtracted from the outstanding balance of the John Deere Chisel note, highlight [JD Chisel] and then right-click and select Go to Matching Transfer. Note: If you get a message that the transaction is not a transfer, then you have not yet recorded the payment to Yukon John Deere in the checking account. Return to the transaction in the checking register and click Enter (or press [Ctrl+Enter]), then right-click and select Go to Matching Transfer again. Note the account name, Liability: JD Chisel, across the top of the window. The principal portion of the payment from the checking account has automatically been applied to the loan balance using the category information. Thus, the remaining balance has been reduced from the opening amount to reflect the principal payment. With the cursor on the Yukon John Deere transaction, right-click and select Go to Matching Transfer to return to the checking account transactions journal. Click OK to leave the Split Transaction screen. Note: You can check your loan balances at any time by looking at the account list (choose Tools, Account List from the main menu), or by choosing Reports, Net Worth & Balances, Account Balances. 125
Quicken For Farm/Ranch Financial Records
 1 Quicken For Farm/Ranch Financial Records Quicken Deluxe 2014 i Table of Contents Using Quicken for Farm/Ranch Financial Records...1 Introduce Manual Text Conventions, Keyboard Shortcuts and desktop setup...2
QUICKEN COMPUTER WORKSHOP EVALUATION. Please evaluate this workshop by filling in the appropriate number for each pair of phrases.
 QUICKEN COMPUTER WORKSHOP EVALUATION Please evaluate this workshop by filling in the appropriate number for each pair of phrases. What is your overall evaluation of this workshop? (Fill in appropriate
Add liability accounts Tools Account List. To set up a liability account, click the Add Account button.
 Add loan accounts Even if you do not use Quicken for maintaining a balance sheet, you may still want to amortize and/or record loans using the liability account features. We will record only liability
Building A Farm/Ranch Balance Sheet in Quicken Deluxe 2003
 Building A Farm/Ranch Balance Sheet in Quicken Deluxe 2003 To develop a fairly complete picture of an individual business' financial situation, a cash flow statement, an income statement and two balance
Quicke. Finanen. ncial
 Quicke QF For Farm/Ranch Finanen ncial nrecords Quicken Deluxe 2016 i Table of Contents Using Quicken for Farm/Ranch Financial Records...1 Introduce Manual Text Conventions, Keyboard Shortcuts and desktop
Chapter 5- Data Entry Chapter 5- Data Entry
 Chapter 5- Data Entry The following examples cover common farm business transactions. We start with simple single category transactions and move to a more complex multiple category income and expense transactions.
Chapter 6- Reports Chapter 6- Reports
 Using a computer to keep your farm records makes record keeping easier.and enhances your farm record data. Time savings may be the greatest benefit. While you may not save time during the data entry stage,
Using the Budget Features in Quicken 2003
 Using the Budget Features in Quicken 2003 Quicken budgets can be used to summarize expected income and expenses for planning purposes. The budget can later be used in comparisons to actual income and expenses
Insurance Tracking with Advisors Assistant
 Insurance Tracking with Advisors Assistant Client Marketing Systems, Inc. 880 Price Street Pismo Beach, CA 93449 800 643-4488 805 773-7985 fax www.advisorsassistant.com support@climark.com 2015 Client
Getting Started with Quicken 2007
 Getting Started with Quicken 2007 Trademarks 2006 Intuit Inc. All rights reserved. Unauthorized duplication is a violation of applicable law. Intuit, the Intuit logo, and Quicken, among others, are registered
GENERAL ACCOUNTING AND END-OF-PERIOD PROCEDURES: MERCHANDISING BUSINESS
 GENERAL ACCOUNTING AND END-OF-PERIOD PROCEDURES: MERCHANDISING BUSINESS LEARNING OBJECTIVES At the completion of this chapter, you will be able to: 1. Complete the end-of-period procedures. 2. Change the
Volume 23 September 2000
 OKLAHOMA COOPERATIVE EXTENSION SERVICE Volume 23 September 2000 In this newsletter: Quicken 2001 Should You Use Quicken or QuickBooks? Exploring the Investment Features of Quicken Should I Invest Money
Volume 39 September 2004
 OSU OKLAHOMA COOPERATIVE EXTENSION SERVICE Volume 39 September 2004 In this newsletter: What is New in Quicken 2005? 2002 Census Data Provides Agricultural Insights Women in Agriculture Conferences Scheduled
County. Quicken Accounts. Procedures Manual
 County Quicken Accounts Procedures Manual Revised Spring 2013 Table of Contents Process Flow Chart............................................ Pg. 3 Operating Guidelines Acceptable Uses for County Petty
Using QuickBooks. To Manage Your Farm Business: A Workshop Series for the Modern Farm Basic Training Guide
 Using QuickBooks To Manage Your Farm Business: A Workshop Series for the Modern Farm Basic Training Guide Presented by: Penn State Extension Dairy Team & Ag. Entrepreneurship Team Table Of Contents Basic
INTUIT PROA DVISOR PR O G RAM. QuickBooks Desktop Certification
 INTUIT PROA DVISOR PR O G RAM QuickBooks Desktop Certification Getting Started Guide Table of Contents TABLE OF CONTENTS QuickBooks ProAdvisor Training Objectives... 1 What s in the Workbook?... 2 Chapter
Using the Budget Features
 Using the Budget Features Quicken budgets can be used to summarize expected income and expenses for planning purposes. The budget can later be used in comparisons to actual income and expenses to determine
County. Quicken Accounts. Procedures Manual
 County Quicken Accounts Procedures Manual Revised Summer 2015 Table of Contents Process Flow Chart............................................ Pg. 3 Operating Guidelines Acceptable Uses for County Petty
Frequently Asked Questions for Members
 Frequently Asked Questions for Members m y i n s i g h t p e r s o n a l f i n a n c i a l m a n a g e m e n t t o o l GENERAL What is MyInsight? MyInsight is an intuitive online money management tool
Lesson 2: Banks and Credit Cards
 QuickBooks Premier 2013 Level 2 Lesson 2: Banks and Credit Cards Lesson Objectives In this lesson you will learn how to set up and use the bank reconciliation feature in QuickBooks. You will also work
QuickBooks. For Evaluation Only. Premier 2015 Level 2. Courseware MasterTrak Accounting Series
 QuickBooks Premier 2015 Level 2 Courseware 1702-1 MasterTrak Accounting Series QuickBooks Premier 2015 Level 2 Lesson 2: Banking and Credit Cards Lesson Objectives In this lesson you will learn how to
OHIO STATE UNIVERSITY EXTENSION
 OHIO STATE UNIVERSITY EXTENSION Contents Chapter 1- Introduction 1 Chapter 2- Getting Started 1 Chapter 3- Accounts 1 Chapter 4- Categories & Tags 1 Chapter 5- Data Entry 1 Chapter 6- Reports 1 Chapter
Money Management (MX) Frequently Asked Question s
 Frequently Asked Question s") Money Management (MX) Frequently Asked Question s Account Maintenance How do I get rid of duplicate accounts? How do I permanently delete an account? How do I hide/exclude an account? How do I rename my
Money Management (MX) Frequently Asked Question s Account Maintenance How do I get rid of duplicate accounts? How do I permanently delete an account? How do I hide/exclude an account? How do I rename my
Standard Accounts User Guide
 Standard Accounts User Guide v. 8.1, Windows February 2016 Table of Contents Table of Contents INTRODUCTION... 4 Installation and Starting of Standard Accounts... 4 Starting Standard Accounts for the first
I added my Checking and Savings accounts from another financial institution. Why didn t my loans and other accounts import as well?
 What is MoneyDesktop? MoneyDesktop is a PFM, Personal Financial Management tool, that helps you budget and manage your finances. It allows you to import all of your accounts, across multiple institutions,
PFM MoneyMobile. Product Overview Guide. August 2013
 PFM MoneyMobile Product Overview Guide August 2013 1 Contents MoneyMobile iphone App... 3 New Navigation Menu... 5 Accounts... 6 Transactions... 13 Excluded Transactions... 16 Spending Wheel... 17 Bubble
Mutual Fund & Stock Basis Keeper
 A Guide To Mutual Fund & Stock Basis Keeper By Denver Tax Software, Inc. Copyright 1995-2006 Denver Tax Software, Inc. Denver Tax Software, Inc. P.O. Box 5308 Denver, CO 80217-5308 Telephone (voice): Toll-Free:
TAA Scheduling. User s Guide
 TAA Scheduling User s Guide While every attempt is made to ensure both accuracy and completeness of information included in this document, errors can occur, and updates or improvements may be implemented
QuickBooks Pro Manual
 QuickBooks Pro Manual for Development Organisations Fifth version prepared December 2009 for users of QuickBooks Pro 2006. For limited circulation within Mango and selected NGOs (further information from
Moneydance. Simplified Money Management
 Moneydance Simplified Money Management Copyright 2012 The Infinite Kind. All rights reserved. February 18, 2013 Chapter 1: What's new!... 9 What's New in Moneydance 2012!... 9 Downloading and Installing!...
J&L Financial Planner Users Manual Version 20.0
 1 J&L Financial Planner Users Manual Version 20.0 J&L Financial Planner -- Version 20.0 2 Table Of Contents TABLE OF FIGURES...6 INTRODUCTION...8 Assumptions...8 Getting Started...9 QUICK TIPS...11 Quick
WinTen² Budget Management
 Budget Management Preliminary User Manual User Manual Edition: 4/13/2005 Your inside track for making your job easier! Tenmast Software 132 Venture Court, Suite 1 Lexington, KY 40511 www.tenmast.com Support:
Fixed Assets Inventory
 Fixed Assets Inventory Preliminary User Manual User Manual Edition: 2/3/2006 For Program version: 2/3/2006 Your inside track for making your job easier! Tenmast Software 132 Venture Court, Suite 1 Lexington,
Digital Docs, Inc. The Quality Time Company. User's Guide
 Digital Docs, Inc. The Quality Time Company User's Guide DIGITAL DOCS, INC Disclaimers and Notices DISCLAIMERS AND NOTICES Copyrights: Copyright 2000 Digital Docs, Inc. All rights reserved. Trademarks:
Enhanced General Ledger Quick Steps version 8.016
 Enhanced General Ledger Quick Steps version 8.016 The General Ledger module is designed to handle journal entries for various transactions that are not accounted for in other modules (A/P, Payroll etc.).
Sage Bank Services User's Guide. May 2017
 Sage 300 2018 Bank Services User's Guide May 2017 This is a publication of Sage Software, Inc. 2017 The Sage Group plc or its licensors. All rights reserved. Sage, Sage logos, and Sage product and service
In this chapter: Budgets and Planning Tools. Configure a budget. Report on budget versus actual figures. Export budgets.
 Budgets and Planning Tools In this chapter: Configure a budget Report on budget versus actual figures Export budgets Project cash flow Chapter 23 479 Tuesday, September 18, 2007 4:38:14 PM 480 P A R T
#2 Password Protecting QuickBooks
 #2 Password Protecting QuickBooks We ve compiled these useful Tips to help our clients and friends get more out of their Quickbooks software. Please contact us if we can help you in any way with your accounting
Policy. Chapter 6. Accessing the Policy. Nexsure Training Manual - CRM. In This Chapter
 Nexsure Training Manual - CRM Policy In This Chapter Accessing the Policy Adding a Thank You Letter Editing the Policy Adding, Editing and Removing Assignments Admitted Carrier Identification Summary of
Lesson 2: Banking and Credit Cards
 Sage 50 Premium Accounting 2016 Level 2 Lesson 2: Banking and Credit Cards Lesson Objectives In this lesson, you will learn how to set up and use the bank reconciliation feature in Sage 50 Accounting.
User s Guide for the Mississippi State Budget Generator Version 6.0 for Windows
 User s Guide for the Mississippi State Budget Generator Version 6.0 for Windows by David H. Laughlin and Stan R. Spurlock Department of Agricultural Economics Mississippi State University Table of Contents
Money Management FAQs
 Page 1 Money Management FAQs What is Money Management? Money Management is a PFM, Personal Financial Management tool, that helps you budget and manage your finances. It allows you to import all of your
Introduction to Quicken 2008 for Personal Use
 Introduction to Quicken 2008 for Personal Use Presented by Irene Burt April 24, 2008 Introduction to Quicken 2008 Finding Information Access on the Internet: http://quicken.intuit.com OR http://quicken.com
QUICKBOOKS 2018 STUDENT GUIDE. Lesson 4. Banking in QuickBooks
 QUICKBOOKS 2018 STUDENT GUIDE Lesson 4 Banking in QuickBooks Copyright Copyright 2018 Intuit, Inc. All rights reserved. Intuit, Inc. 5100 Spectrum Way Mississauga, ON L4W 5S2 Trademarks 2018 Intuit Inc.
Using other accounts in QuickBooks
 LESSON 5 Using other accounts in QuickBooks 5 Lesson objectives, 134 Supporting materials, 134 Instructor preparation, 134 To start this lesson, 134 Other account types in QuickBooks, 135 Tracking credit
Getting Ready to Trade
 Section VI. Getting Ready to Trade In This Section 1. Adding new securities 78 2. Updating your data 79 3. It's important to keep your data clean 80 4. Using Real-Time Alerts 81 5. Monitoring your tickers
Additional Medicare Tax User Guide for QuickBooks
 Additional Medicare Tax User Guide for QuickBooks Beginning tax year 2013, a new Additional Medicare Tax (a provision of the Affordable Care Act) of 0.9 percent applies to individuals Medicare taxable
QuickBooks Pro. Instructor: Edward Marden
 QuickBooks Pro Instructor: Edward Marden Goals for QuickBooks Develop Balance Sheets and Profit & Loss Statements (Income Statements) Develop Better Management Practices Reasons to Use QuickBooks Strong
Sage Bank Services User's Guide
 Sage 300 2017 Bank Services User's Guide This is a publication of Sage Software, Inc. Copyright 2016. Sage Software, Inc. All rights reserved. Sage, the Sage logos, and the Sage product and service names
Farm Accounting Using QuickBooks
 Farm Accounting Using QuickBooks Teaching Outlines Stanley Schraufnagel Jenny Vanderlin Table of Contents Introduction...i Outline 1 Creating a company file...1 Outline 2 Working with lists...2 Outline
Using the Clients & Portfolios Module in Advisor Workstation
 Using the Clients & Portfolios Module in Advisor Workstation Disclaimer - - - - - - - - - - - - - - - - - - - - - - - - - - - - - - - - - - - - - 1 Overview - - - - - - - - - - - - - - - - - - - - - -
Moneydance User's Guide
 Moneydance 2010 User's Guide 1 Moneydance 2010 User's Guide Table Of Contents Table Of Contents...1 Chapter 1: Introduction...4 Introduction... 4 What's New and Improved in Moneydance 2010...4 What is
Certifying Mortgages for Freddie Mac. User Guide
 Certifying Mortgages for Freddie Mac User Guide December 2017 The Freddie Mac Single-Family Seller/Servicer (Guide) requires a Seller/Servicer selling Mortgages to Freddie Mac to forward the Notes, assignments
You should already have a worksheet with the Basic Plus Plan details in it as well as another plan you have chosen from ehealthinsurance.com.
 In earlier technology assignments, you identified several details of a health plan and created a table of total cost. In this technology assignment, you ll create a worksheet which calculates the total
QuickBooks Company File Setup and Introduction to Customizing QuickBooks
 QuickBooks Company File Setup and Introduction to Customizing QuickBooks Contents Welcome and Orientation... 2 Set up the QuickBooks File for Use... 3 Plan Your Customer and Vendor Lists... 4 Customer:Job
MoneyPlan Digital Instruction Manual
 MoneyPlan Digital Instruction Manual Version 1 - March 2012 Welcome to MoneyPlan Digital! Thank you for purchasing this new and unique program that has been developed to help you manage your finances by
County Quicken Accounts Procedures Manual
 County Quicken Accounts Procedures Manual REVISED SUMMER 2018 TABLE OF CONTENTS Process Flow Chart...Pg. 2 Operating Guidelines Quicken Acceptable Uses for County Petty Cash Accounts...Pg. 3 Disallowed
M Y F I N A N C E H O W T O
 U S S F C U P E R S O N A L F I N A N C I A L M A N A G E M E N T M Y F I N A N C E H O W T O CONTENTS Overview..2 Getting Started... 2 Dashboard... 4 Accounts... 6 Adding an External Online Account...
ACCOUNTANT TRAINING NETWORK. Top 10 QuickBooks Mistakes Clients Make and How to Fix Them
 ACCOUNTANT TRAINING NETWORK Top 10 QuickBooks Mistakes Clients Make and How to Fix Them Copyright Copyright 2008 Intuit, Inc. Intuit, Inc. All rights reserved. PO Box 7850, MS 2475 Mountain View, CA 94039-7850
QuickBooks Advanced. Basic Reports. For most reports use the Report Center button. That will lead to a screen like this:
 QuickBooks Advanced Basic Reports For most reports use the Report Center button. That will lead to a screen like this: There are a ton of report options, but there are really only 3 that you need: Profit
Master User Manual. Last Updated: August, Released concurrently with CDM v.1.0
 Master User Manual Last Updated: August, 2010 Released concurrently with CDM v.1.0 All information in this manual referring to individuals or organizations (names, addresses, company names, telephone numbers,
Real Estate Investor s Workshop
 Real Estate Investor s Workshop the software solution for the true real estate investing professional Property Analysis Creative Financing Personal Financial Statement Automated Offers, Contracts and Agreements
CHAPTER 3 BANKING. You turn to see Mr. Castle charging toward you with documents in hand.
 CHAPTER 3 BANKING SCENARIO The next morning as you pass the open door of Mr. Castle's office, you notice he is looking at the financial statements you prepared. You try to slip past his door unnoticed,
Processing a BAS using your MYOB software
 Processing a BAS using your MYOB software Contents How to use this guide 2 1.0 Checking the accurateness of your transactions 3 1.1 Reconcile your accounts 3 1.2 Review your accounts and reports 3 1.3
Bond Amortization. amortization schedule. the PV, FV, and PMT functions. elements. macros
 8 Bond Amortization N LY O LEARNING OBJECTIVES a bond amortization schedule Use the PV, FV, and PMT functions Protect worksheet elements Automate processes with macros A T IO N Create E V A LU Financial
Individual Taxpayer Electronic Filing Instructions
 Individual Taxpayer Electronic Filing Instructions Table of Contents INDIVIDUAL TAXPAYER ELECTRONIC FILING OVERVIEW... 3 SUPPORTED BROWSERS... 3 PAGE AND NAVIGATION OVERVIEW... 4 BUTTONS AND ICONS... 5
Complete Closing Enterprise Closing Disclosure Form
 Complete Closing Enterprise Closing Disclosure Form VERSION 8.3 RamQuest.com 2015 RamQuest, Inc. Table of Contents Introduction... 5 Loan Estimate... 5 Closing Disclosure Form... 5 Accessing the CDF...
CashManager Home. Getting Started and Installation Guide
 CashManager Home Getting Started and Installation Guide 1. Place the CD in your computer s CD drive and install CashManager. If a window pops up stating that the publisher could not be verified, click
2017 Conversion Instructions TaxACT to ATX Individual
 Updated 08/27/2017 2017 Conversion Instructions TaxACT to ATX Individual TaxACT is a registered trademark of 2nd Story Software, Inc.2nd Story Software, Inc. does not sanction nor participate in this conversion
NetTeller Online Financial Management (OFM)
") NetTeller Online Financial Management (OFM) Contents About This Manual... Error! Bookmark not defined. Overview...1 Getting Started...1 Dashboard...3 Accounts...5 CashEdge Adding an Online Account... 7
NetTeller Online Financial Management (OFM) Contents About This Manual... Error! Bookmark not defined. Overview...1 Getting Started...1 Dashboard...3 Accounts...5 CashEdge Adding an Online Account... 7
Viive 5.2 QUICK START GUIDE MAC-VIIVE
 Viive 5.2 QUICK START GUIDE 1-855-MAC-VIIVE ii Contents PUBLICATION DATE January 2016 COPYRIGHT 2016 Henry Schein, Inc. All rights reserved. No part of this publication may be reproduced, transmitted,
7. Portfolio Simulation and Pick of the Day
 7. Portfolio Simulation and Pick of the Day Overview Two special functions are incorporated into the AIQ Portfolio Manager for users who base their trading selections on Expert Design Studio (EDS) analysis.
Investment Tracking with Advisors Assistant
 Investment Tracking with Advisors Assistant Client Marketing Systems, Inc. 880 Price Street Pismo Beach, CA 93449 800 643-4488 805 773-7985 fax www.advisorsassistant.com support@climark.com 2015 Client
Basic -- Manage Your Bank Account and Your Budget
 Basic -- Manage Your Bank Account and Your Budget This tutorial is intended as a quick overview to show you how to set up a budget file for basic account management as well as budget management. (See the
CHAPTER 2 ANALYZING TRANSACTIONS: THE ACCOUNTING EQUATION
 REVIEW QUESTIONS CHAPTER 2 ANALYZING TRANSACTIONS: THE ACCOUNTING EQUATION 1. It is necessary to distinguish between business assets and liabilities and nonbusiness assets and liabilities of a single proprietor
Lesson 8 Vendors and Expenses Part 2
 Q U IC K BOOKS 2017 STUDEN T GUIDE Lesson 8 Vendors and Expenses Part 2 Copyright Copyright 2017 Intuit, Inc. All rights reserved. Intuit, Inc. 5100 Spectrum Way Mississauga, ON L4W 5S2 Trademarks 2017
Processing a BAS using your MYOB software. Processing a BAS. using your MYOB software
 Processing a BAS using your MYOB software Processing a BAS using your MYOB software Processing a BAS using your MYOB software Processing a BAS using your MYOB software Business Activity Statements (BAS)
Microsoft Dynamics GP. Receivables Management
 Microsoft Dynamics GP Receivables Management Copyright Copyright 2012 Microsoft. All rights reserved. Limitation of liability This document is provided as-is. Information and views expressed in this document,
HandDA program instructions
 HandDA program instructions All materials referenced in these instructions can be downloaded from: http://www.umass.edu/resec/faculty/murphy/handda/handda.html Background The HandDA program is another
BBPadmin s WebCOBRA On Demand Employer User s Guide. BBPadmin s Employer User s Guide to
 BBPadmin s Employer User s Guide to 1 Table of Contents Introduction to Employers... 5 Chapter 1: Getting Started... 6 Purpose of WebCOBRA... 6 For Employers... 6 For Participants... 6 Getting Started
Cash Organizer 2003 Deluxe User Manual. Copyright Inesoft All Right reserved
 Cash Organizer 2003 Deluxe User Manual http://www.inesoft.com Copyright 1998-2003 Inesoft All Right reserved 2 Table of Contents 1. Introduction... 4 2. Registration... 5 3. Program Features... 6 4. Installation
Questions & Answers (Q&A)
") Questions & Answers (Q&A) This Q&A will help answer questions about enhancements made to the PremiumChoice Series 2 calculator and the n-link transfer process. Overview On 3 March 2014, we introduced PremiumChoice
Questions & Answers (Q&A) This Q&A will help answer questions about enhancements made to the PremiumChoice Series 2 calculator and the n-link transfer process. Overview On 3 March 2014, we introduced PremiumChoice
å Follow these steps to delete a list: å To rename a list: Maintaining your lists
 Maintaining your lists TradingExpert Pro provides a number of functions for maintaining the data contained in your Group/Sector List and all other lists that you have created. This section lists the data
Draftworx Manual. Thank you for choosing Draftworx
 Draftworx Manual Thank you for choosing Draftworx Contents Installing the program... 4 Activating the program... 5 Getting going... 6 Training videos... 6 Filter bar... 6 Regional Settings... 8 Client
Budget - By Salesperson
 Budget - By Salesperson Entering a budget is easy. Follow these five steps to get started. Version 2013.12.21.01 1 Create a template. Before you can enter a budget, you first need to create a template.
Introduction to Quicken 2006 for Personal Use
 Introduction to Quicken 2006 for Personal Use Presented by Irene Burt April 6, 2006 Introduction to Quicken 2006 Finding Information Access on the Internet: http://quicken.intuit.com OR http://quicken.com
Chapter Three Setting up General Ledger
 How to Restore Your Back up File: Chapter Three Setting up General Ledger Click File - Click Restore - Click Browse - Select Drive - Select Folder - Select the File - Click Open - Click Next - Tick New
Sage Tax Services User's Guide
 Sage 300 2017 Tax Services User's Guide This is a publication of Sage Software, Inc. Copyright 2016. Sage Software, Inc. All rights reserved. Sage, the Sage logos, and the Sage product and service names
Quick Tips. Are You Utilizing the Home Office Deduction? JC Hobbs, OSU Extension Specialist
 Oklahoma State University Quick Tips Are You Utilizing the Home Office Deduction? JC Hobbs, OSU Extension Specialist Farmers and ranchers who use a portion of the home as an office may be allowed to take
End of Financial Year Guide 2018
 End of Financial Year Guide 2018 How to use your software to guide your business through the end of financial year period Need some help? Visit help.myob.com, or find answers, ask questions, and share
14. Roster Processing
 14. Roster Processing Plan processing Roster processing Roster processing roster list You can create rosters by entering data manually or by using the file import capability. If you want to create the
Cash Counting Sheet & Closing
 Cash Counting Sheet & Closing Purpose The Cash Counting window allows you to reconcile your cash and balance your drawer(s). You have the option of tracking and closing multiple cash drawers and multiple
Team Expansion QuickBooks 2003 Setup & Use
 10.2.3 QuickBooks 2003 Setup & Use Setting Up your Team "Company" Expansion 1. Install QuickBooks following the installation instructions that come with the program. 2. Copy the Teamex2003.qbw file. You
Micropay Professional Payroll Year End 2012 User Guide
 Micropay Professional Payroll Year End 2012 User Guide This guide covers the Payroll Year End 2012 process. You can read it onscreen or print it out. For additional PYE advice, select the Year End Tax
Company Activities Part I
 QuickBooks Online Student Guide Chapter 5 Company Activities Part I Chapter 2 Chapter 5 In this chapter, you ll about how QuickBooks is built using lists and transactions. You ll learn more about the importance
PriceMyLoan.com Lender AE Guide. Revision 0707
 PriceMyLoan.com Revision 0707 PriceMyLoan INTRODUCTION... 3 CUSTOMER SUPPORT... 3 VIEWING LOAN SUBMISSIONS... 4 AUTOMATIC EMAIL NOTIFICATIONS... 5 PRICING ENGINE COMMON SCENARIOS... 6 Running the LPE on
Get Started with My Budget Planner
 Page 1 of 24 Get Started with My Budget Planner Click on the "Start" button, select "Programs", select "My Budget Planner" to open My Budget Planner software. When you open My Budget Planner a Welcome
Welcome to Citizens Bank Online New & Improved
 Welcome to Citizens Bank Online New & Improved You ll enjoy enhanced Citizens Bank online banking services this fall. This User s Guide explains the features and the use of Citizens Bank s Online Banking
Microsoft Dynamics GP Year-End Close. Manual
 Microsoft Dynamics GP Year-End Close Manual 2017 Contact FMT Consultants Support Customer Care customercare@fmtconsultants.com (760) 930-6400 option 1 Sales Felipe Jara fjara@fmtconsultants.com (760) 930-6451
Church Contribution Getting Started Guide 2017 Icon Systems Inc.
 Church Contribution Getting Started Guide IconCMO Church Software by Icon Systems Inc. Church Contribution Getting Started Guide All rights reserved. No parts of this work may be reproduced in any form